SSO Between OCI and ADFS
In this tutorial, configure SSO between the OCI IAM and ADFS, using ADFS as the identity provider (IdP).
This 30 minute tutorial shows you how to integrate OCI IAM, acting as a service provider (SP), with ADFS, acting as an IdP. By setting up federation between ADFS and OCI IAM, you enable users' access to services and applications in OCI using user credentials that ADFS authenticates.
This tutorial covers setting up ADFS as an IdP for OCI IAM.
OCI IAM provides integration with SAML 2.0 IdPs. This integration:
- Works with federated Single Sign-On (SSO) solutions that are compatible with SAML 2.0 as an IdP, such as ADFS.
- Lets users sign in to OCI using their ADFS credentials.
- Lets users sign in to end applications.
- First, download the metadata from the OCI IAM identity domain.
- In the next few steps you create and configure a relying party in ADFS.
- In ADFS, set up SSO with OCI IAM using the metadata.
- In ADFS, edit the Attributes and Claims so that the email name is used as the identifier for users.
- In ADFS, add a user to the app.
- For the next steps, you return to the identity domain to finish the setup and configuration. In OCI IAM, update the default IdP policy to add ADFS.
- Test that federated authentication works between OCI IAM and ADFS.
This tutorial is specific to IAM with Identity Domains.
To perform this tutorial, you must have the following:
- A paid Oracle Cloud Infrastructure (OCI) account, or an OCI trial account. See Oracle Cloud Infrastructure Free Tier.
- Identity domain administrator role for the OCI IAM identity domain. See Understanding Administrator Roles.
- An on-premises ADFS installation. Note
This tutorial describes using the ADFS software provided with Microsoft Windows Server 2016 R2. - In addition, you must verify that the same user exists in OCI and ADFS, and that ADFS is working.
Ensure that a user with the same email address exists in both systems.
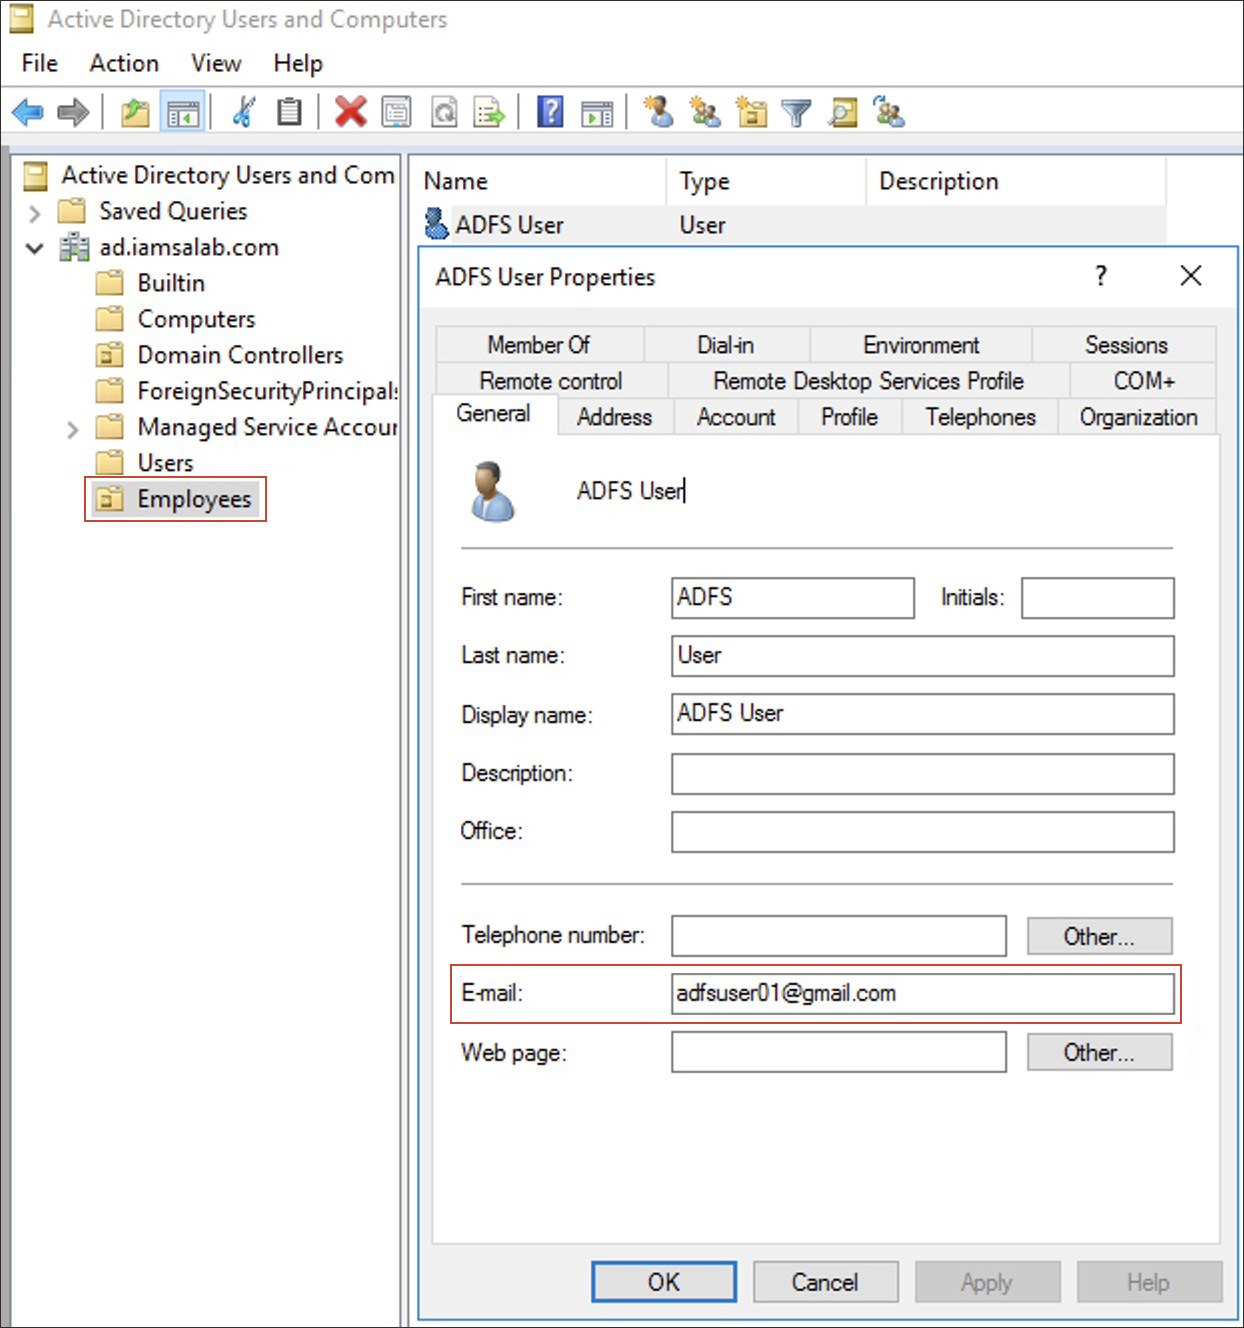
For SAML SSO to work between ADFS and OCI IAM, there must be a user with the same email address in both the Microsoft Active Directory domain and the OCI IAM identity domain. In this task, you confirm that such a user that exists on both systems.
- Open the Microsoft Active Directory Users and Computers utility. In Windows 2016 Server, select Server Manager, then Tools, and then Active Directory Users and Computers.
-
In the Employees folder, double-click the user you want to use. Make a note of the user's email address.
ADFS USER(adfsuser01@gmail.com)Note
If more than one user in the OCI IAM domain has the same email address then SAML SSO fails because because it's impossible to determine which user is to be signed in.
- The user's email address is used to link the user signed in to ADFS with the same user's entry in OCI IAM.
- If you don't have an ADFS user to test the connection, you can create one.
- In a browser, enter the Console URL to access the OCI IAM Console:
- Enter your Cloud Account Name, also referred to as the tenancy name, and select Next.
- Sign in with your username and password.
- Select the domain that you are going to use.
- Select Users.
- In the search field, enter the email address you recorded from Microsoft Active Directory.
- In the search results, confirm that a user exists with the same email address as the user in the Microsoft Active Directory.Note
If the user doesn't exist in OCI IAM, select Add and create the user with the same email address as in Microsoft Active Directory.
Verify that ADFS is running, and that you can successfully challenge the user for sign in.
- In the browser, sign in to ADFS using the URL:
wherehttps://adfs.example.com/adfs/ls/IdpInitiatedSignOnPageadfs.example.comis your ADFS hostname. - If you need to, select Sign in to this site. Select Sign In.
- Enter the Microsoft Active Directory credentials for a user that exists on both ADFS and OCI IAM (in this example,
adfsuser01) and select Sign In. - You'll see the message
You are signed in.
- In the browser, sign in to ADFS using the URL:
wherehttps://adfs.example.com/FederationMetadata/2007-06/FederationMetadata.xmladfs.example.comis your ADFS hostname. - Save the
FederationMetadata.xmlfile. You will use this file to register ADFS with OCI IAM. - In the OCI Console navigate to the domain you want to work in. You might need to change the compartment to find the domain that you want. Select Security and then Identity providers.
- Select Add IdP, then select Add SAML IdP.
- Enter a name for the SAML IdP, for example
ADFS_IdP. Select Next. - Select Enter IdP metadata.
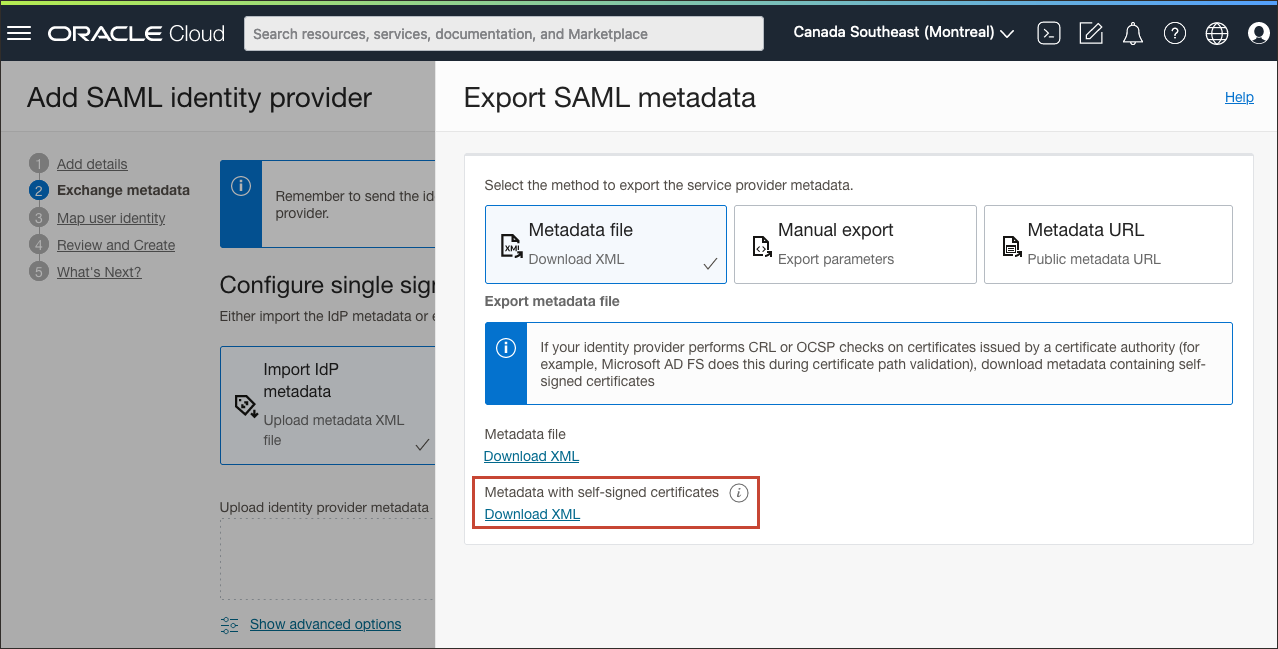
- Download the OCI IAM Service Provider (SP) metadata by selecting Export SAML metadata.
- On the Export SAML metadata page under Metadata with self-signed certificates, select Download XML.Note
Use metadata with self-signed certificates when the identity provider performs CRL or OCSP checks on certificates issued by a CA. In this tutorial, ADFS does this during certificate path validation. - Save the file to an appropriate location.
- Transfer the
Metadata.xmlfile to the Windows Server where ADFS is managed. You will use this file to register the OCI IAM domain with ADFS.
- On the Export SAML metadata page under Metadata with self-signed certificates, select Download XML.
- Close the Export SAML metadata page.
- Select Import IdP metadata, and then select Upload. Select the
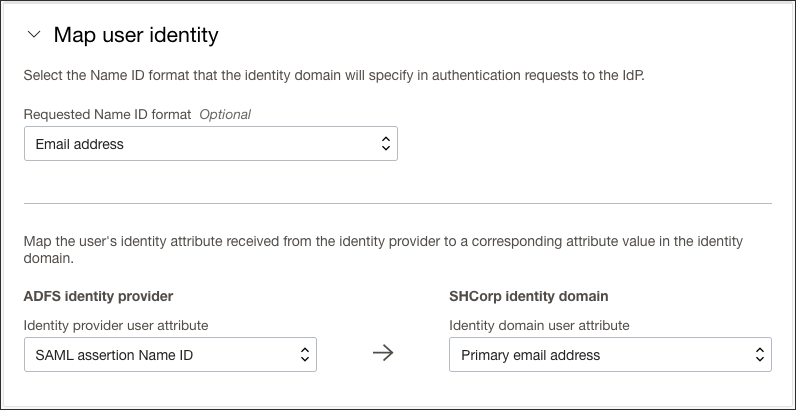
FederationMetadata.xmlfile that you saved earlier from ADFS, select Open, and then select Next. - In Map user identity, set the following
- Under Requested NameID format, select
Email address. - Under Identity provider user attribute, select
SAML assertion Name ID. - Under Identity domain user attribute, select
Primary email address.
- Under Requested NameID format, select
- Select Next.
- Under Review and Create verify the configurations, and select Create IdP.
- Select Activate.
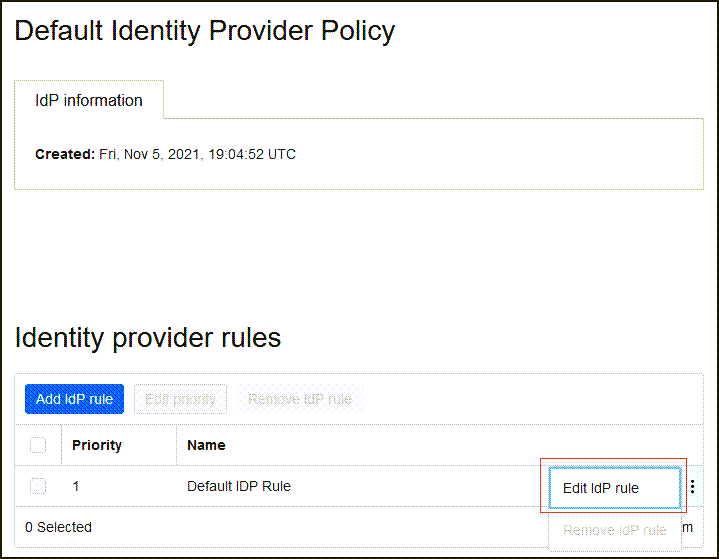
- Select Add to IdP Policy Rule. Adding the ADFS IdP to an IdP Policy allows it to be displayed on the OCI IAM sign-in screen.
-
Select Default Identity Provider Policy to open it, then select the for the rule and select Edit IdP rule.
-
Select Assign identity providers and then select ADFS_IdP to add it to the list.
- Select Save Changes.
Now, ADFS is registered as identity provider in OCI IAM.
Next, you register OCI IAM as a trusted relying party in ADFS.
First, register OCI IAM as the relying party with ADFS. Then, configure claim rules for OCI IAM as a relying party.
Register the Relying Party
- Open the ADFS management utility. For example, in Windows 2016 Server Manager utility, select Tools, then select Microsoft Active Directory Federation Services Management.
- Select Action, then select Add Relying Party Trust.
-
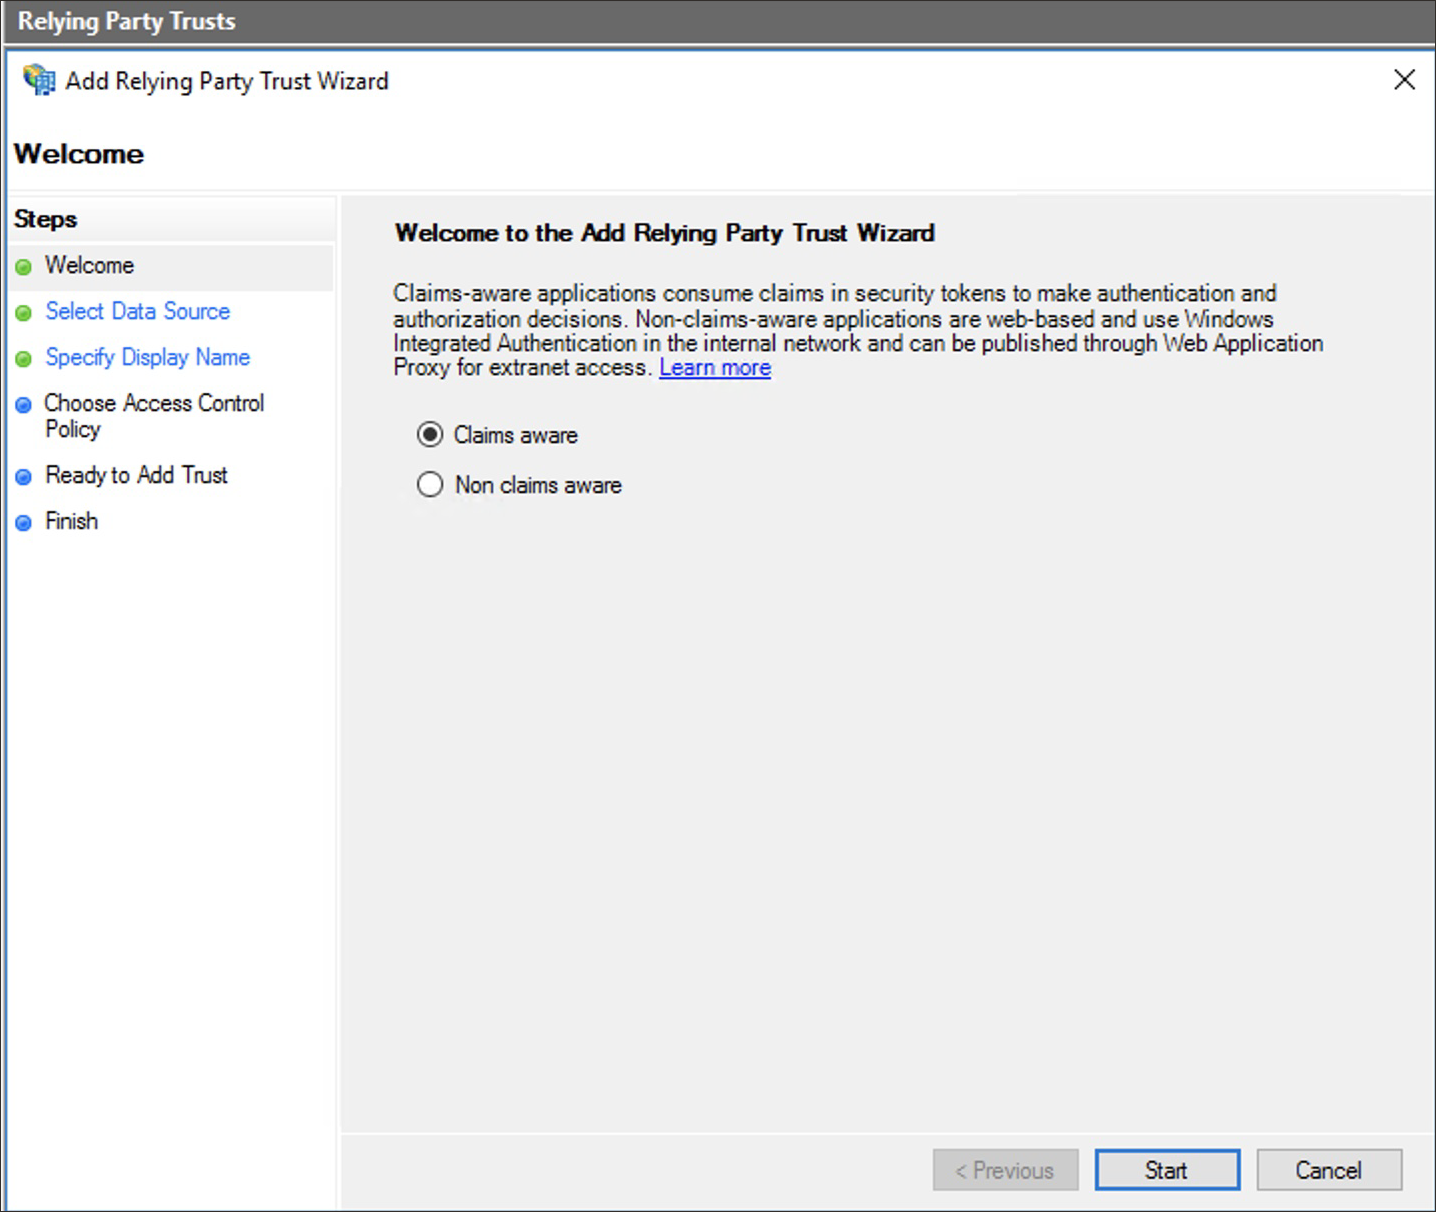
In the Add Relying Party Trust Wizard window, select Start.
-
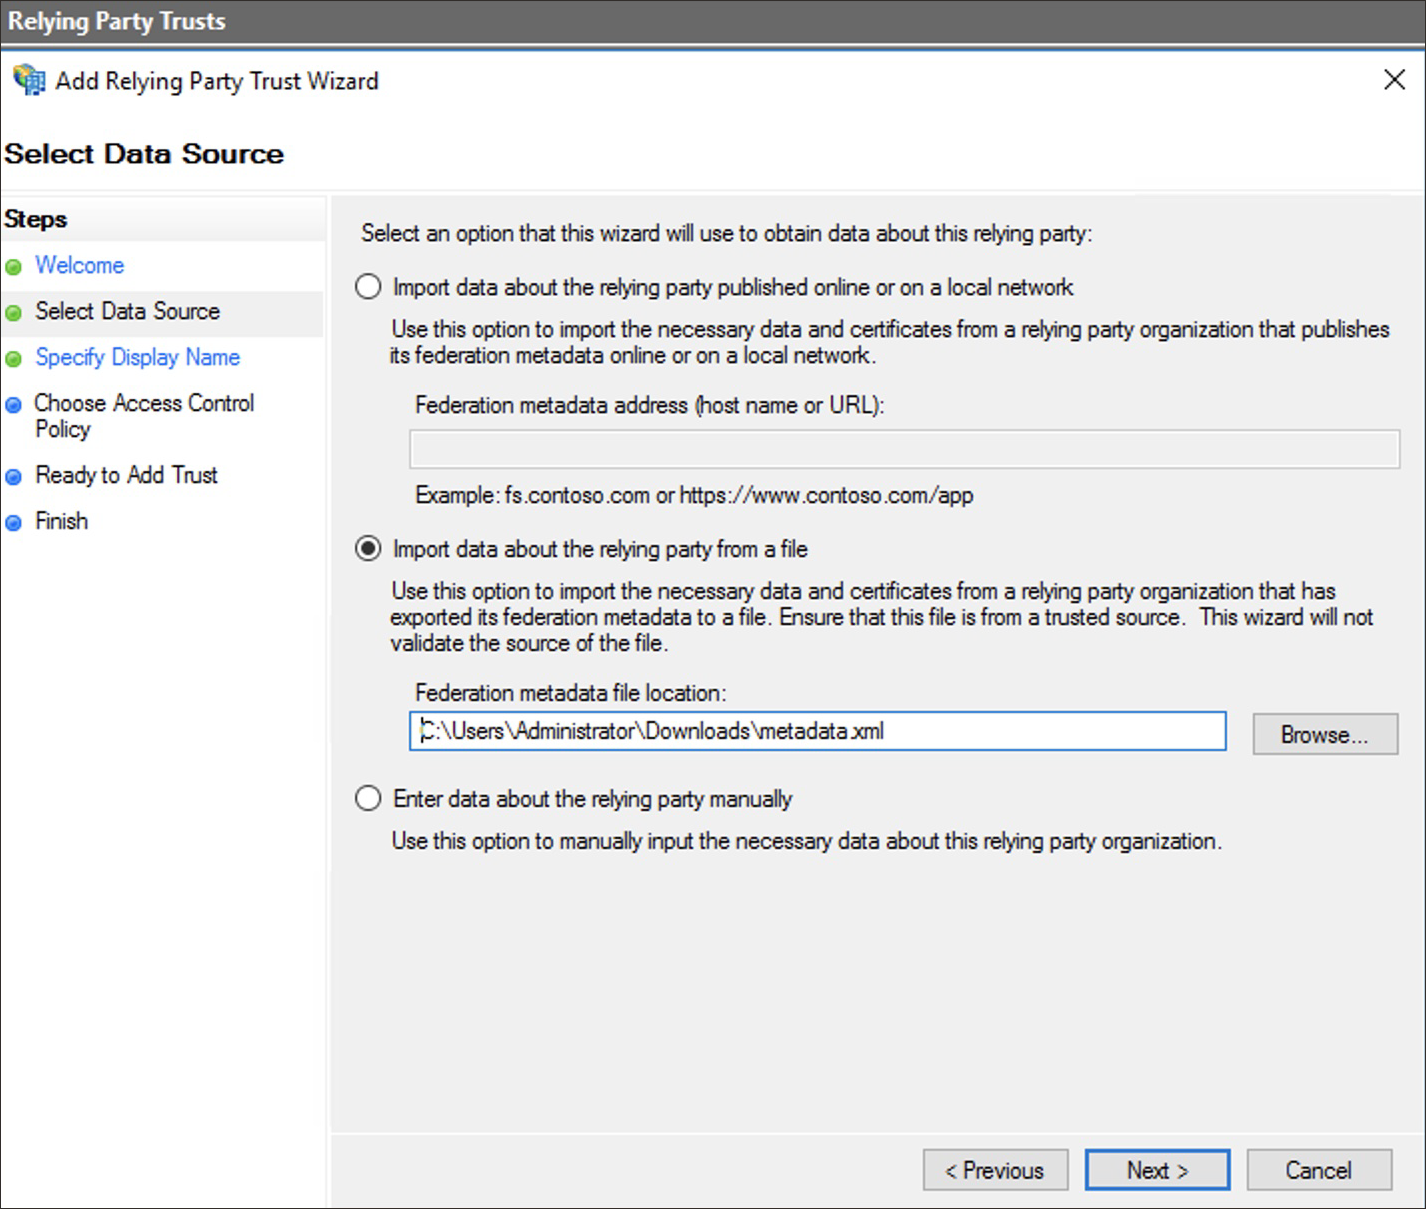
Select Import data about the relying party from a file, and then select Browse.
- Select
Metadata.xmlwhich you downloaded earlier from OCI IAM, and select Next. -
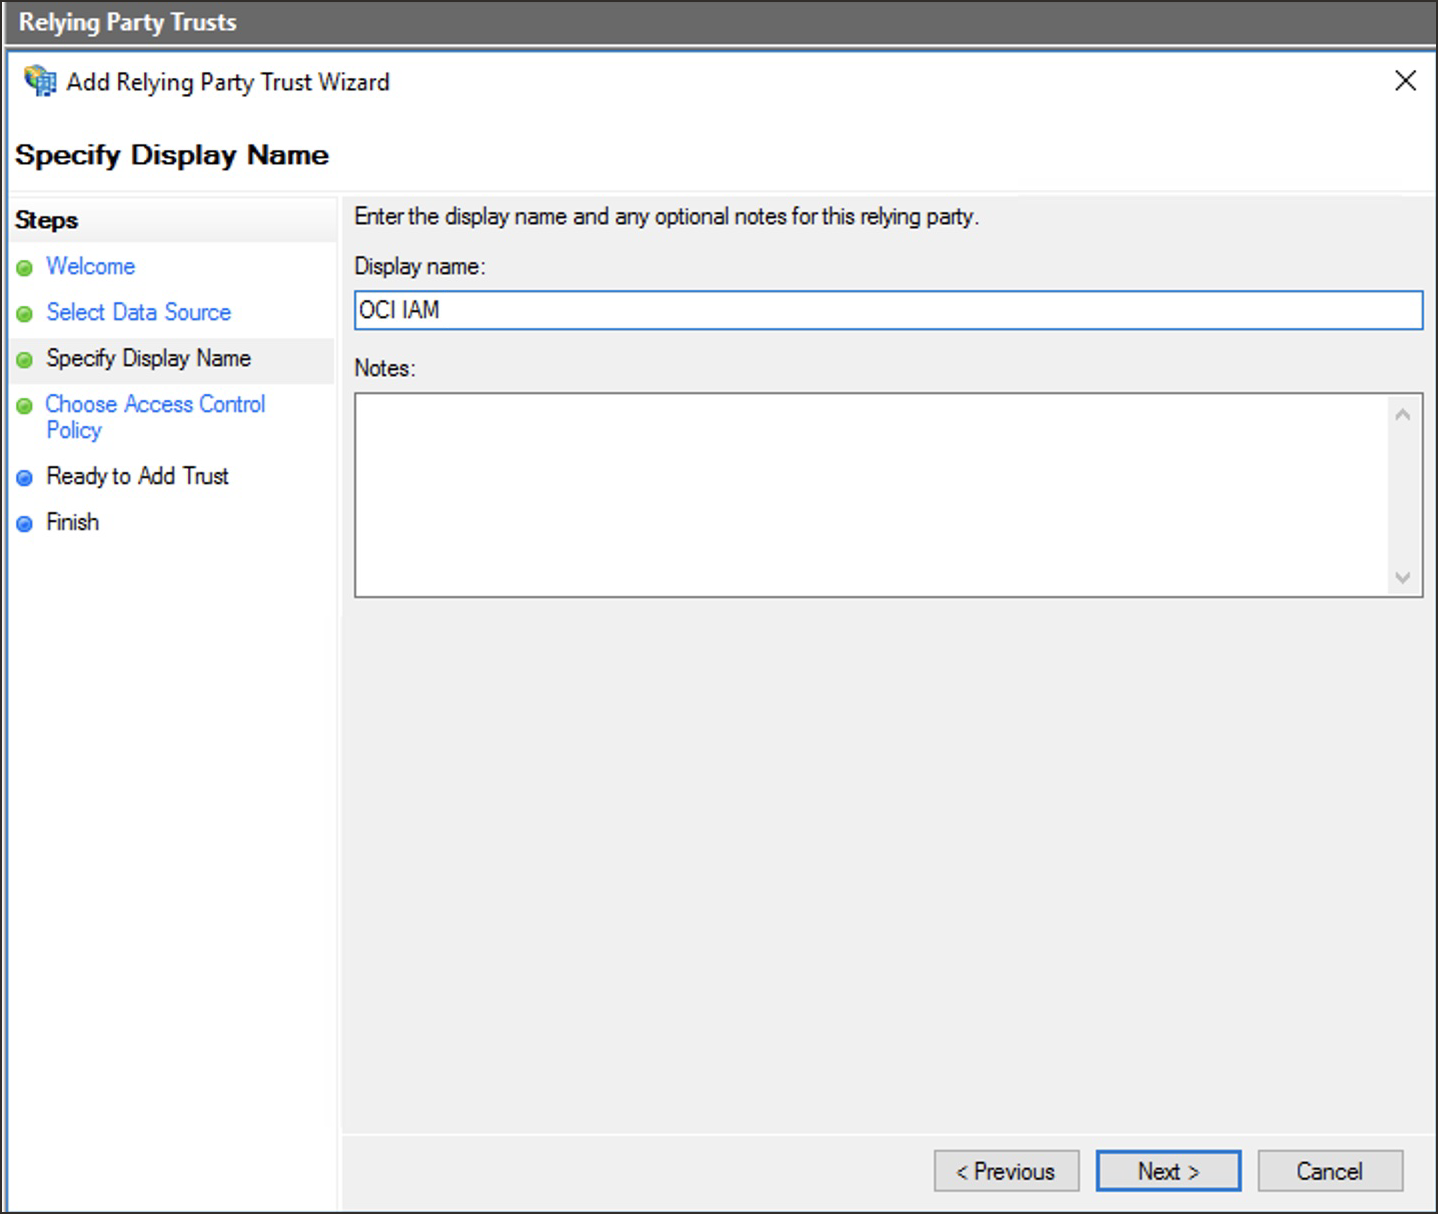
Enter a display name, for example
OCI IAM, and optionally enter a description under Notes. Select Next. -
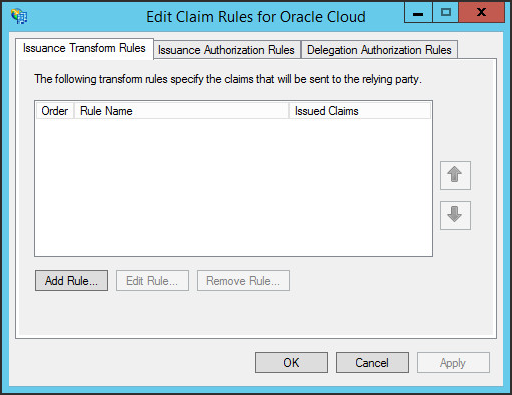
Proceed with the default options until you reach the Finish step, and then select Close. The Edit Claim Rules window opens.
Configure Claim Rules
Claim rules define the information about a signed-in user sent from ADFS to OCI IAM after successful authentication. Here, you define two claim rules for OCI IAM to act as a relying party:
- Email: This rule indicates that the user's email address is sent to OCI IAM in the SAML assertion.
-
Name ID: This rule indicates that the result of the Email rule is sent to OCI IAM in the Subject
NameIDelement of the SAML assertion.
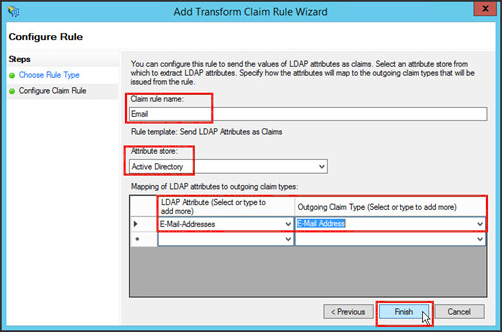
- In the Edit Claim Rules window, select Add Rule.
- Select Send LDAP Attributes as Claims as claim rule template, and then select Next
- In the Choose Rule Type page, provide the following information for the Email rule:
-
Claim rule name:
Email -
Attribute store:
Active Directory -
Mapping of LDAP attributes to outgoing claim types:
-
LDAP Attribute:
E-Mail-Addresses -
Outgoing Claim Type:
E-Mail Address
-
LDAP Attribute:
-
Claim rule name:
- Select Finish.
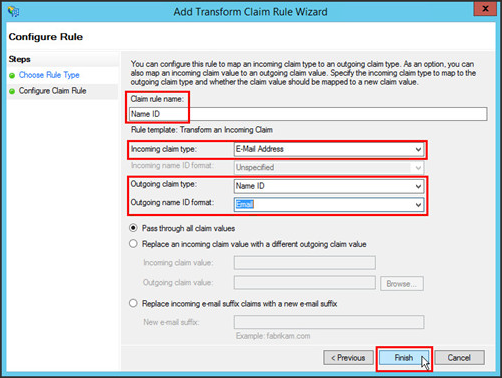
- In the Edit Claim Rules window, select Add Rule to add the second claim rule.
- Select Transform an Incoming Claim as claim rule template, then select Next.
- In the Choose Rule Type page, provide the following information for the Name ID rule:
-
Claim rule name:
Name ID -
Incoming claim type:
E-Mail Address -
Outgoing claim type:
Name ID -
Outgoing name ID format:
Email
-
Claim rule name:
- Select Finish.
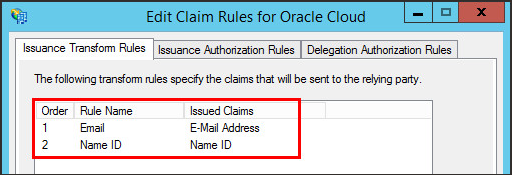
- In the Edit Claim Rules for Oracle Cloud window, check that the Email and Name ID rules have been created.
Now, ADFS and OCI IAM have enough information to establish SSO and you can test the integration.
In this task, you test the authentication between OCI IAM and ADFS. If the authentication is successful, you enable the identity provider for end-users.
- Restart your browser, and enter the Console URL to access the OCI IAM Console:
- Enter the Cloud Account Name, also referred to as the tenancy name, and select Next.
- Sign in with your username and password.
- Select the domain that you configured the ADFS IdP for.
- Select Security and then Identity Providers.
- Select the ADFS IdP entry.
- On the details page for the IdP, select More actions then select Test login.
- Scroll to the bottom and select Test Login.
- On the ADFS sign in page, sign in with a user that exists on ADFS and OCI IAM.
- You see the confirmation message Your connection is successful.
Congratulations! You have successfully set up SSO between ADFS and OCI IAM.
To explore more information about development with Oracle products, check out these sites:
