Validate Your Data

As a functional administrator, validate the data after loading the source data in to your data warehouse.

You can schedule the validation of your data using the prebuilt validation sets or custom validation sets that you create. You can create a validation set and define the subject area, metrics, and columns that you want to validate and schedule the validation frequency and date. You see the validation sets that you create under Custom Validation Sets in the Scheduled Validation tab.

Ensure that you validate data from the initial extract date set up in the pipeline settings and avoid using any data before the initial extract date. For example, if the Initial Extract Date in the pipeline settings is January 1, 2014, even if there is data in your Oracle Fusion Cloud Applications source from January 1, 2010 to December 31, 2013, because there is nothing to validate it against in the warehouse, the data validation process won't produce correct results.

Based on the schedule and the validation set, Oracle Fusion Data Intelligence validates the data and stores the details in the Data Validation workbook available in the Common folder in Oracle Analytics Cloud. Use the report tabs such as Validate data for ERP Analytics and Validate data for HCM Analytics available in this workbook to view the data validation details.
  1. Sign in to your service.
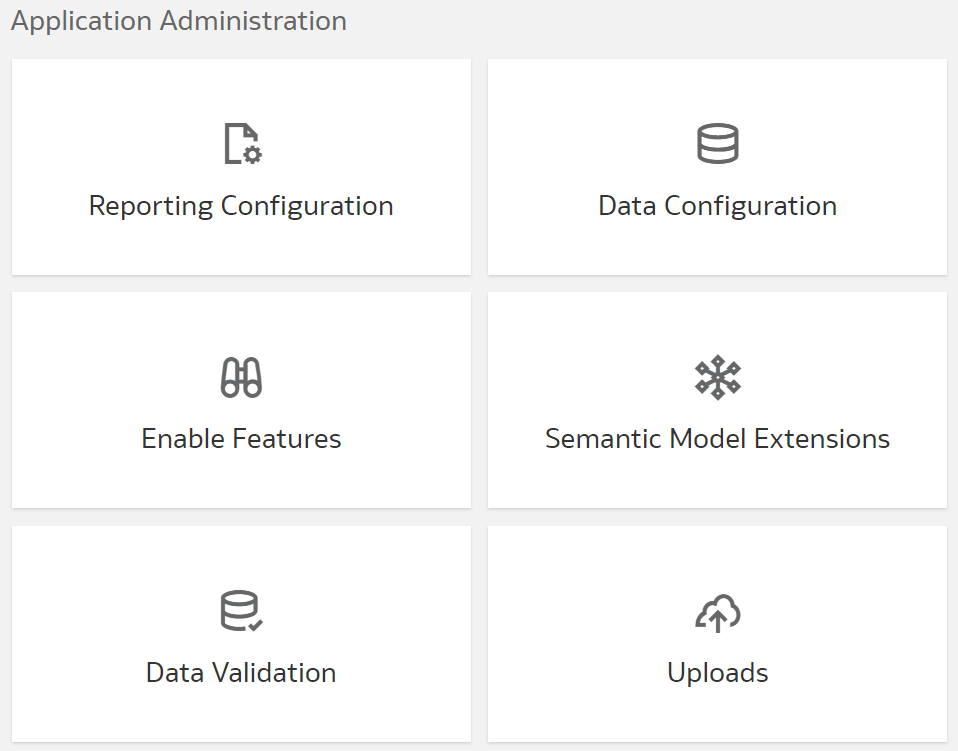
  2. In Oracle Fusion Data Intelligence Console, click Data Validation under Application Administration.

    Description of fawag_data_validation_tile.png follows

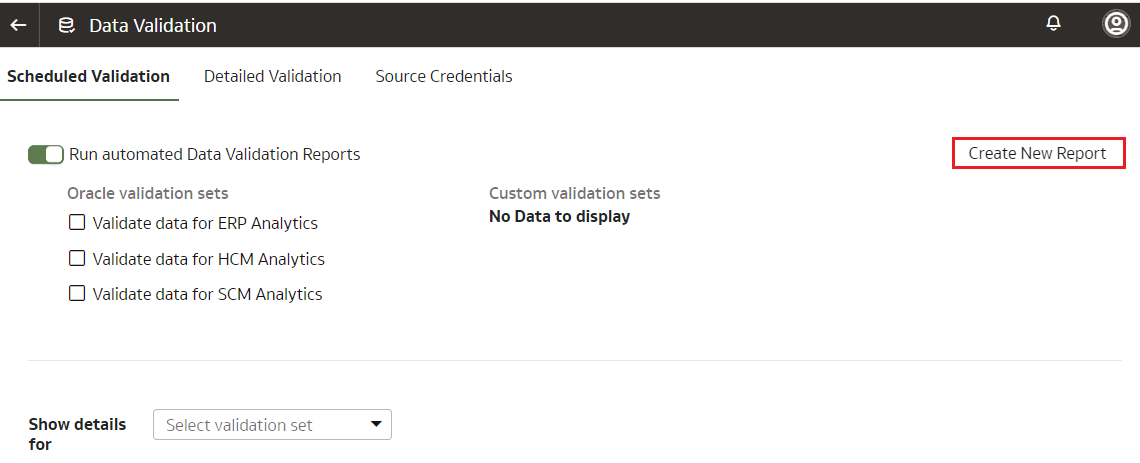
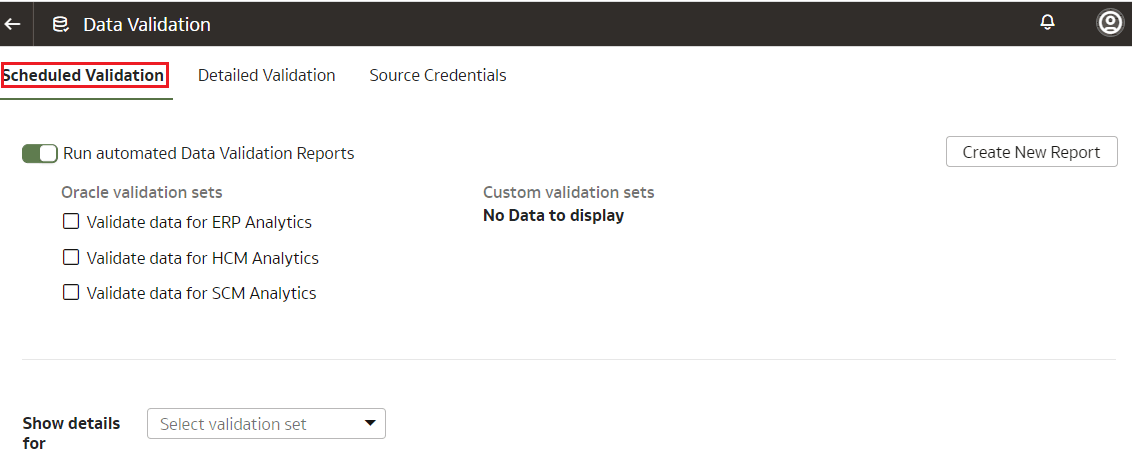
  3. On the Data Validation page, in the Scheduled Validation tab, ensure that the Run automated Data Validation Reports toggle is “on” if you want to validate your data using theprebuilt validation sets or your custom validation sets. Select the check box for the specific validation sets.

    Description of fawag_scheduled_validation.png follows

  4. To create a custom validation set, click Create New Report.

    Description of fawag_create_custom_validation_set.png follows

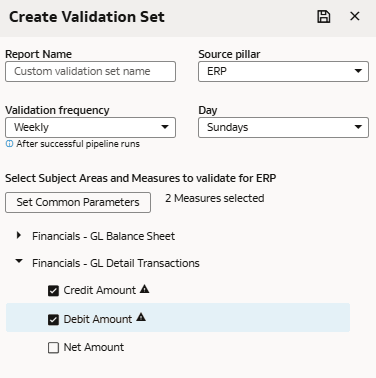
  5. In Create Validation Set:
    1. Enter a name for your custom validated set.
    2. Select the source pillar.
      You see the subject areas for the selected pillars.
    3. Select the validation frequency and the corresponding day, month, and date as required.
    4. For each subject area, select the check box for the measures that you want, and then click the edit icon next to the measure.
    5. In Select Values, select the values that are displayed, or search for values, or click Show More Values, and then move them to the Selected Values box using the arrows.
    6. Click Select to retain the selection.
    7. Click Save.

    Description of fawag_create_validation_set.png follows

  6. In Show details for, select the validation set to view the subject area and its measures that would be validated as part of this validation set.
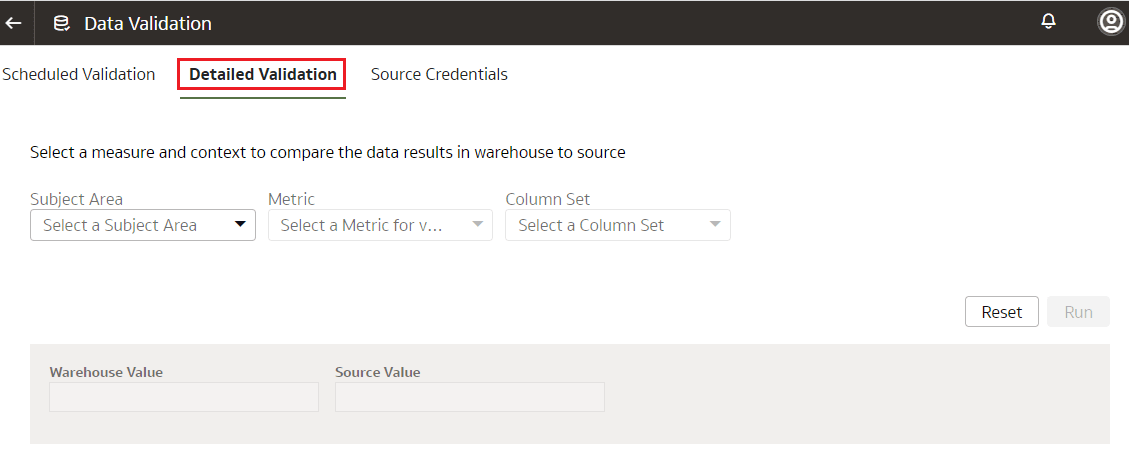
  7. On the Data Validation page, in the Detailed Validation tab, select the subject area such as Financials - GL Balance Sheet, a metric related to the selected subject area, and the column set that you want to validate.
    You see the columns listed from the selected Column Set.
    Description of fawag_detailed_validation.png follows

  8. For each column, click the + icon to open the Select Values dialog.
  9. In Select Values, select the values that are displayed, or search for values, or click Show More Values, and then move them to the Selected Values box using the arrows.
  10. Click Select to retain the selection.
  11. In the Detailed Validation tab, click Run to show the metric values in the Oracle Fusion Data Intelligence instance and the Oracle Transactional Business Intelligence instance.
  12. On the Data Validation page, click Show Summary to display the detail drill down of the metric values for Oracle Fusion Data Intelligence instance and the Oracle Transactional Business Intelligence instance.
  13. Select the attribute columns that you would like to pivot the details on in the display.
    You see the Summary table with values for these categories:
    • Total Records in Analytics Warehouse
    • Total Records in Oracle Transactional Business Intelligence
    • Records Only in Analytics Warehouse
    • Records Only in Oracle Transactional Business Intelligence
    • Matched Records
    • Mismatched Records
  14. On the Data Validation page, click Show Details to show the detail drill down of the metric values for the Oracle Fusion Data Intelligence instance and the Oracle Transactional Business Intelligence instance. The detail table gives the actual data for the differences between these instances using the pivot columns that you had selected previously.
  15. Optional: Use the Download Details option to download the detail data into a csv file.
  16. Optional: Use the Change Columns option to change the columns that you would like to pivot the detail data on.
    This regenerates the summary and the detail analysis.