Creating a Connector with a Logging Source
Create a connector in Connector Hub to transfer log data from the Logging service to a target service.
For more information about the Logging service, see Logging.
A connector that's defined with a Logging source and optional task supports all targets. For an example of the Connector Hub workflow, see Overview of Connector Hub. For an example of a connector that uses Logging as the source, with a Functions task, see Scenario: Sending Log Data to an Autonomous Database.
Retention Period: Logging Source
The retention period for the Logging source in Connector Hub is 24 hours. For more information about delivery, see Delivery Details.
If the first run of a new connector is successful, then it moves log data from the connector's creation time. If the first run fails (such as with missing policies), then after resolution the connector moves log data from the connector creation time or 24 hours before the current time, whichever is later.
Each later run moves the next log data. If a later run fails and resolution occurs within the 24-hour retention period, then the connector moves the next log data. If a later run fails and resolution occurs outside the 24-hour retention period, then the connector moves the latest log data, and any data generated between the failed run and that latest log data isn't delivered.
A connector with a Logging source and either Streaming or Object Storage target can handle a throughput of about 10 GB per hour (exact throughput depends on target configuration and batch setting). If you expect a higher throughput, then we recommend either creating multiple connectors with different log objects or defining some filter in the connector's query to stay at a nominal lag level.
Query Reference
To review supported queries for filtering source logs, see Log Query Reference for Connector Hub.
-
If you selected Monitoring as the target, under Configure target, configure the metric to send the log data to. Then, skip to step 17.
- Compartment: Select the compartment that contains the metric that you want.
- Metric namespace: Select the metric namespaces that includes the metric that you want. You can select an existing namespace or enter a new namespace.
When typing a new namespace, press Enter to submit it.
For a new metric namespace, don't use the reserved
oci_prefix. Metrics aren't ingested when reserved prefixes are used. See Publishing Custom Metrics and PostMetricData Reference (API). - Metric: Select the name of the metric that you want to send the data to. You can select an existing metric or enter a new metric.
When typing a new metric name, press Enter to submit it.
For a new metric, don't use the reserved
oci_prefix. Metrics aren't ingested when reserved prefixes are used. See Publishing Custom Metrics and PostMetricData Reference (API). -
Add dimensions: Select this button to optionally configure dimensions. The Add dimensions panel opens.
The six latest rows of log data are retrieved from the log specified under Configure source.
Specify a name-value key pair for each dimension that you want to send data to. The name can be custom and the value can be either static or a path to evaluate. Use dimensions to filter the data after the log data is moved to a metric. For an example dimension use case, see Scenario: Creating Dimensions for a Monitoring Target.
To extract data (path value)-
Under Select path, select the down-arrow for the log that you want.
Paths are listed for the expanded log.
-
Select the checkbox for the path that you want.
The following image shows an example of a selected path (
bucketName) and an unselected path (eTag):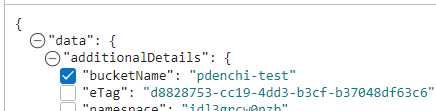
Under Edit path, the Dimension name and Value fields are automatically populated from the selected path.
If no log data is available, then you can manually enter a path value with a custom dimension name under Edit path. The path must start withlogContent, using either dot (.) or index ([]) notation. Dot and index are the only supported JMESPath selectors. For example:logContent.data(dot notation)logContent.data[0].content(index notation)
For more information about valid path notation, see JmesPathDimensionValue.
- Optionally, edit the dimension name.
To tag data (static value)
-
Under Static values, select + Another static value and then enter a dimension name and value. For example, enter
trafficandcustomer.
-
Note
For new (custom) metrics, the specified metric namespace and metric are created the first time that the connector moves data from the source to the Monitoring service. To check for the existence of moved data, query the new metric by using the Console, CLI, or API. See Creating a Query for a Custom Metric.What's included with the metric
In addition to any dimension name-value key pairs that you specify under Configure dimensions, the following dimensions are included with the metric:connectorId: The OCID of the connector that the metrics apply to.connectorName: The name of the connector that the metrics apply to.connectorSourceType: The source service that the metrics apply to.
The timestamp of each metric data point is the timestamp of the corresponding log message.
The creation process begins, and its progress is displayed. On completion, the connector's details page opens. -
If you selected Monitoring as the target, under Configure target, configure the metric to send the log data to. Then, skip to step 17.
Use the oci sch service-connector create command and required parameters to create a connector with a Logging source:
oci sch service-connector create --display-name "<display_name>" --compartment-id <compartment_OCID> --source [<logging_source_in_JSON>] --target [<target_in_JSON>]For a complete list of parameters and values for CLI commands, see the CLI Command Reference.
Run the CreateServiceConnector operation to create a connector.
To create a connector with a Logging source, populate
sourcein the request (CreateServiceConnectorDetails) with logging details. For an example, see LoggingSourceDetails.
Confirm That the New Connector Moves Data
After you create the connector, confirm that it's moving data.
- Enable logs for the connector to get details on data flow.
- Check for expected results at the target service.
Confirming that data is moved helps you avoid automatic deactivation, which happens when a connector fails for a long time.