Management Features in the OracleDB for Azure Portal
Learn how to manage your OracleDB for Azure subscription linking and check your billing in the OracleDB for Azure portal.
Manage OracleDB for Azure Subscriptions
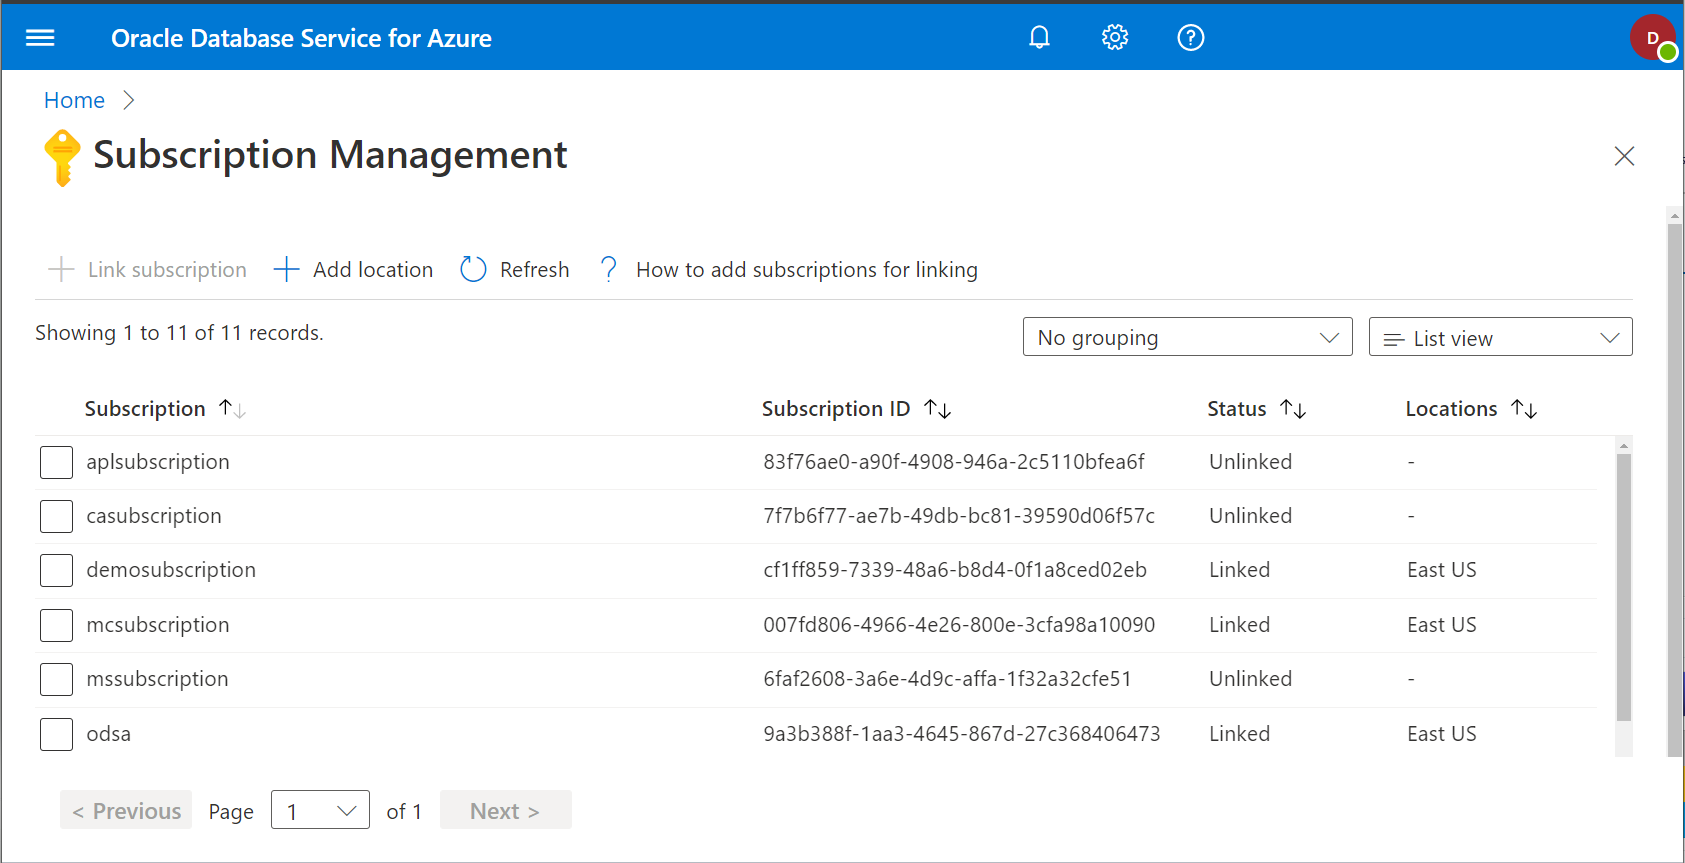
You can link Azure subscriptions in the OracleDB for Azure portal and extend linked subscriptions to new locations on the Subscription Management page of the OracleDB for Azure portal.
To link Azure subscriptions in the OracleDB for Azure portal
Review the instructions in To assign OracleDB for Azure ARM roles to users within an Azure subscription to assign the necessary ARM roles to your Azure subscriptions before completing the steps in this task.
- Log in to the OracleDB for Azure and click Subscription Management/
- In the list of available subscriptions, find unlinked subscriptions that you want to link and select the check box beside the subscription name.
- Click + Link subscription.
- Confirm that you want to link the specified subscription by clicking OK. To cancel the operation, click Discard.
To add your Azure subscriptions to a new region
You can extend your linked OracleDB for Azure Azure subscriptions to additional regions supported by OracleDB for Azure. See Oracle Database Service for Azure Regional Availability for information about supported OracleDB for Azure regions. Note that the "add location" operation described in this task adds all currently linked subscriptions in the subscription list to the region your specify.
- Log in to the OracleDB for Azure and click Subscription Management/
- Click + Add location.
- In the Add location window, select a location, then click OK.
- Confirm that you want to add all linked subscription to the specified region by clicking OK. To cancel the operation, click Discard.
To add your Azure subscriptions to OracleDB for Azure Subscription Management
- Log in to the OracleDB for Azure and click Subscription Management/
- Click ? How to add subscriptions for linking.
- In the Assign Azure roles for subscriptions panel, read the instructions for assigning the required Azure roles to your subscriptions.
- Click Continue to Azure subscriptions. A new tab or window will open. Follow the instructions provided in the Assign Azure roles for subscriptions panel.
- After you complete the role assignment in Azure, click the Refresh button in the Subscription Management page.
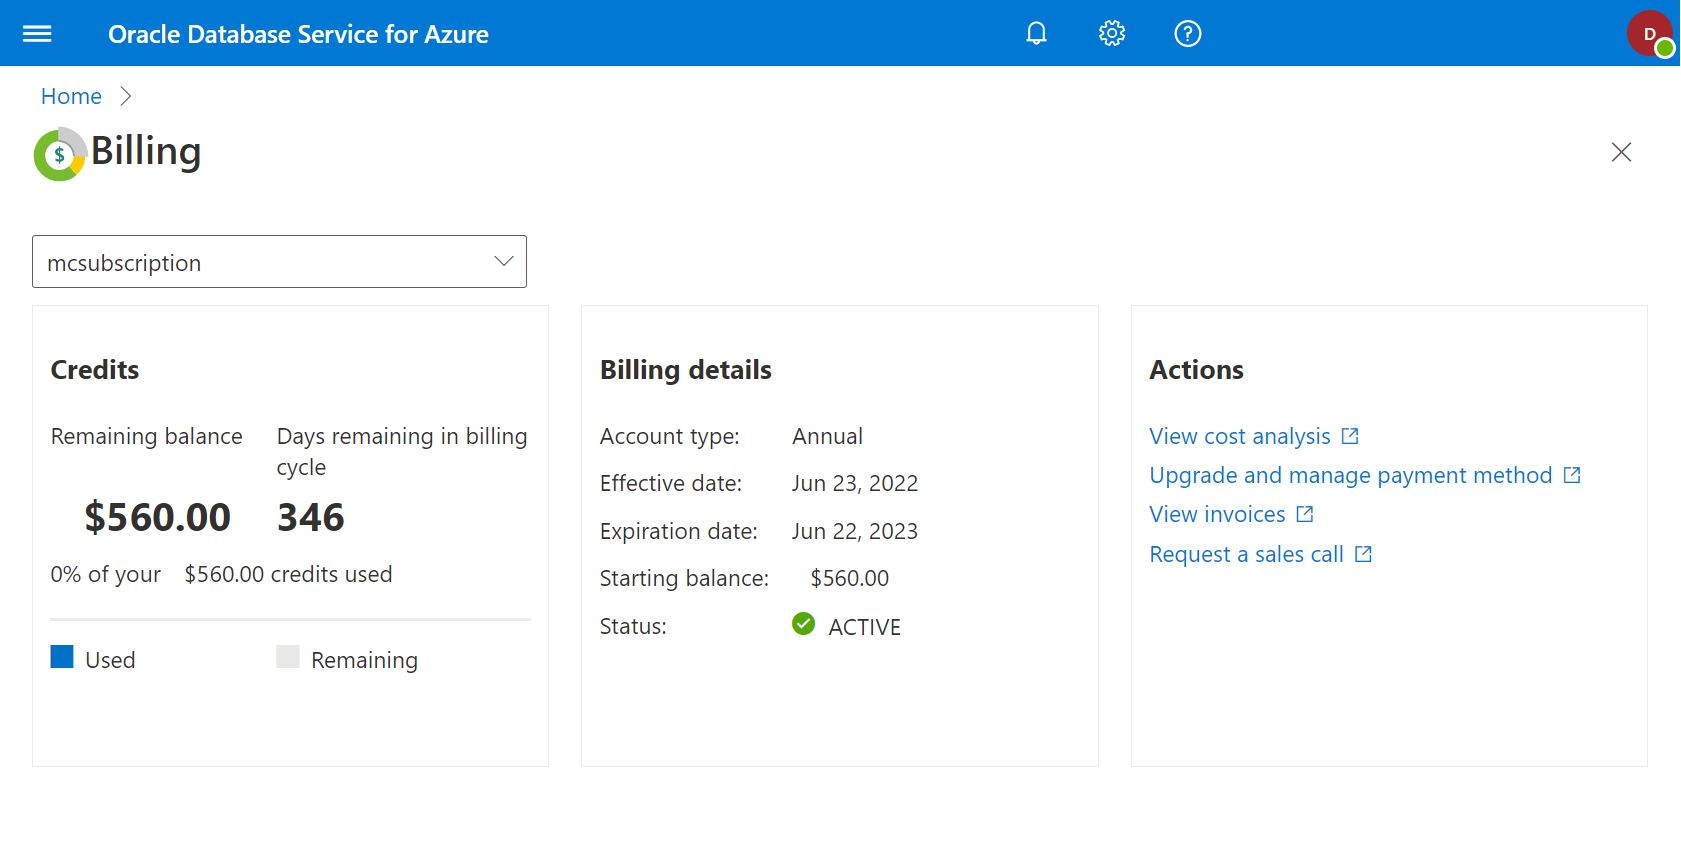
Check Your OracleDB for Azure Billing
The OracleDB for Azure portal provides you with billing information and a credit balance, if applicable, for your account. To see billing information, log in to the OracleDB for Azure portal and click Billing.