Other Ways to Run Jobs

You can use jobs in a myriad of different ways such as using conda environments and zip files.

Using zip or compressed tar Files

You can use jobs to run an entire Python project that you archive into a single file.

zip or compressed tar files that are run as a job can leverage the Data Science service conda environments, and, the custom conda environments.

For the job run, you point to the main entry file using the JOB_RUN_ENTRYPOINT environment variable. This variable is only used with jobs that use zip or compressed tar job artifacts.

Using a Data Science Conda Environment

You can use one of the Data Science conda environments that are included in the service.

A conda environment encapsulates all the third-party Python dependencies (such as Numpy, Dask, or XGBoost) that the job run requires. Data Science conda environments are included and maintained in the service. If you don't specify a conda environment as part of job and job run configurations, a conda environment isn't used because there's no default.

Your job code is embedded in a Data Science conda environment:
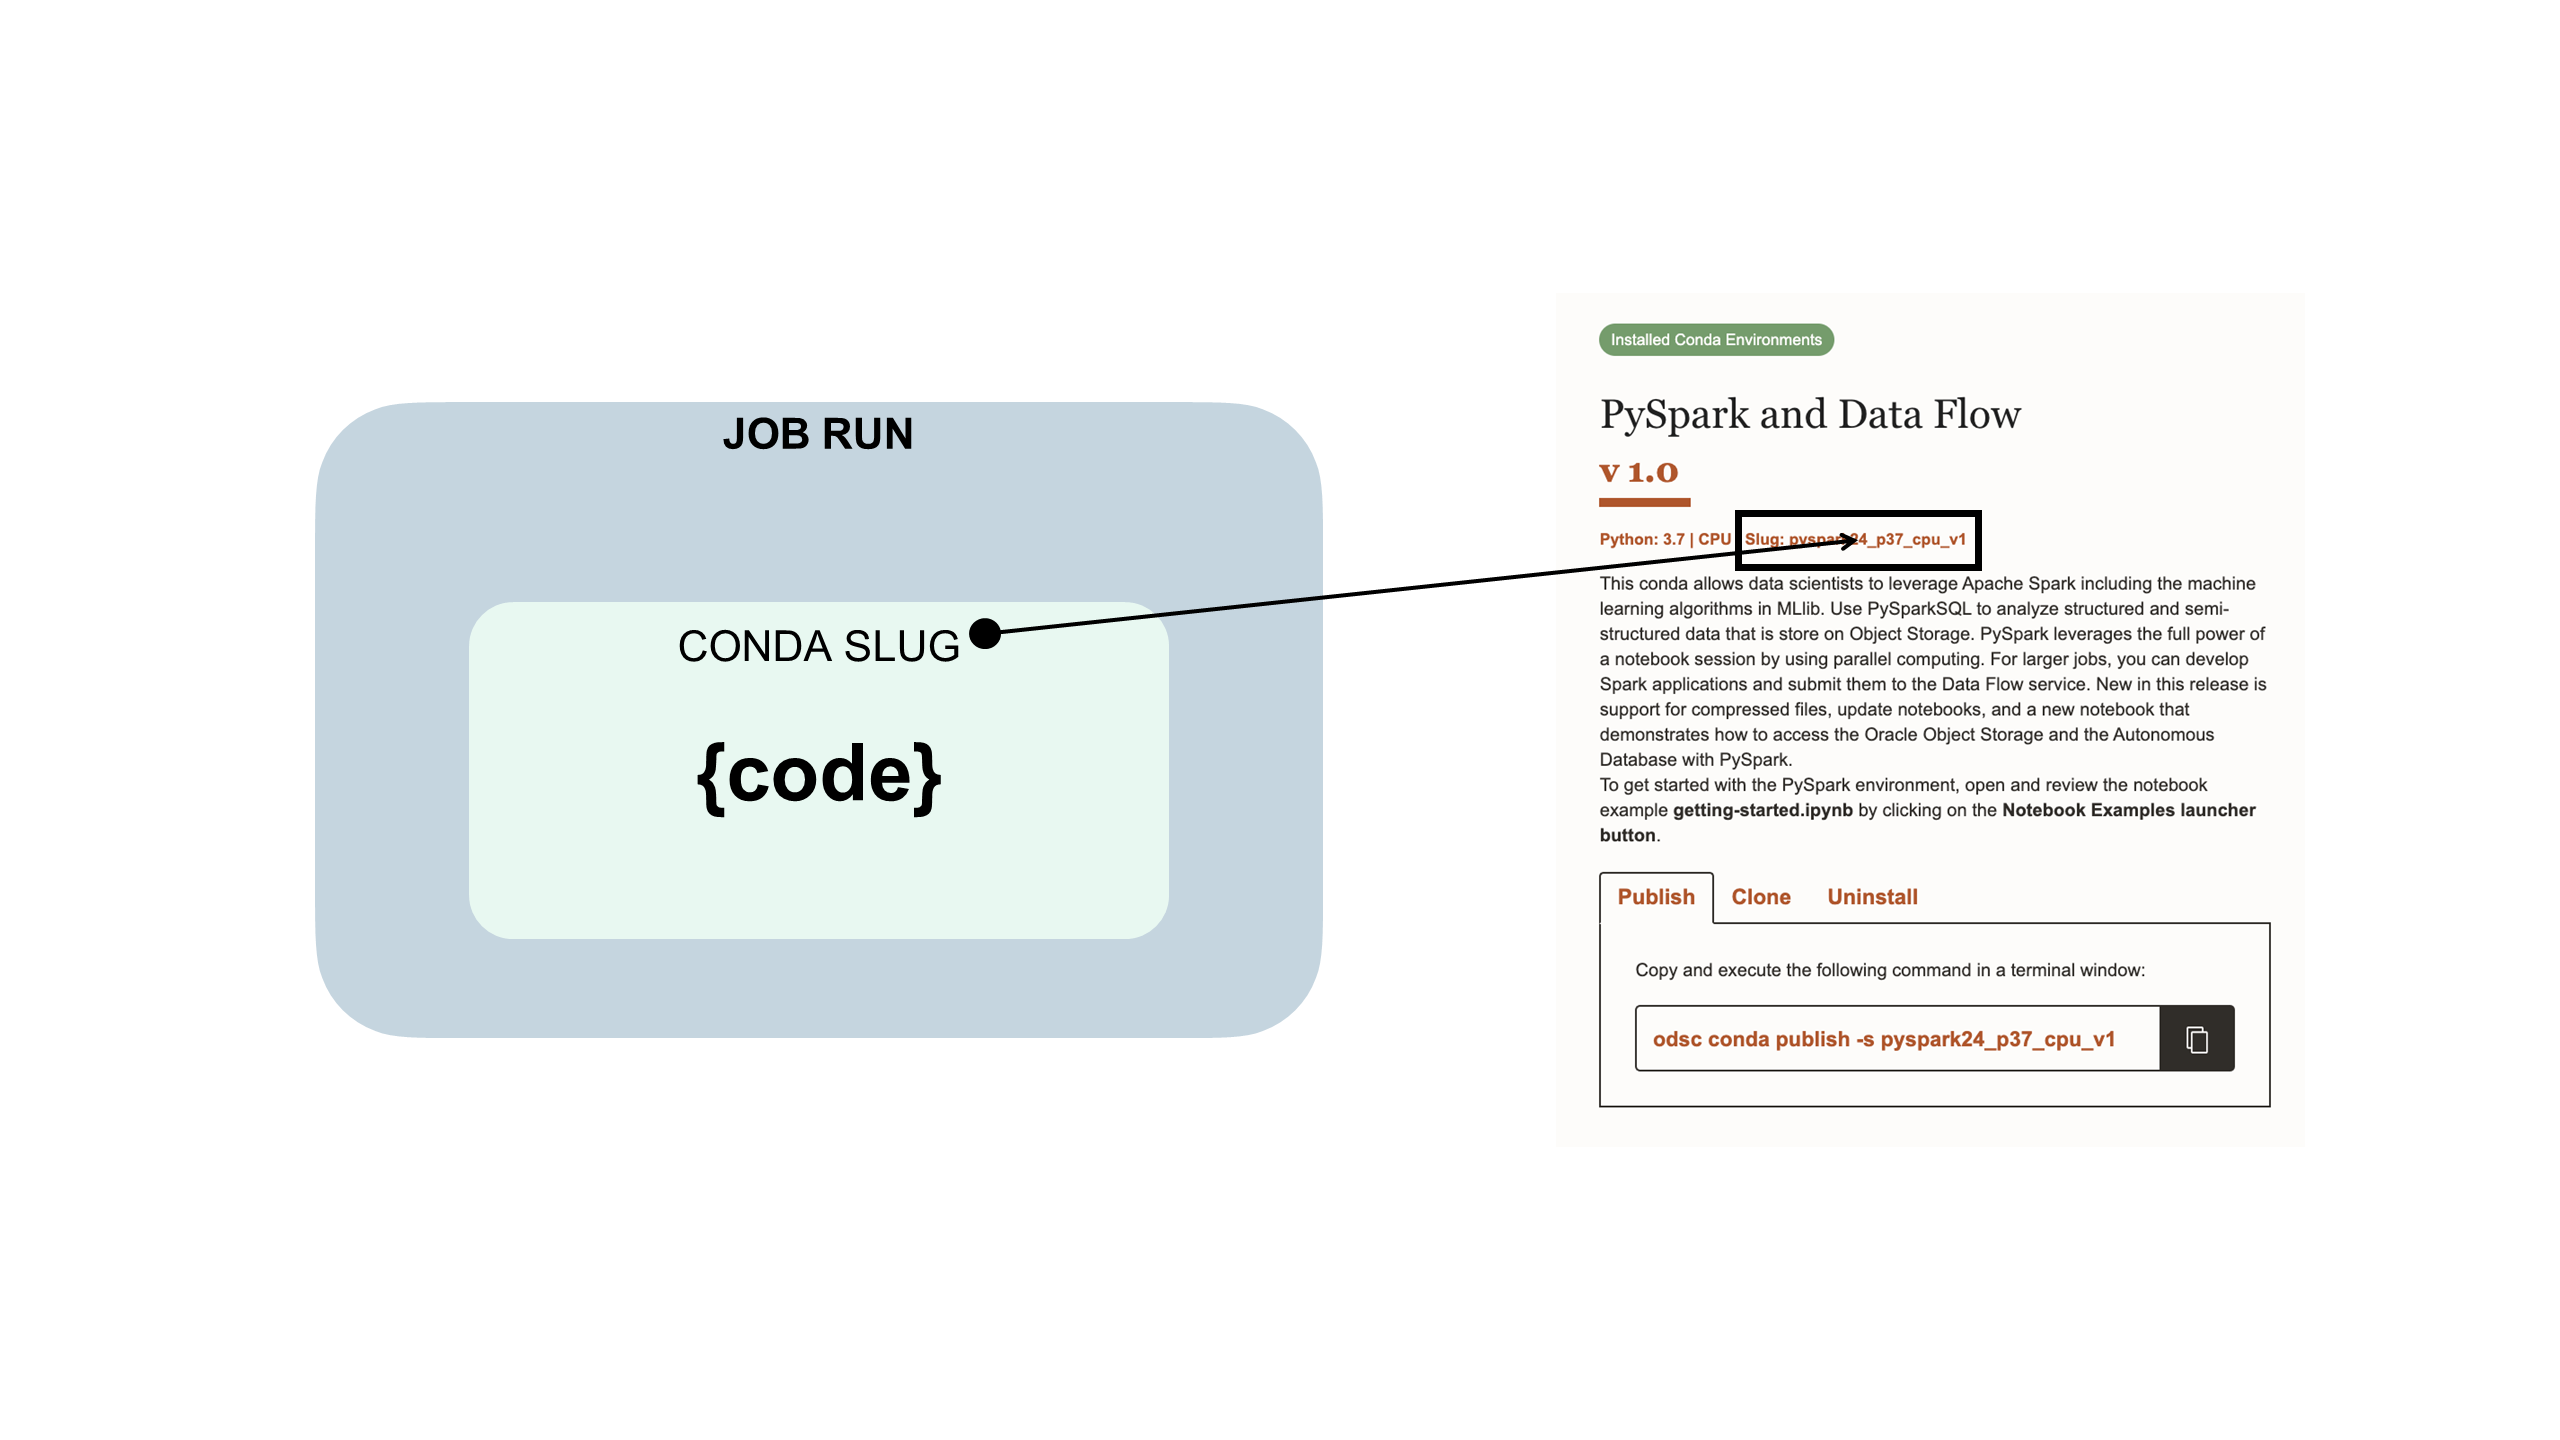
Shows how job code is embedded in a Data Science conda, shape, and job run. And the conda slug in the conda card.

  1. Find the Data Science conda that you want to use, and then choose from:
    • From the Console:

      1. In a project, create a notebook session.

      2. Open the notebook session.

      3. View the conda environments and select the Data Science conda that you want to use.

      4. Copy the conda environment slug from the selected card.

        When running a job with Data Science conda, you don't need to publish it to Object Storage. You only need the conda slug value.

        Tip

        You can test the code in a notebook before running it as a job.

    • From the Data Science conda list of environments:

      1. Find the conda that you want to use.

      2. In the table, copy the slug.

  2. Create a job and add this custom environment variable to specify the Data Science conda:
    CONDA_ENV_TYPE => "service"
    CONDA_ENV_SLUG = <service_conda_environment_slug>
  3. Start a job run and if you want to use a different conda environment for the job run use the custom environment variables to override the job configuration.

Using a Custom Conda Environment

You can use a zip and compressed tar file jobs with custom conda environments, as well as Data Science conda environments.

A conda environment encapsulates all the third-party Python dependencies (like Numpy, Dask, or XGBoost) that your job run requires. You create, publish, and maintain custom conda environments. If you don't specify a conda environment as part of job and job run configurations, a conda environment isn't used because there is no default

Your job code is embedded in a custom conda environment like this:

Shows how your job code is embedded in a custom conda, shape, and job run. And the conda slug in the conda card.

  1. Create a custom conda environment.
  2. Publish it to Object Storage.
  3. Set up policies that allow the job run resource to access the published conda environments that are stored in your tenancy's Object Storage bucket.
  4. Create a job and set these environment variables (region is optional if it is in the same region as the job run):
    CONDA_ENV_TYPE => "published"
    CONDA_ENV_OBJECT_NAME => <full_path_object_storage_name>
    CONDA_ENV_REGION => <object_storage_region>
    CONDA_ENV_NAMESPACE => <object_storage_namespace>
    CONDA_ENV_BUCKET => <object_storage_bucket_name>
    Important

    The job and job run must be configured with a subnet that has a service gateway to access the published conda environment in your tenancy's Object Storage bucket.

  5. Start a job run.

    (Optional) If you want to use a different conda environment for individual job runs, set custom environment variables to override the job configuration.

  6. (Optional) If you used logging, then you can review them to see the job run values.

Using a Runtime YAML File

You can use a runtime YAML file to configure job environment variables rather than using the Console or SDK.

Before you begin:

Download, unzip, and review the jobruntime.yaml and conda_pack_test.py sample files to create and test your job project.

Using a jobruntime.yaml file makes setting custom environment variables in your project easier.

  1. Modify the jobruntime.yaml sample file to specify your values.

    Add variables that you want to use during the job run. You can add job run specific environment variables like CONDA_ENV_TYPE or CONDA_ENV_SLUG, and custom key pairs.

    For example:

    CONDA_ENV_TYPE: service
    CONDA_ENV_SLUG: dataexpl_p37_cpu_v2
    JOB_RUN_ENTRYPOINT: conda_pack_test.py
    KEY1: value1
    KEY2: 123123
    Important

    Nested variables aren't supported.

    Note how the JOB_RUN_ENTRYPOINT for the project is included in the runtime YAML, so you don't have to do this manually when you run the job.

  2. Create a simple project with a single python file and your jobruntime.yaml file in a project root directory.
  3. In the python file, read the environment variables, and print them to test that they are accessible.

    For example:

    print("Executing job artifact")
    print(os.getenv("CONDA_PREFIX"))
    print(os.getenv("CONDA_ENV_SLUG"))
    print(os.getenv("JOB_RUN_ENTRYPOINT"))
    print(os.getenv("KEY1"))
    print(os.getenv("KEY2"))
    print(os.getenv("spec"))
  4. Archive the project root directory to a zip or compressed tar file.

    For example, to zip a file on a Mac you could use:

    zip -r zip-runtime-yaml-artifact.zip zip-runtime-yaml-artifact/ -x ".*" -x "__MACOSX"
  5. From the Console, create a new job and upload the job archive file.
  6. Run the job to test that it works.

    Note that you don't need to provide any environment variables in the job run because they are set in your .yaml file.

  7. Monitor the job run for a successful finish.
  8. (Optional) If you used logging, then you can review them to see the job run values.

Using a Vault

You can integrate the OCI Vault service into Data Science jobs using resource principals.

Before you begin:

  • For the resource principal in the job to have access to a vault, ensure that you have a dynamic group in your compartment that either specifies the instance or the resource principal. For example, you could use the resource principal and a dynamic group with this rule:

    all {resource.type='datasciencejobrun',resource.compartment.id='<compartment_ocid>'}
  • For the job to run, you have to ensure that you have at least be able to manage secret-family on the dynamic group. For example:

    Allow dynamic-group <dynamic_group_name> to manage secret-family in compartment <compartment_name>

    The Using the OCI Instance Principals and Vault with Python to retrieve a Secret blog post provides useful details.

  • Download, unzip, and review the zipped_python_job.zip sample file that demonstrates the following:

    • Initializing the vault client in the job using the Python SDK
    • Reads a secret by using the secret OCID.
    • Decodes the secrete bundle and shows the actual secret content.

    Since jobs have access to the resource principal, you could initialize all the Vault clients available in the Python SDK.

  • Create a vault that has a master key, a secret, and add policy statement to all the job resource principals to manage secret-family.

  1. From the Console, create a new job.
  2. Run the job to test that it works.
  3. Monitor the job run for a successful finish.
  4. (Optional) If you used logging, then you can review them to see the job run values.