Federating Using Identity Domains with Microsoft Azure Active Directory for the Oracle US Government Cloud
Learn how to federate using Identity Domains with Microsoft Azure Active Directory in the Oracle US Government Cloud.
Enterprise organizations typically use an identity provider (IdP) to manage user logins and passwords, and to authenticate users for access to secure websites, services, and resources. For more information, see Federating with Identity Providers. You can use your preferred IdP, such as Azure Active Directory (AD), Okta, or other IdPs, and federate into Oracle Cloud Infrastructure with FedRAMP High Joint Authorization Board authorization.
The process for federating in the US Government Cloud is similar to the process for federating in the Commercial cloud, except for a few differences in the order that you perform some steps. For more information about the federation process in the commercial cloud, see Federating with Microsoft Active Directory.
Identity and Access Management (IAM) uses identity domains to provide identity and access management features such as authentication, single sign-on (SSO), and identity life cycle management for Oracle Cloud Infrastructure and for Oracle and non-Oracle applications, whether SaaS, cloud-hosted, or on-premises. You can create multiple identity domains for separate environments, for example, development and production. You can also use identity domains for consumer-facing applications and allow consumer users to perform self-registration and social sign-in.
For existing OCI tenancies without identity domains, see OCI US Government Cloud federation with Microsoft Azure AD.
Prerequisites
A US Government Cloud tenancy with Identity Domains.
An Azure AD Account with users and groups.
Task 1: Microsoft Azure Portal
From the Azure portal, click Enterprise Applications, and then select New Application.
Select Oracle Cloud, and then specify Oracle Cloud Infrastructure Console.
Specify a name, and then click Create.
On the Getting Started page, select Set up Single sign on, and then select SAML. This opens the page where you set up single sign-on with SAML.
In the SAML Certificates section click Edit.
Note
The Oracle service provider metadata isn't available in US Government Cloud by default to upload into Azure. You must use the existing SAML certificate that's available in the Azure IdP.-
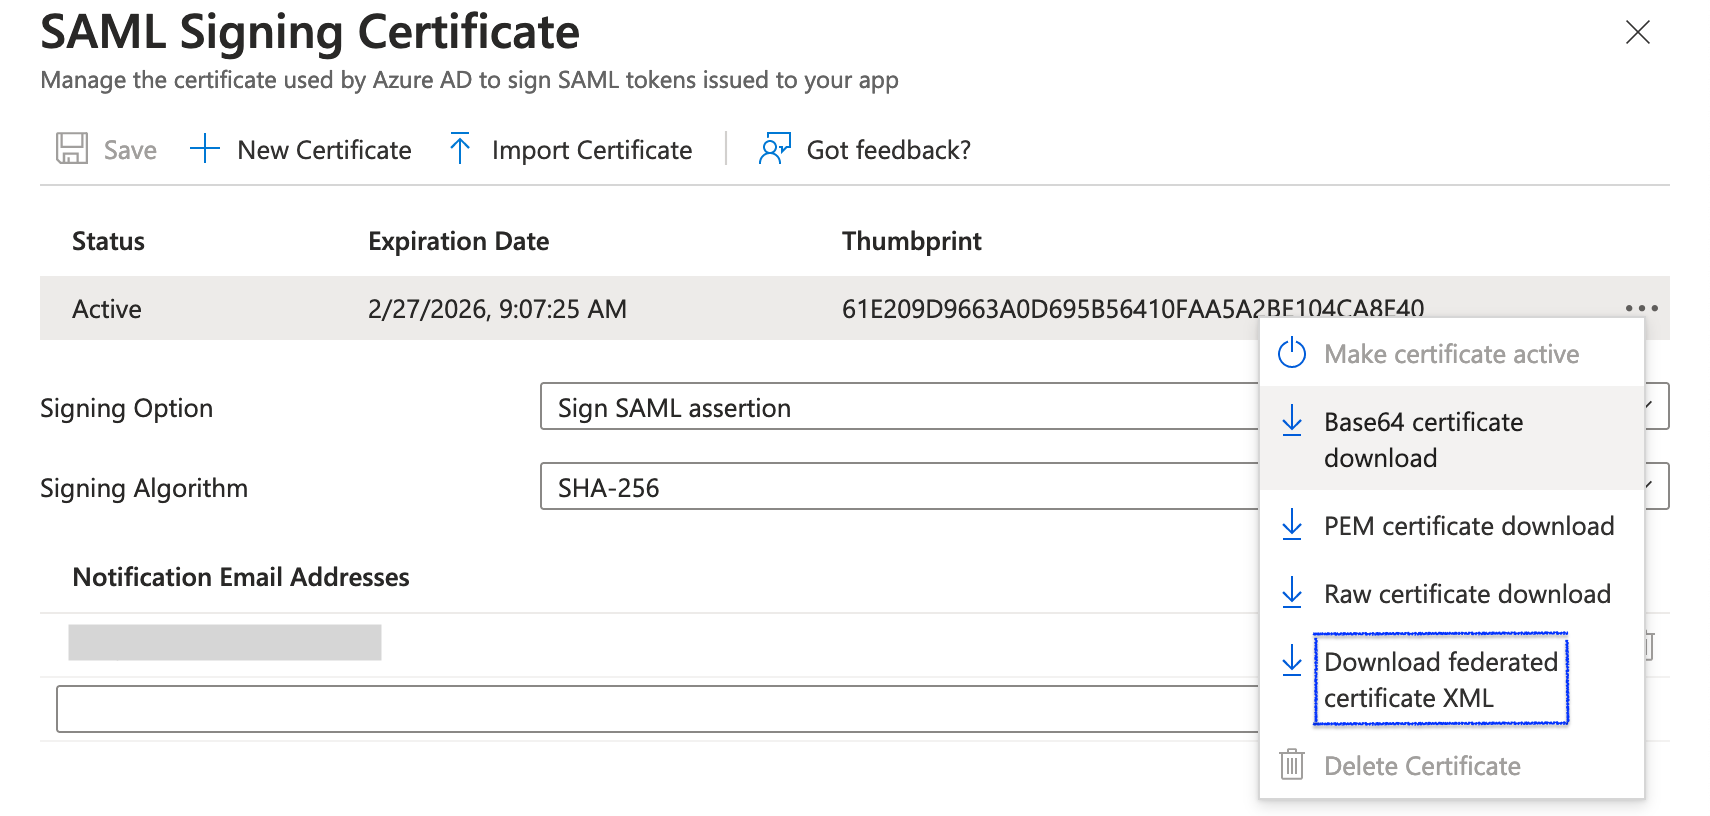
Click the , and then select Download federated certificate XML, as shown in the following screen shot.
In the Oracle section of the Azure portal single sign-on page, generate the service provider metadata, and then proceed to the next step.
After the metadata is generated, select Upload metadata file, and then click Add, as shown in the following screen shot.
After the metadata is uploaded, select Basic SAML Configuration, and then enter the Console sign-in URL. For example, the Console sign-in URL of the US Gov East (Ashburn) region is https://console.us-langley-1.oraclegovcloud.com/. For more information, see Console Sign-in URLs. Click Save.
In the AML certificates section, download and save the federation metadata XML.
Task 2: Oracle Cloud Infrastructure Console
In the Console, open the navigation menu and click Identity and Security. Under Identity, click Domains.
Click the name of the identity domain (for example, Default) that you want users to federate into from Azure AD. You might need to change the compartment to find the domain that you want.
Select Security, and then Identity Providers.
Click Add IdP, and then Add SAML IdP.
Enter Name, Description, and Identity provider icon. Then click Next.
On the Configure IdP page, drag the XML file to upload the metadata, or click select one to browse for the metadata file you downloaded in step 6 of Task 1: Microsoft Azure Portal. Click Next.
Note
If you've already generated the new IdP SAML, use the XML from Step 9 of Task 1: Microsoft Azure PortalThe Map attributes section maps users' identity attributes received from the IdP to an identity domain, and is optional. These options vary based on the IdP.
Click Create IdP.
Note
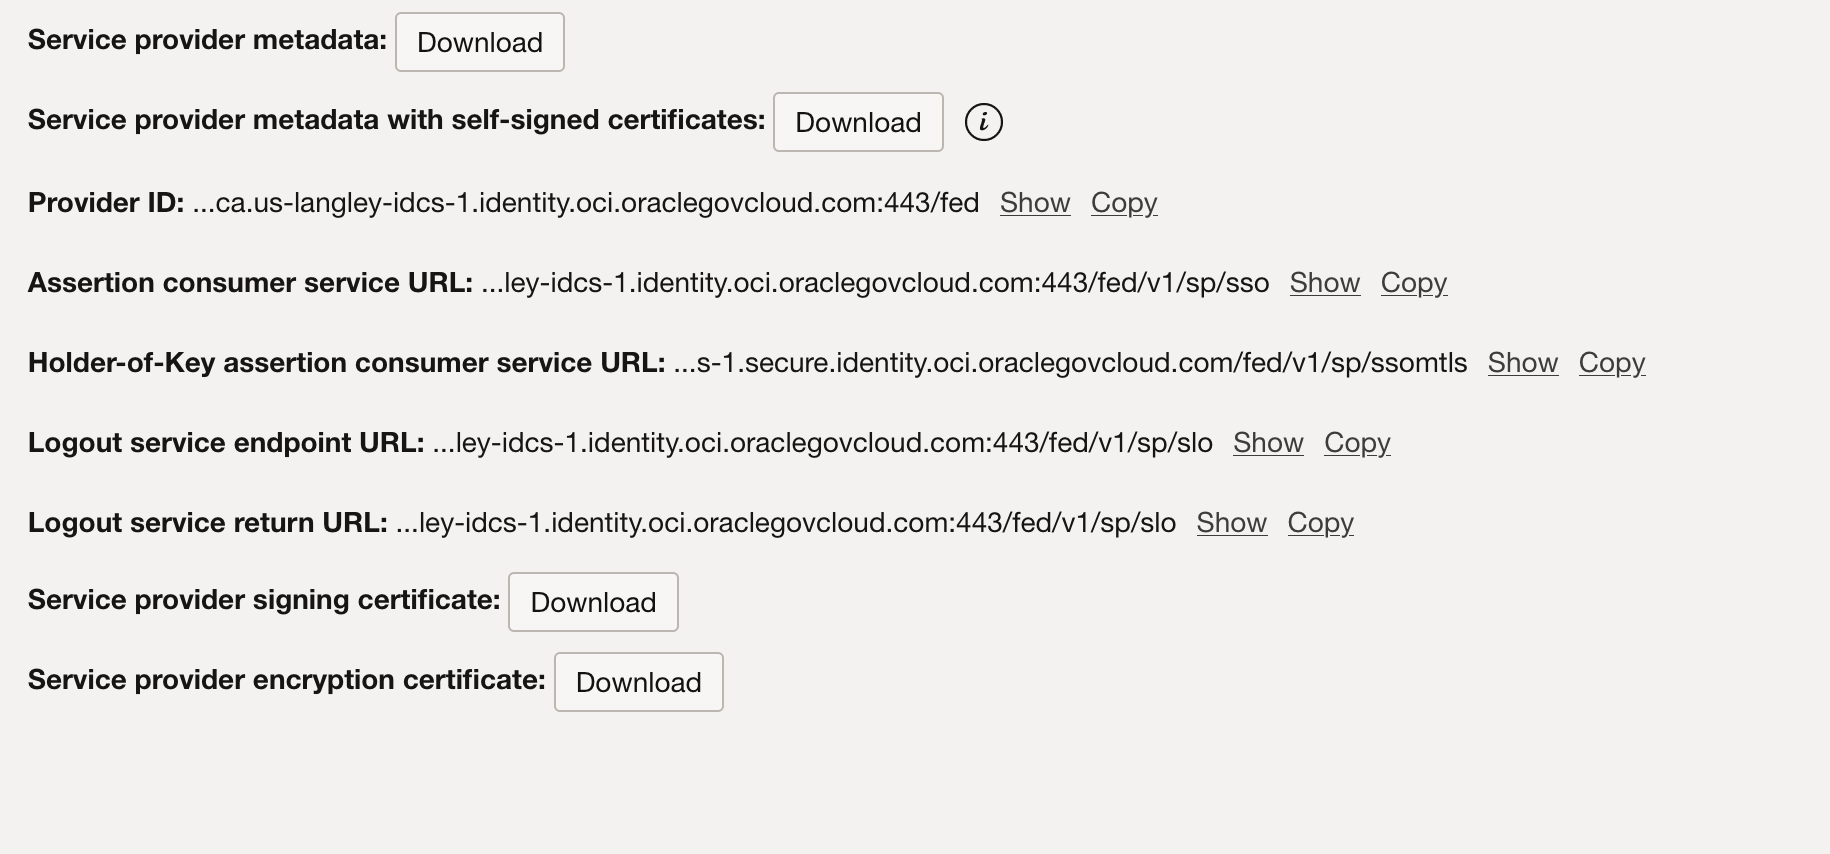
If you have already created the Azure IdP using service provider metadata, skip steps 8 through 10, and instead proceed to step 11.In the Add SAML identity provider section, click Download for Service provider metadata, as shown in the following screen shot. This is the metadata you use to import into Azure AD.
Don't test or activate the IdP at this point, because you'll delete and then re-create the IdP with the correct Azure metadata XML file, using the process described in steps 1-8. Click Cancel to exit the setup process, and then click the Actions menu (
 ). Click
Deactivate to deactivate the IdP, and then click
Delete.
). Click
Deactivate to deactivate the IdP, and then click
Delete.Go to step 8 in Task 1: Microsoft Azure Portal and finish the IdP setup using the correct metadata from the service provider that you generated in step 8 of this procedure.
On the Export page, click Next, and then click Next again for the Add SAML identity provider page.
Click Activate to activate the IdP, as shown in the following screen shot, and then click Finish.
On the default page for identity providers, click IdP policies , as shown in the following screen shot, to assign identity providers to the policy.
Select the name of the IdP policy that you want to assign an IdP to, for example, Default IdP Policy.
Under Resources, click Identity provider rules.
Click the Actions menu (
 ) for the rule you want to assign the
IdP to, click Edit IdP rule, and then assign the created IdP
provider, as shown in the following screen shot.
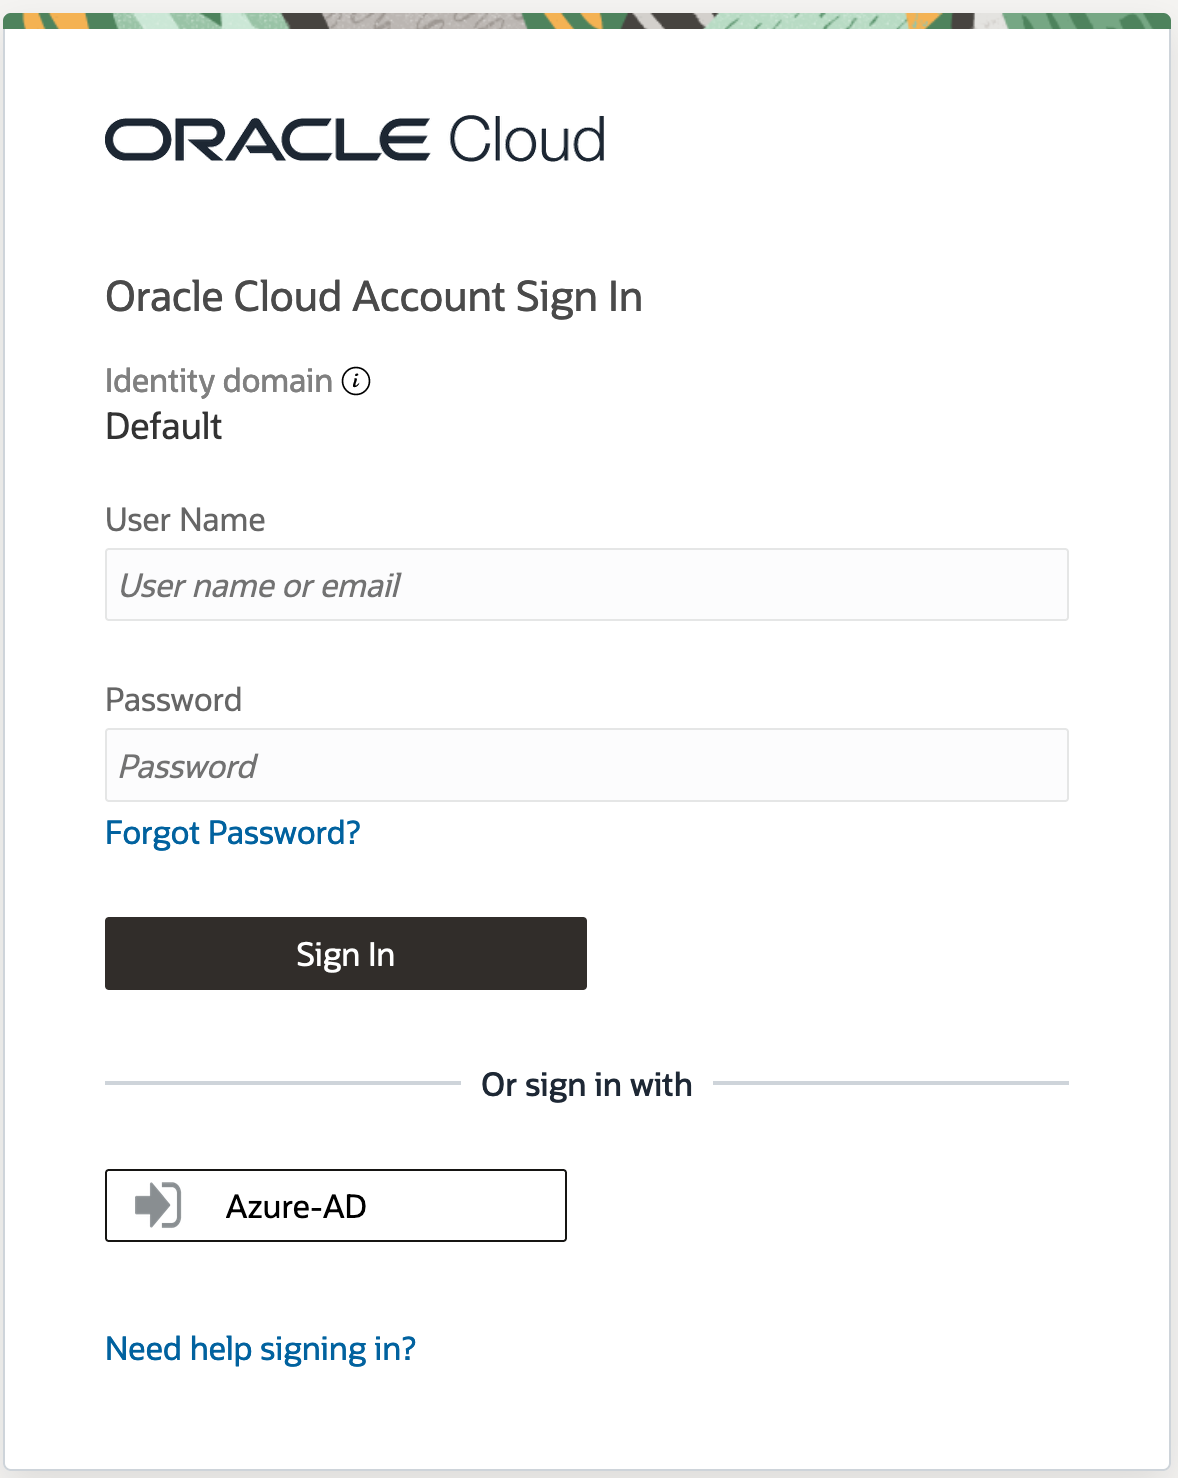
The federation process is now complete. If you sign out and then try to sign in again, you should see the identity provider name, in this case Azure-AD, as shown in the following screen shot. Click the name to proceed to the federated sign-in page.
Resources
The US Government Cloud has achieved FedRAMP High JAB P-ATO accreditation, as have all the OCI and platform-as-a-service (PaaS) services available in those regions.
For more information, see:


