Tutorial 1: Entra ID as Authoritative Source to Manage Identities Using Entra ID Gallery Application
Configure Entra ID as the authoritative identity store to manage identities in OCI IAM using an application template from Entra ID Gallery.
- Configure OCI IAM so that Entra ID is the identity store to manage identities in OCI IAM. In OCI IAM, create a confidential application.
- Generate a secret token from the OCI IAM identity domain's client ID and client secret. Use this, along with the domain URL, in Entra ID.
- Create an app in Entra ID and use the secret token and identity domain URL to specify the OCI IAM identity domain, and prove that it works by pushing users from Entra ID to OCI IAM.
- Assign the users and groups which you want to provision to OCI IAM to the Entra ID application.
- In addition, instructions on how to
- Set users' federated status so that they're authenticated by the external identity provider.
- Stop users getting notification emails when their account is created or updated.
In this section, you configure Entra ID to act as the identity manager so that user accounts are synchronized from Entra ID to OCI IAM.
- In the identity domain, you are working in, select Applications.
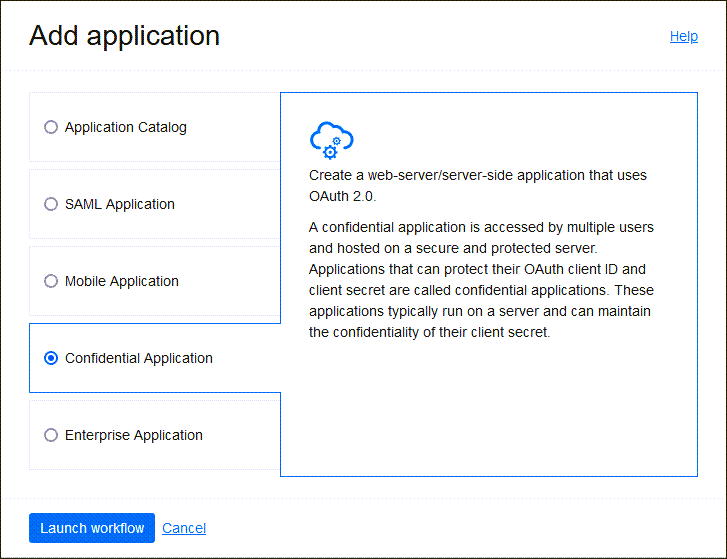
- Select Add Application, and choose Confidential Application and select Launch workflow.
- Enter a name for the application, for example
Entra ID, select Next. - Under Client configuration, select Configure this application as a client now.
- Under Authorization, check Client credentials.
- Under Client type select Confidential.
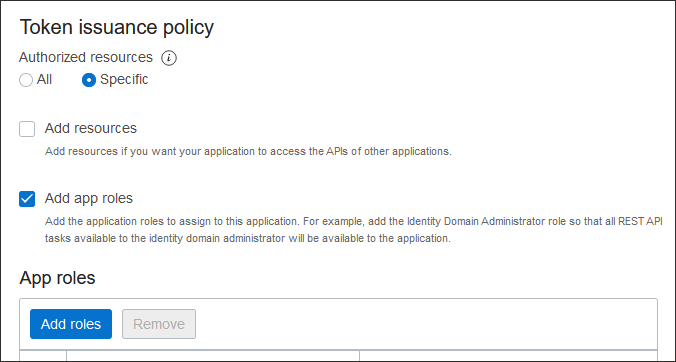
- Scroll down, and in the Token issuance policy section, set Authorized resources to Specific.
- Select Add app roles.
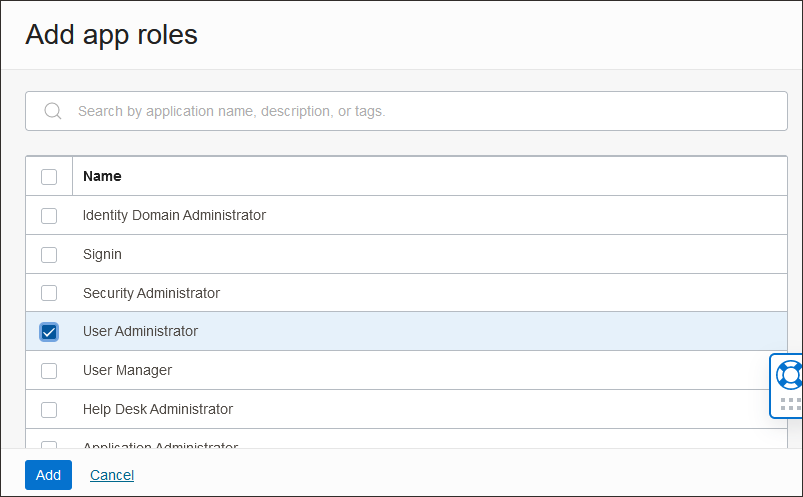
- In the App Roles section, select Add roles, and in the Add app roles page select User Administrator then select Add.
- Select Next, then Finish.
- On the application overview page, select Activate and confirm that you want to activate the application.
The confidential application is activated.
You need two pieces of information to use as part of the connection settings for the enterprise app you create in Entra ID:
- The domain URL.
- A secret token generated from the client ID and client secret.
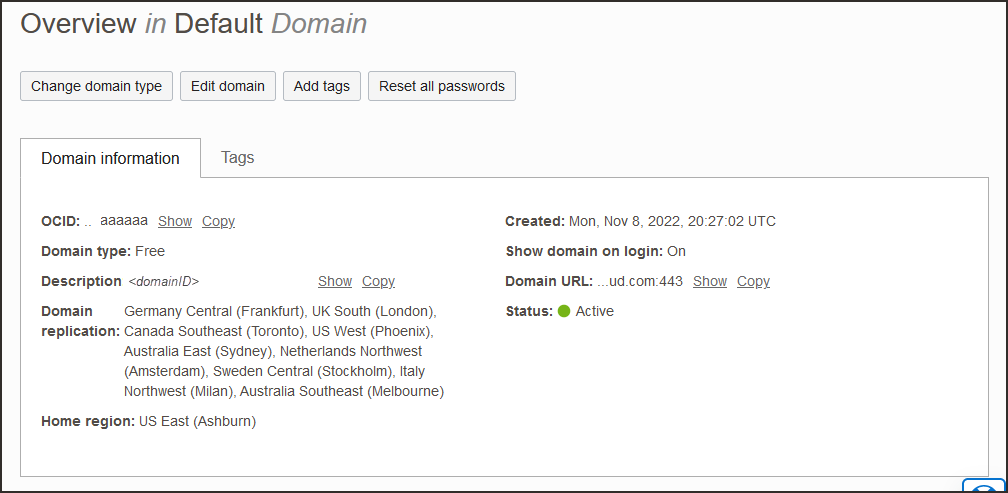
- Return to the identity domain overview by selecting the identity domain name in the breadcrumbs. Select Copy next to the Domain URL in Domain information and save the URL to an app where you can edit it.
- In the confidential app in OCI IAM, select OAuth configuration under Resources.
- Scroll down, and find the Client ID and Client secret under General Information.
- Copy the client ID and store it
- Select Show secret and copy the secret and store it.The secret token is the base64 encoding of
<clientID>:<clientsecret>, orbase64(<clientID>:<clientsecret>)These examples show how to generate the secret token on Windows, Linux, or MacOS.
In a Windows environment, open CMD and use this powershell command to generate base64 encoding
[Convert]::ToBase64String([System.Text.Encoding]::Unicode.GetBytes('client_id:secret'))In Linux, useecho -n <clientID>:<clientsecret> | base64 --wrap=0In MacOS, useecho -n <clientID>:<clientsecret> | base64The secret token is returned. For exampleecho -n 392357752347523923457437:3454-9853-7843-3554 | base64 Nk0NzUyMzcyMzQ1NzMTc0NzUyMzMtNTQzNC05ODc4LTUzNQ==Make a note of the secret token value.
Configure Entra ID to enable Entra ID to be the authoritative identity store to manage identities in IAM.
- In the browser, sign in to Microsoft Entra ID using the URL:
https://portal.azure.com - Select Identity then Applications.
- Select Enterprise applications.
- On the Enterprise applications page, select New application then Oracle.
- Select Oracle Cloud Infrastructure Console.
- Enter a name, or accept the default of
Oracle Cloud Infrastructure Console. - Select Create.
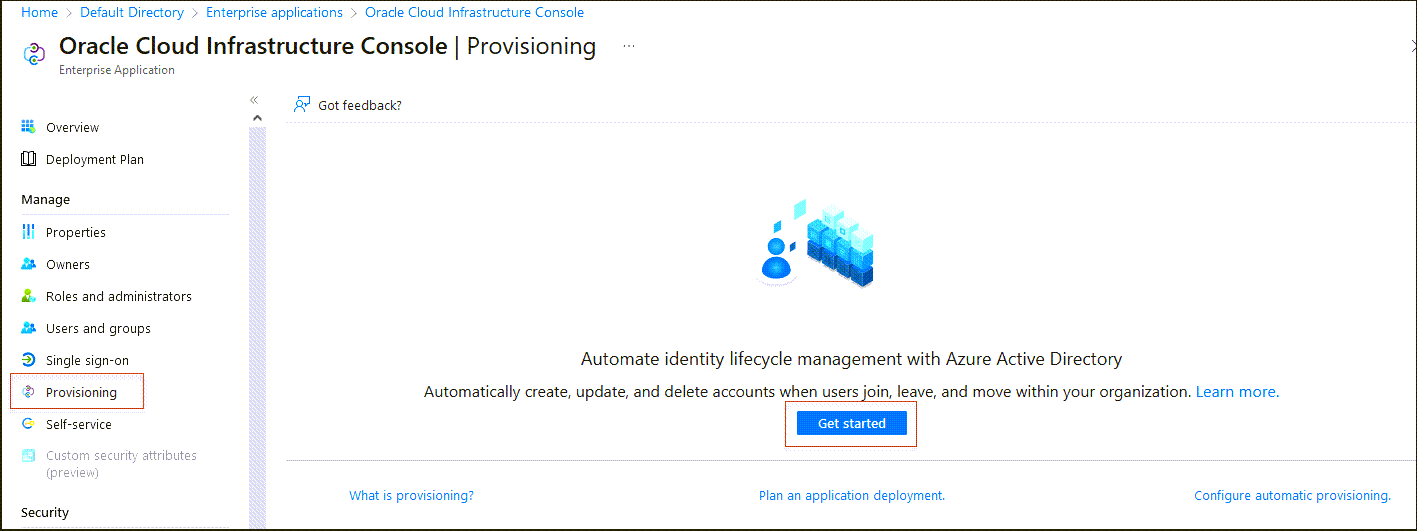
- Choose Provisioning from the left menu under Manage.
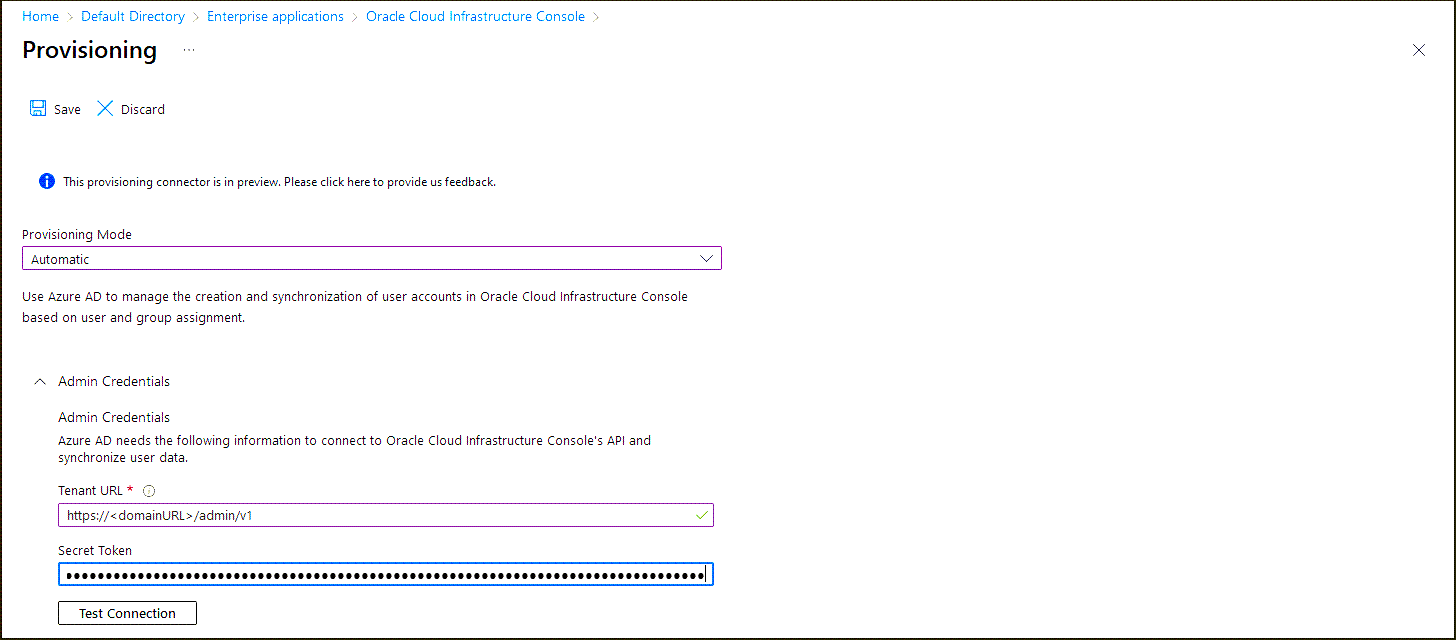
- Select Get started, and change Provisioning Mode to Automatic.
- In Tenant URL, enter the OCI IAM Domain URL from 2. Find the Domain URL and Generate a Secret Token followed by
/admin/v1. That is, the tenant URL ishttps://<domainURL>/admin/v1 - Enter the secret token you generated in 2. Find the Domain URL and Generate a Secret Token.
- Select Test Connection. When this message appears, the connection is successful
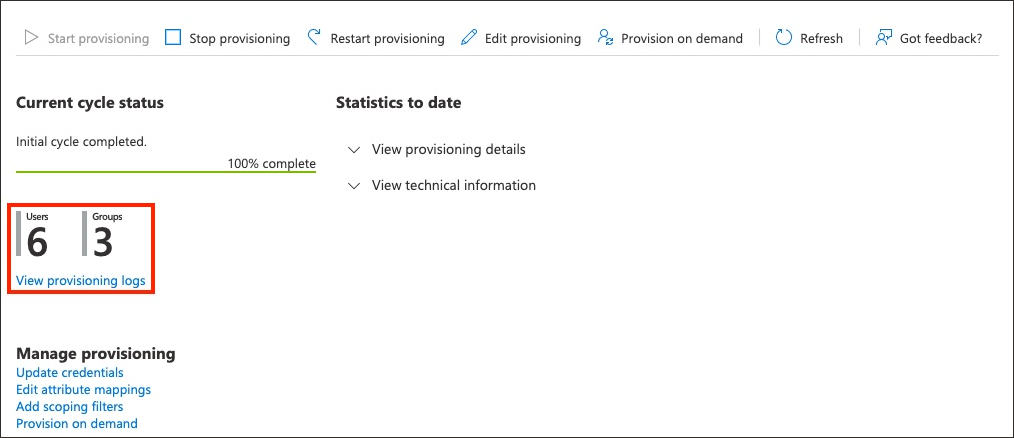
Testing connection to Oracle Cloud Infrastructure Console The supplied credentials are authorized to enable provisioning - Choose Provisioning from the left menu under Manage and select Start provisioning. The provisioning cycle starts, and the status of provisioning is displayed.
Assign the users which you want to provision to OCI IAM to the Entra ID application.
- In Entra ID, in the left menu select Enterprise applications.
- Select the application you created earlier,
Oracle Cloud Infrastructure Console. - In the left menu under Manage, select Users and groups.
- In the Users and groups page, select Add user/group.
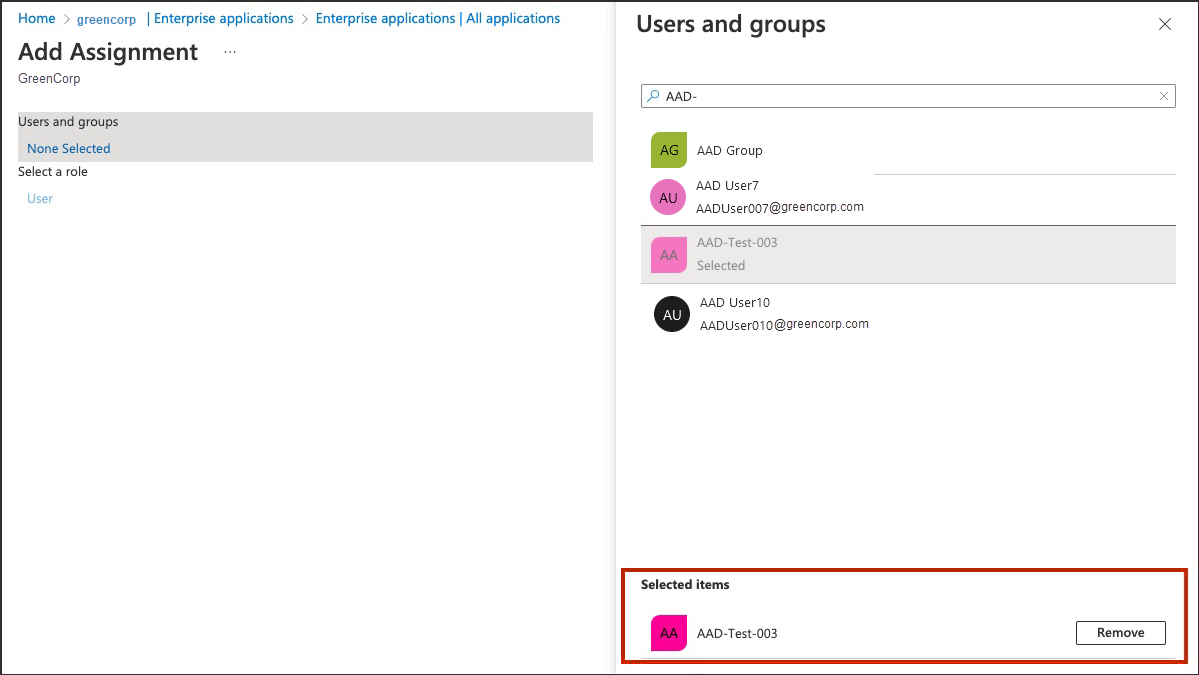
- In the Add Assignment page, on the left under Users and groups, select None Selected.
The Users and groups page opens.
- Select one or more users or groups from the list by selecting on them. The ones you select are listed under Selected items.
- Select Select. The number of users and groups selected are shown on the Add Assignment page.
- On the Add Assignment page, select Assign.
The Users and groups page now shows the users and groups you have chosen.
- Select Provisioning in the left menu to provision the groups and users. The provisioning log shows the status.
- When provisioning has been successful, the Current cycle status shows that the incremental cycle has completed and the number of users provisioned to OCI IAM is shown.
In OCI IAM, you can now see the users and groups provisioned from Entra ID.
Note
When you remove users from the Oracle Cloud Infrastructure console app on Entra ID, the user will only be deactivated on OCI IAM.
- You can set users' federated status so that they're authenticated by the external identity provider.
- You can disable notification emails being sent to the user when their account is created or updated.
Federated users don't have credentials to sign in directly to OCI. Instead they're authenticated by the external identity provider. If you want users to use their federated accounts to sign in to OCI, set the federated attribute to true for those users.
To set the user's federated status:
- In the browser, sign in to Microsoft Entra ID using the URL:
https://portal.azure.com - Select Identity then Applications.
- Select Enterprise applications.
- Select the application you created earlier,
Oracle Cloud Infrastructure Console. - In the left menu under Manage, select Provisioning then select Edit Provisioning.
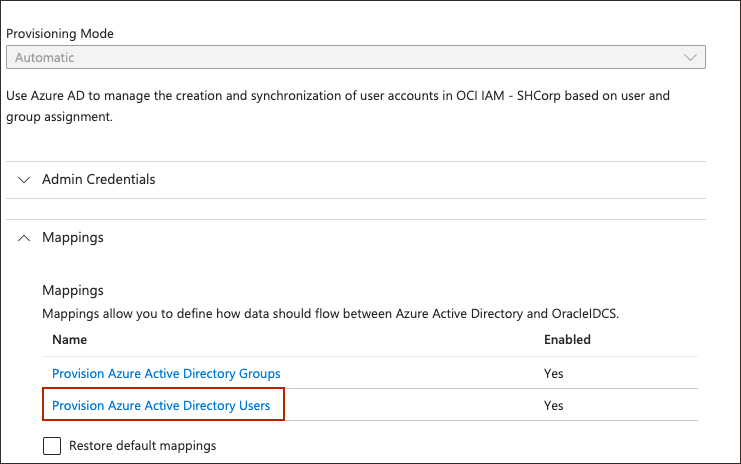
- In the Provisioning page, select Mappings.
-
Under Mappings, select Provision Entra ID Users.
- Under Attribute Mappings, scroll down and select Add New Mapping.
- In the Edit Attribute page:
- For Mapping type, choose
Expression. - For Expression, enter
CBool("true"). - For Target Attribute, choose
urn:ietf:params:scim:schemas:oracle:idcs:extension:user:User:isFederatedUser.
- For Mapping type, choose
- Select Ok.
- In the Attribute Mapping page, select Save.
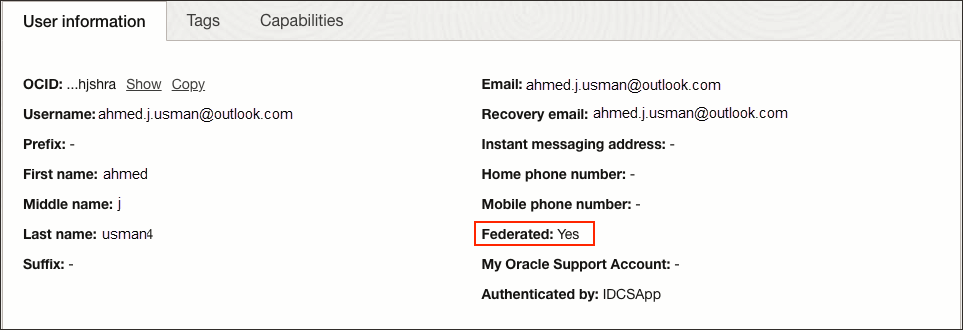
Now, when the users are provisioned from Entra ID to OCI, their federated status is set to true. You can see this in the user's profile page.
- In the OCI Console, navigate to the identity domain you are using, select Users, and select the user to show the user information.
-
Federated is shown as
Yes.
The bypass notification flag controls whether an email notification is sent after creating or updating a user account in OCI. If you don't want users to be notified that account have been created for them, then set the bypass notification flag to true.
To set the bypass notification flag:
- In the browser, sign in to Microsoft Entra ID using the URL:
https://portal.azure.com - Select Identity then Applications.
- Select Enterprise applications.
- Select the application you created earlier,
Oracle Cloud Infrastructure Console. - In the left menu under Manage, select Provisioning then select Edit Provisioning.
- In the Provisioning page, select Mappings.
-
Under Mappings, select Provision Entra ID Users.
- Under Attribute Mappings, scroll down and select Add New Mapping.
- In the Edit Attribute page:
- For Mapping type, choose
Expression. - For Expression, enter
CBool("true"). - For Target Attribute, choose
urn:ietf:params:scim:schemas:oracle:idcs:extension:user:User:bypassNotification.
- For Mapping type, choose
- Select Ok.
- In the Attribute Mapping page, select Save.
