Access and Enable the Data Share Tool

To share or consume data using the Data Share tool, navigate to the Data Studio, launch the Data Share tool, and enable sharing.

Follow these steps:
  1. Navigate to the Launchpad on your Database Actions instance. See Accessing Database Actions for further instructions.
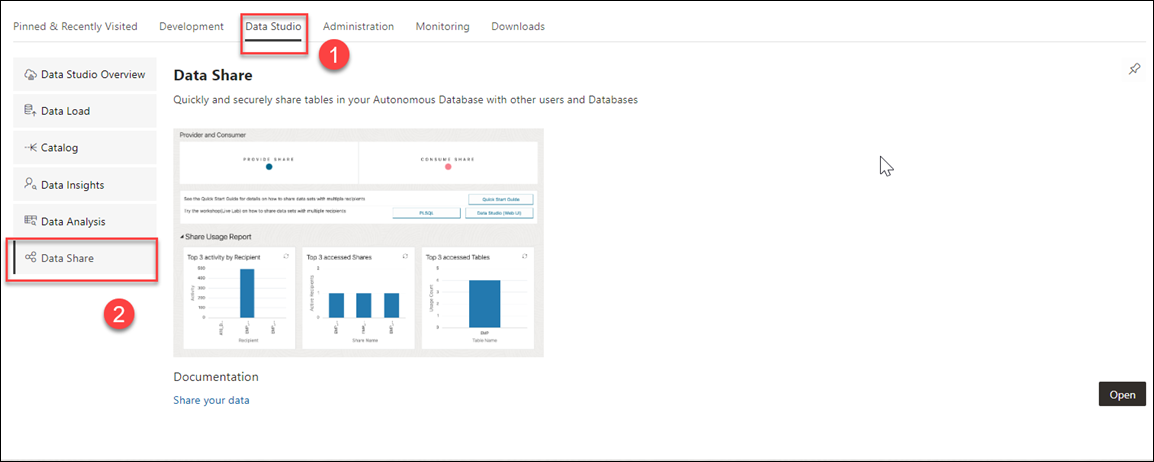
  2. Click the Data Studio tab and select the Data Share pane.


    Description of data-share-pane.png follows

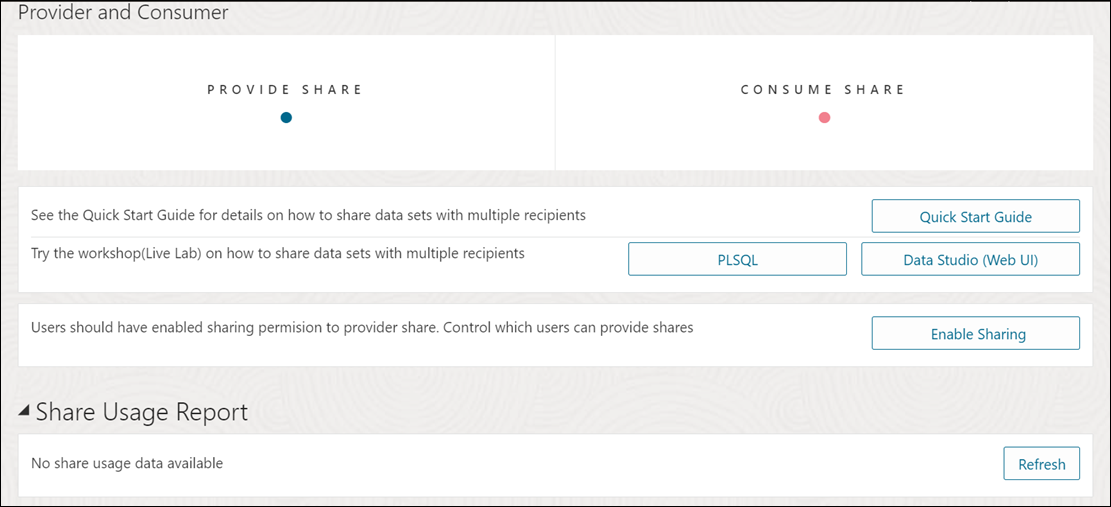
  3. Clicking the Data Share pane opens a Provider and Consumer page where you can view Provide Share and Consume Share widgets.


    Description of provider-consumer.png follows

    Click Provide Share.

  4. On the Provide Share page, click Enable Sharing.


    Description of enable-share.png follows

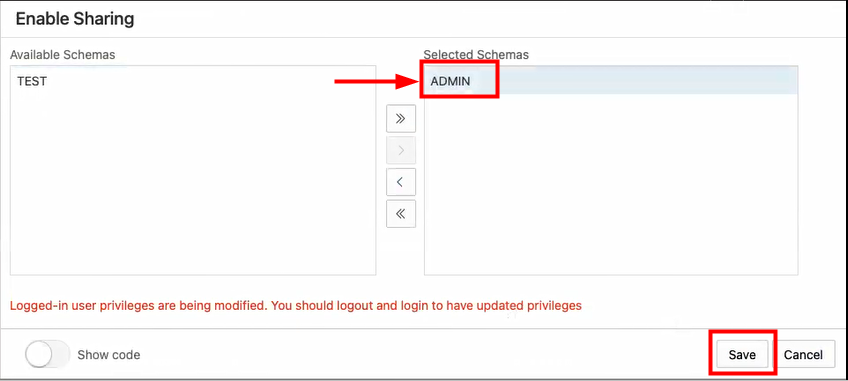
    Clicking the Enable Share icon takes you to the Enable Sharing screen where you must select the user schema you want to enable and move it from the Available Schemas column to the Selected Schemas column.

  5. Click Save.

    Description of select_schema.png follows

  6. Log out and log in again to update privileges.
  7. You now view the following Provider and Consumer page.


    Description of data-share-home-page.png follows

    You have now enabled the share. Click Provide Share. On the Provide Share page, click Provider Identification to create a Provider ID. This provides information to the recipient on how to identify you.

    This field provides the details of the provider before you share the data. The share provider identification will be available to recipients with whom you grant the share.

    Selecting this button opens a Provider Identification wizard. Specify the following fields on the General tab of the Provider Identification wizard:


    Description of provider-identification-general.png follows

    • Name: Enter the name of the provider. For example, ams.
    • Email: Enter the email address of the provider. For example, ams@gmail.com.
    • Description: Enter a description of the provider. For example, AMS sharing stuff.

    Progress to the Simple Mail Transfer Protocol (SMTP) Configuration tab of the wizard. This tab configures email service like a local email client on your system (e.g., Thunderbird).

    Note

    You must configure SMTP only once and then the system uses the saved configuration from that point forward.

    Specify the following field values in the SMTP Configuration tab of the wizard:

    • Server host: Enter the endpoint used to send the email. For example, internal-mailrouter.oracle.com.
    • Server port: Enter the SMTP port used to accept an email. Email Delivery supports TLS on port 25. Sender: Enter the email address of the sender. For example, oaapgens_us@oracle.com.
    • Server Encryption: This field indicates if TLS, the standard means of performing encryption in transit for emails, is being used. Providers must encrypt emails while it's in transit to the Oracle Cloud Infrastructure Email Delivery service. Encrypted emails are protected from being read during transit. If there is no encryption, enter, None.

    Select credential to use for SMTP connection from the drop-down. If there is no available credential in the drop-down, you can create credential by clicking Create Credential icon. Refer to Create Oracle Cloud Infrastructure Native Credentials for more details.

    Click Test to test the SMTP configuration. You will view a screen that asks you to run the ACL script. You can run the script if you have the ADMIN rights. This is just a first time setting. After you receive a successful message of SMTP Test, you can save the SMTP configuration.

You can now start sharing your data.