Using Console to Create Tables in Oracle NoSQL Database Cloud Service
Learn how to create and manage Oracle NoSQL Database Cloud Service tables and indexes from the console.
This article has the following topics:
Creating a Compartment
When you sign up for Oracle Cloud Infrastructure, Oracle creates your tenancy with a root compartment that holds all your cloud resources. You then create additional compartments within the tenancy (root compartment) and corresponding policies to control access to the resources in each compartment. Before you create an Oracle NoSQL Database Cloud Service table, Oracle recommends that you set up the compartment where you want the table to belong.
You create compartments in Oracle Cloud Infrastructure Identity and Access Management (IAM). See Setting Up Your Tenancy and Managing Compartments in Oracle Cloud Infrastructure Documentation.
Creating Singleton Tables
You can create new Oracle NoSQL Database Cloud Service table from the NoSQL console.
- Simple Input Mode: You can use this mode to create the NoSQL Database Cloud Service table declaratively, that is, without writing a DDL statement.
- Advanced DDL Input Mode: You can use this mode to create the NoSQL Database Cloud Service table using a DDL statement.
Creating Table: Simple Input Mode
Learn how to create a table from the NoSQL console by using the Simple Input table creation mode.
Creating Table: Advanced DDL Input Mode
Learn how to create a table from the NoSQL console by using the Advanced DDL Input table creation mode.
- Access the NoSQL console from the Infrastructure Console. See Accessing the Service from the Infrastructure Console .
- Click Create Table.
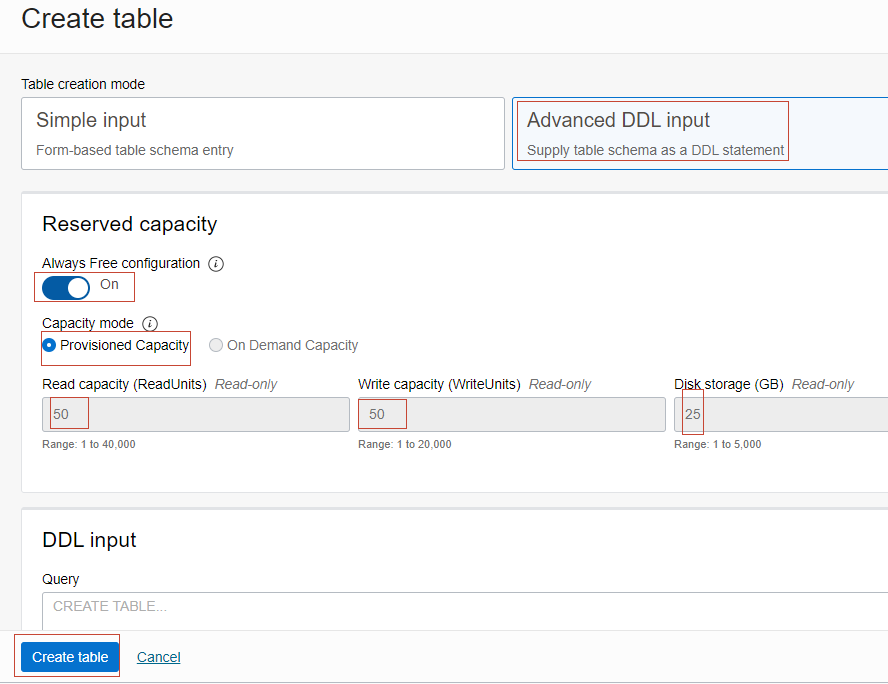
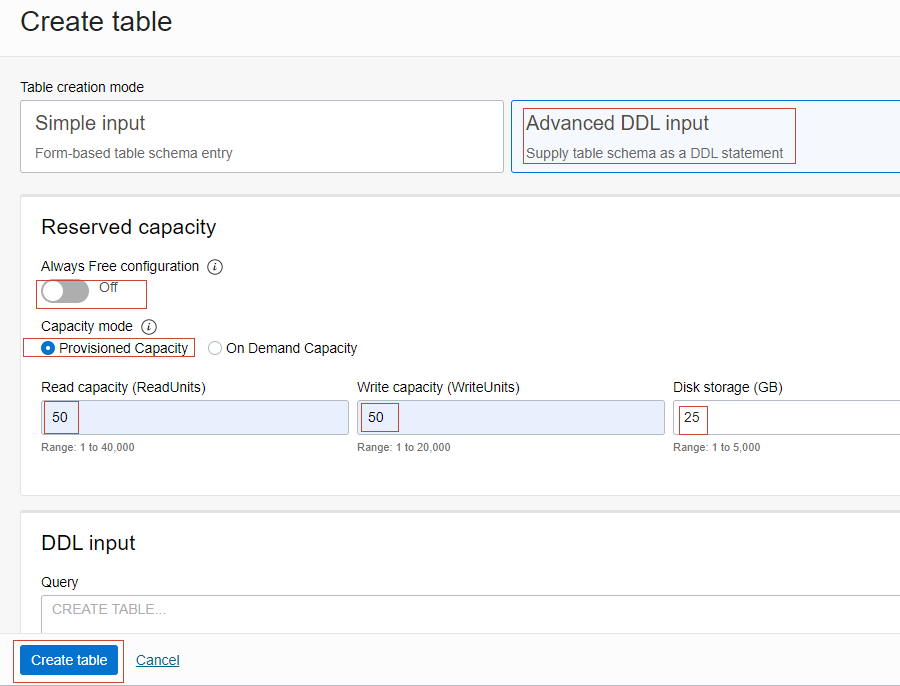
- In the Create Table window, select Advanced DDL Input for Table Creation Mode.
- Under Reserved Capacity, you have the following
options.
-
Always Free Configuration:
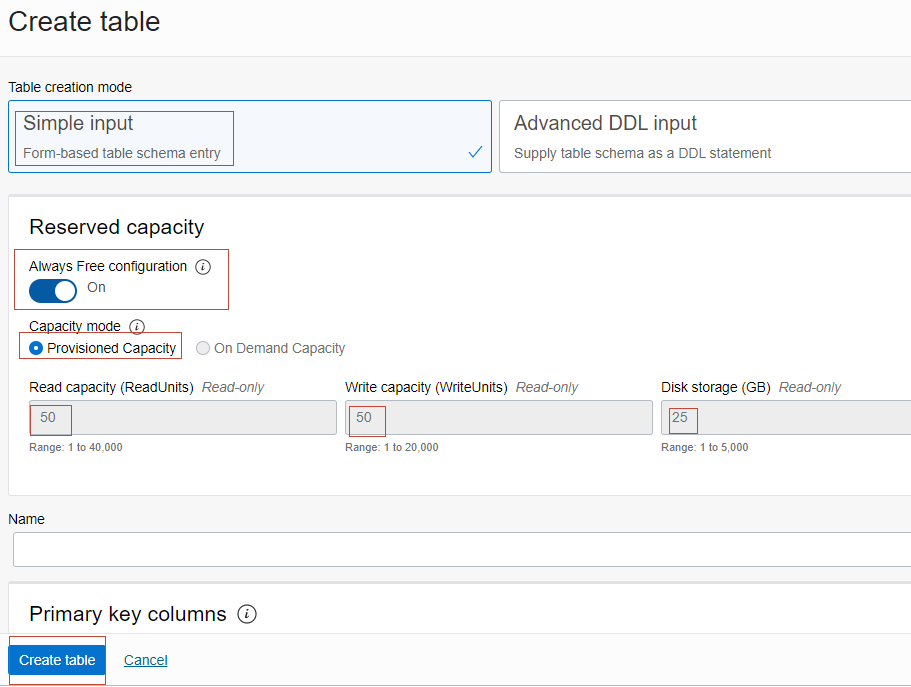
Enable the toggle button to create an Always Free NoSQL table. Disabling the toggle button creates a regular NoSQL table. You can create up to three Always Free NoSQL tables in the tenancy. If you have three Always Free NoSQL tables in the tenancy, the toggle button to create an Always Free SQL table is disabled.
If you enable the toggle button to create an Always Free NoSQL table, the Read capacity, Write capacity, and Disk storage fields are assigned default values. The Capacity mode becomes Provisioned Capacity. These values cannot be changed.
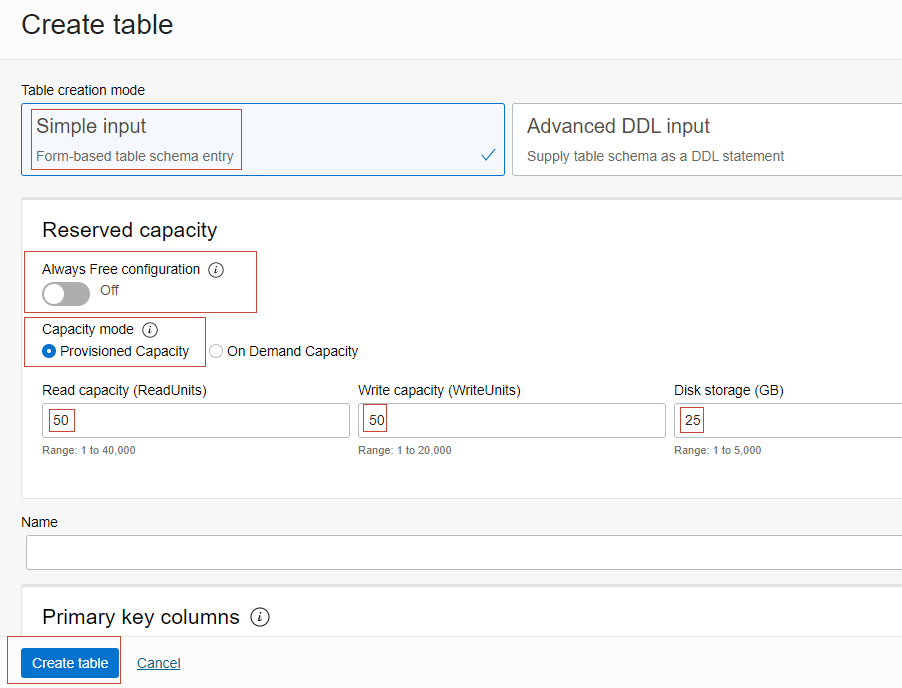
 If you want to create a regular table, then disable the toggle button. You will be able to enter the appropriate capacity values for the table.
- Read Capacity (ReadUnits): Enter the number of read units. See Estimating Capacity to learn about read units.
- Write Capacity (WriteUnits): Enter the number of write units. See Estimating Capacity to learn about write units.
- Disk Storage (GB): Specify the disk space in gigabytes (GB) to be used by the table. See Estimating Capacity to learn about storage capacity.
-
Capacity mode
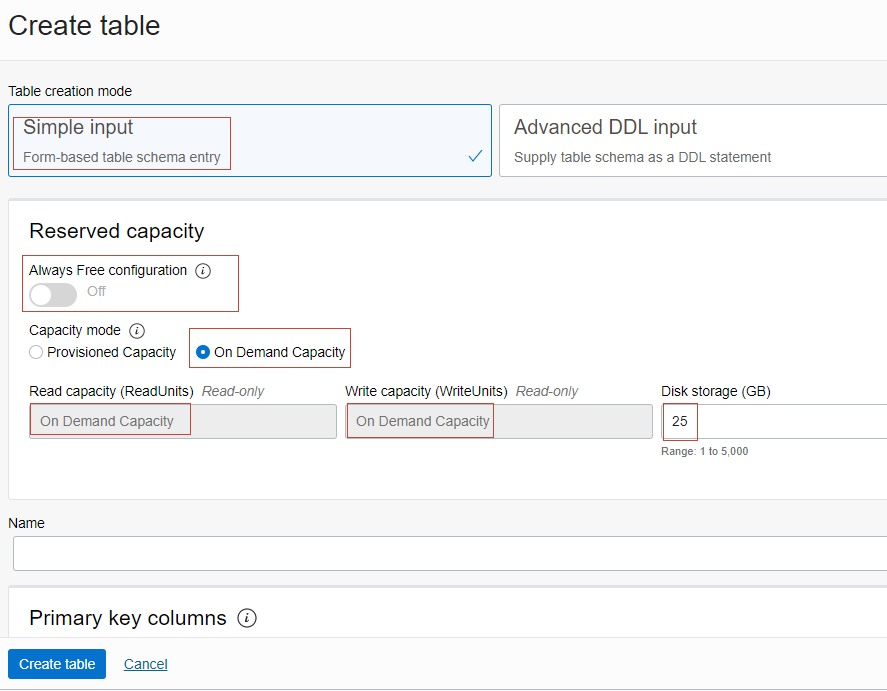
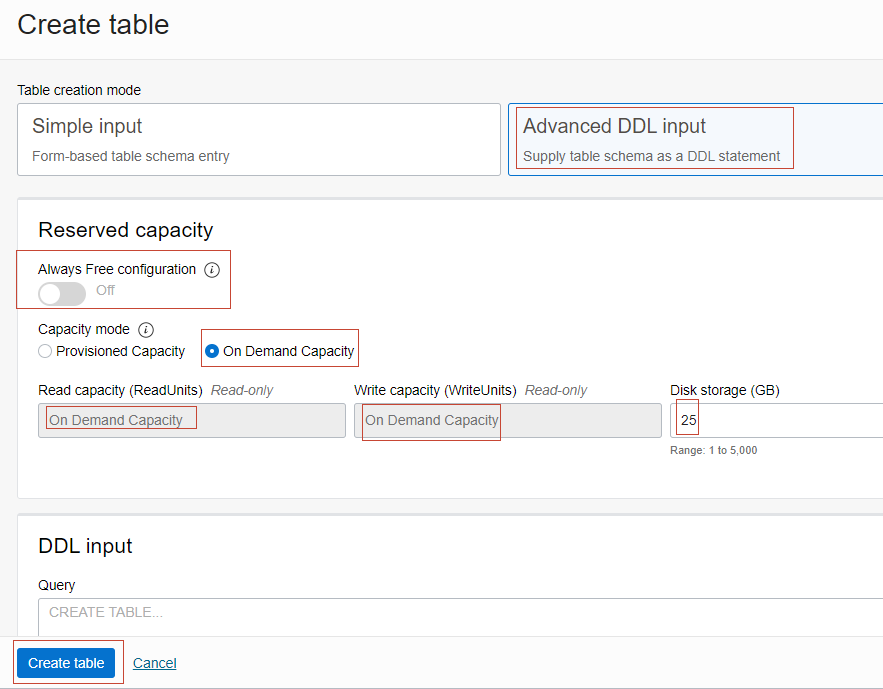
You can specify the option for Capacity mode as Provisioned Capacity or On Demand Capacity. Provisioned Capacity and On Demand Capacity modes are mutually exclusive options. If you enable On Demand Capacity for a table, you don't need to specify the read/write capacity of the table. You are charged for the actual read and write units usage, not the provisioned usage.
Enabling On Demand Capacity for a table is a good option if any of the following are true:- You create new tables with unknown workloads.
- You have unpredictable application traffic.
- You prefer the ease of paying for only what you use.
Limitations of enabling On Demand Capacity for a table:- On Demand Capacity limits the capacity of the table to 5,000 writes and 10,000 reads.
- The number of tables with On Demand Capacity per tenant is limited to 3.
- You pay more per unit for On Demand Capacity table units than provisioned table units.

Selecting On Demand Capacity disables Always Free Configuration. The Read Capacity and Write Capacity input boxes become read-only and show the text On Demand Capacity. The On Demand Capacity tables will show On Demand Capacity in their read and write capacity columns. If Capacity mode is On Demand Capacity then the Always Free control is disabled.
-
- In the DDL input section, enter the create table DDL statement for Query. You may get an error that your statement is Incomplete or faulty. See Debugging SQL statement errors in the OCI console to learn about possible errors in the OCI console and how to fix them. See Developers Guide for examples on create table statement.
- (Optional) To specify advanced options, click Show Advanced
Options and enter advanced details:
- Tag Namespace: Select a tag namespace from the select list. A tag namespace is like a container for your tag keys. It is case insensitive and must be unique across the tenancy.
- Tag Key: Enter the name to use to refer to the tag. A tag key is case insensitive and must be unique within a namespace.
- Value: Enter the value to give your tag.
- + Additional Tag: Click to add more tags.
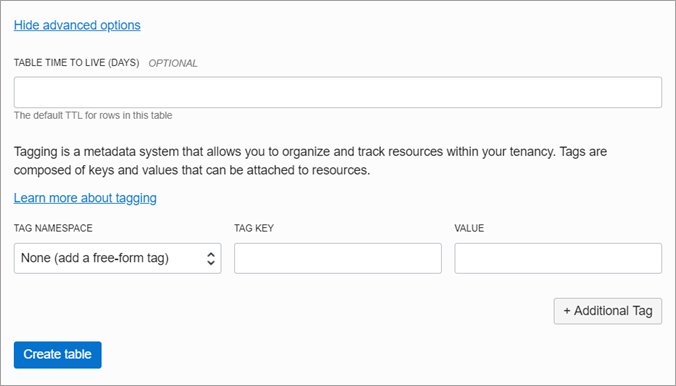
- Click Create Table.
Creating a child table
With Oracle NoSQL Database, you can create tables in a hierarchical structure( as parent-child tables).
Table Hierarchies
           A
         /   \
      A.B    A.G
       /
    A.B.C
     /
   A.B.C.D
The top-most parent table is A. The child table B gets the composite name A.B. The next level of child table C gets the composite name A.B.C and so on.
Properties of child tables:
- You cannot specify the Read capacity, Write capacity, or Disk storage limits while creating a child table. The child table shares the corresponding values from the parent table.
- A child table is counted against a tenancy's total number of tables.
- A parent table and its child tables are always in the same compartment.
- Metric information is collected and aggregated at the parent level. No metrics are visible at the child tables level.
- A child table has its own tags independent of the parent table.
- A child table also inherits the capacity pricing model of the parent table. For example, if the parent table is configured with On Demand Capacity, the child table can also be configured with the same capacity pricing model.
Transactions in parent-child tables
- Declare a table as a child of another table.
- Use
writeMutlipleAPI to add operations for both parent and child tables.
- Find the shard key values for all the objects that you want to include in a transaction.
- Make sure that the shard keys for all the objects are equal.
- Use
writeMutlipleAPI to add every object to a collection.
Use child tables to easily achieve ACID transactions across multiple objects.
Authorization in a child table:
- You have the specific privilege (READ/INSERT/DELETE) for the child table.
- You have the same privileges, or at least the read privilege, for the parent table of the specific child table in the hierarchy.
See IAM policies for authorization for more details.
For example, if you want to insert data into the child table myTable.child1, which you don't own, then you must have the INSERT privilege on the child table and READ and/or INSERT privileges on myTable. Granting privileges to child tables is independent of granting privileges to the parent table. That means you can give specific privileges to the child table without giving the same privilege to its parent table. Any parent/child join queries require the relevant privileges on all tables used in the query. See Using Left Outer joins with parent-child tables for more details.
Creating a child table
- Click on the parent table to view its details. The list of child tables already present for the parent is displayed.
- In the left navigation menu, under Resources, click
Child tables.

-
- The list of child tables for the parent table is
displayed. To create a child table, click Create Child
Table.
- The list of child tables for the parent table is
displayed. To create a child table, click Create Child
Table.
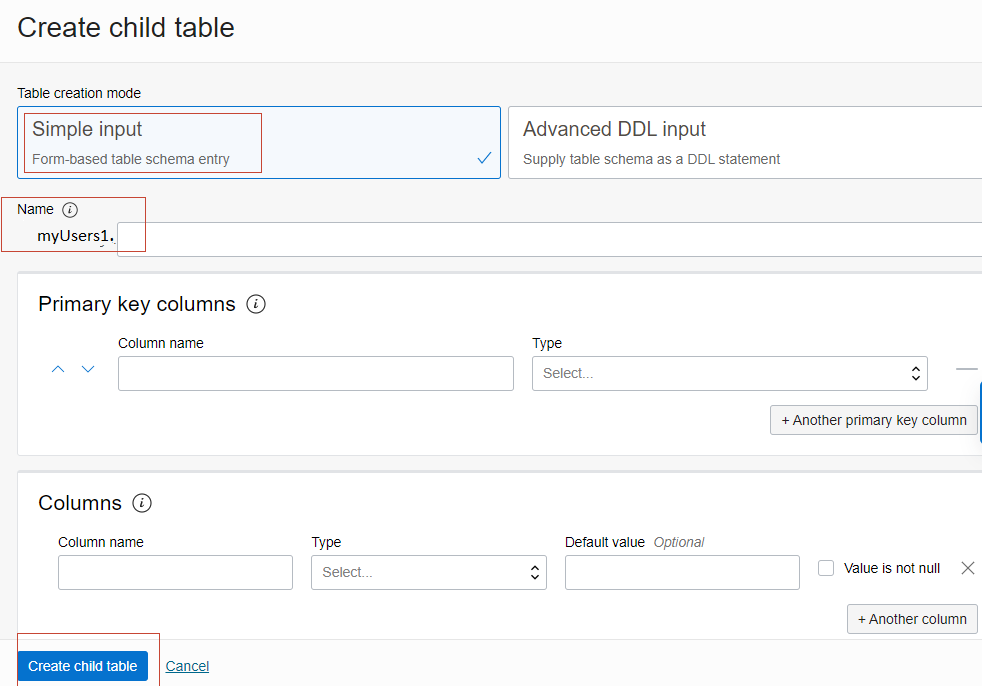
- You can choose Simple input method or Advanced DDL input method to create the child table.
- Specify a name for the child table. This is automatically
prefixed with the name of the parent table followed by a dot. Specify the
list of columns and primary key columns.
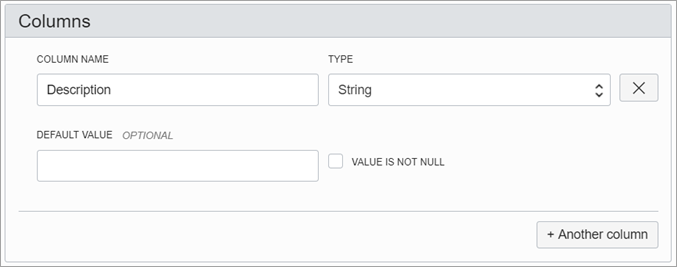
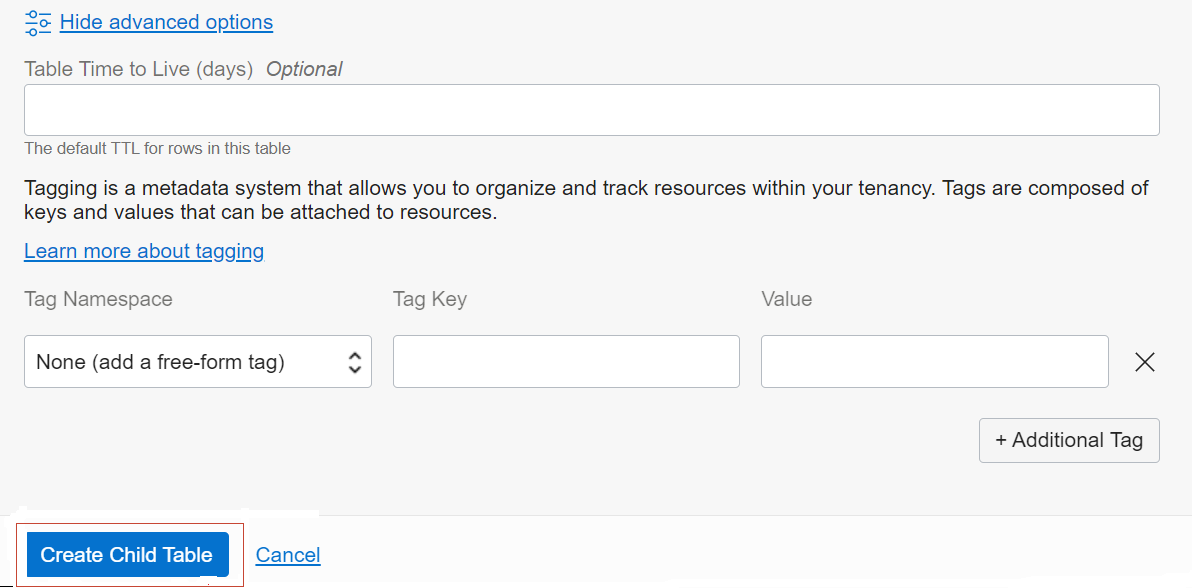
- The Set as shard key checkbox is not shown while creating a child table, as the child tables inherit their shard key from their top-level parent table.
The Read Capacity, Write Capacity, and Disk Storage fields are not specified because a child table inherits these limits from the top-level table. The limits set for the top-level table are automatically applied to the child table.
Viewing the details of a child table
You can view the details of a child table after it is created. 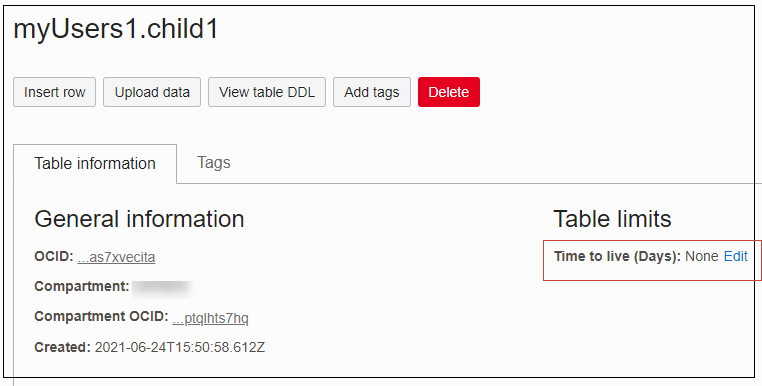
Creating a Global Active table
You can create a Global Active table from the NoSQL console.
See Global Active tables in NDCS to get an overview of what a Global Active table is and when you need to create a Global Active table.
- First, create a singleton table withat least one JSON column. Access the NoSQL console from the Infrastructure Console. See Accessing the Service from the Infrastructure Console . Click Create Table. You can create the table using one of the following:
- Freeze the schema of the table created. Under Table information, you can view the details of the table after it is created. The schema state of the table is currently Mutable. Click Freeze to freeze the schema of the table. The Schema state changes to Frozen.
- A NoSQL Database table becomes a Global Active table only after you add a regional table replica of it. The regional table replica is created in another region.
- In the Table Details page, click Replicas under Resources. You get a list of replicas of the table. Click Add replica.
- In the Add replica page, the list of regions is listed in the drop-down
for the Replication region. Choose the region where you want to create a
regional replica. Choose the read capacity and write capacity of the table in
the replica region. Storage capacity cannot be changed and remains the same as
in the sender region table. Click Add replica.
Note
You can choose to have the same read capacity and write capacity of the sender region table in the replicas. In that case, the values need not be changed or edited.
The singleton table is now changed to a Global Active table. The regional table replica will be initialized with the data of the table in the sender region. Soon after the regional table replica is created and all data is copied to the regional table replica, you see that the Local replica initialized completeness becomes 100%.
