Provisioning an Exadata VM Cluster
Provisioning an Oracle Exadata VM Cluster requires the existence of an Oracle Exadata Infrastructure, and is a prerequisite for Oracle Exadata Databases that runs on the cluster.
You cannot provision an Exadata VM Cluster using an Oracle Cloud Free Tier account. You will have to upgrade your account to provision this.
- From the OracleDB for Azure Portal, select the Create a resource icon.
- Select the Create link for Exadata VM Cluster.
Figure 1-17 Create VM Cluster - Basics Tab
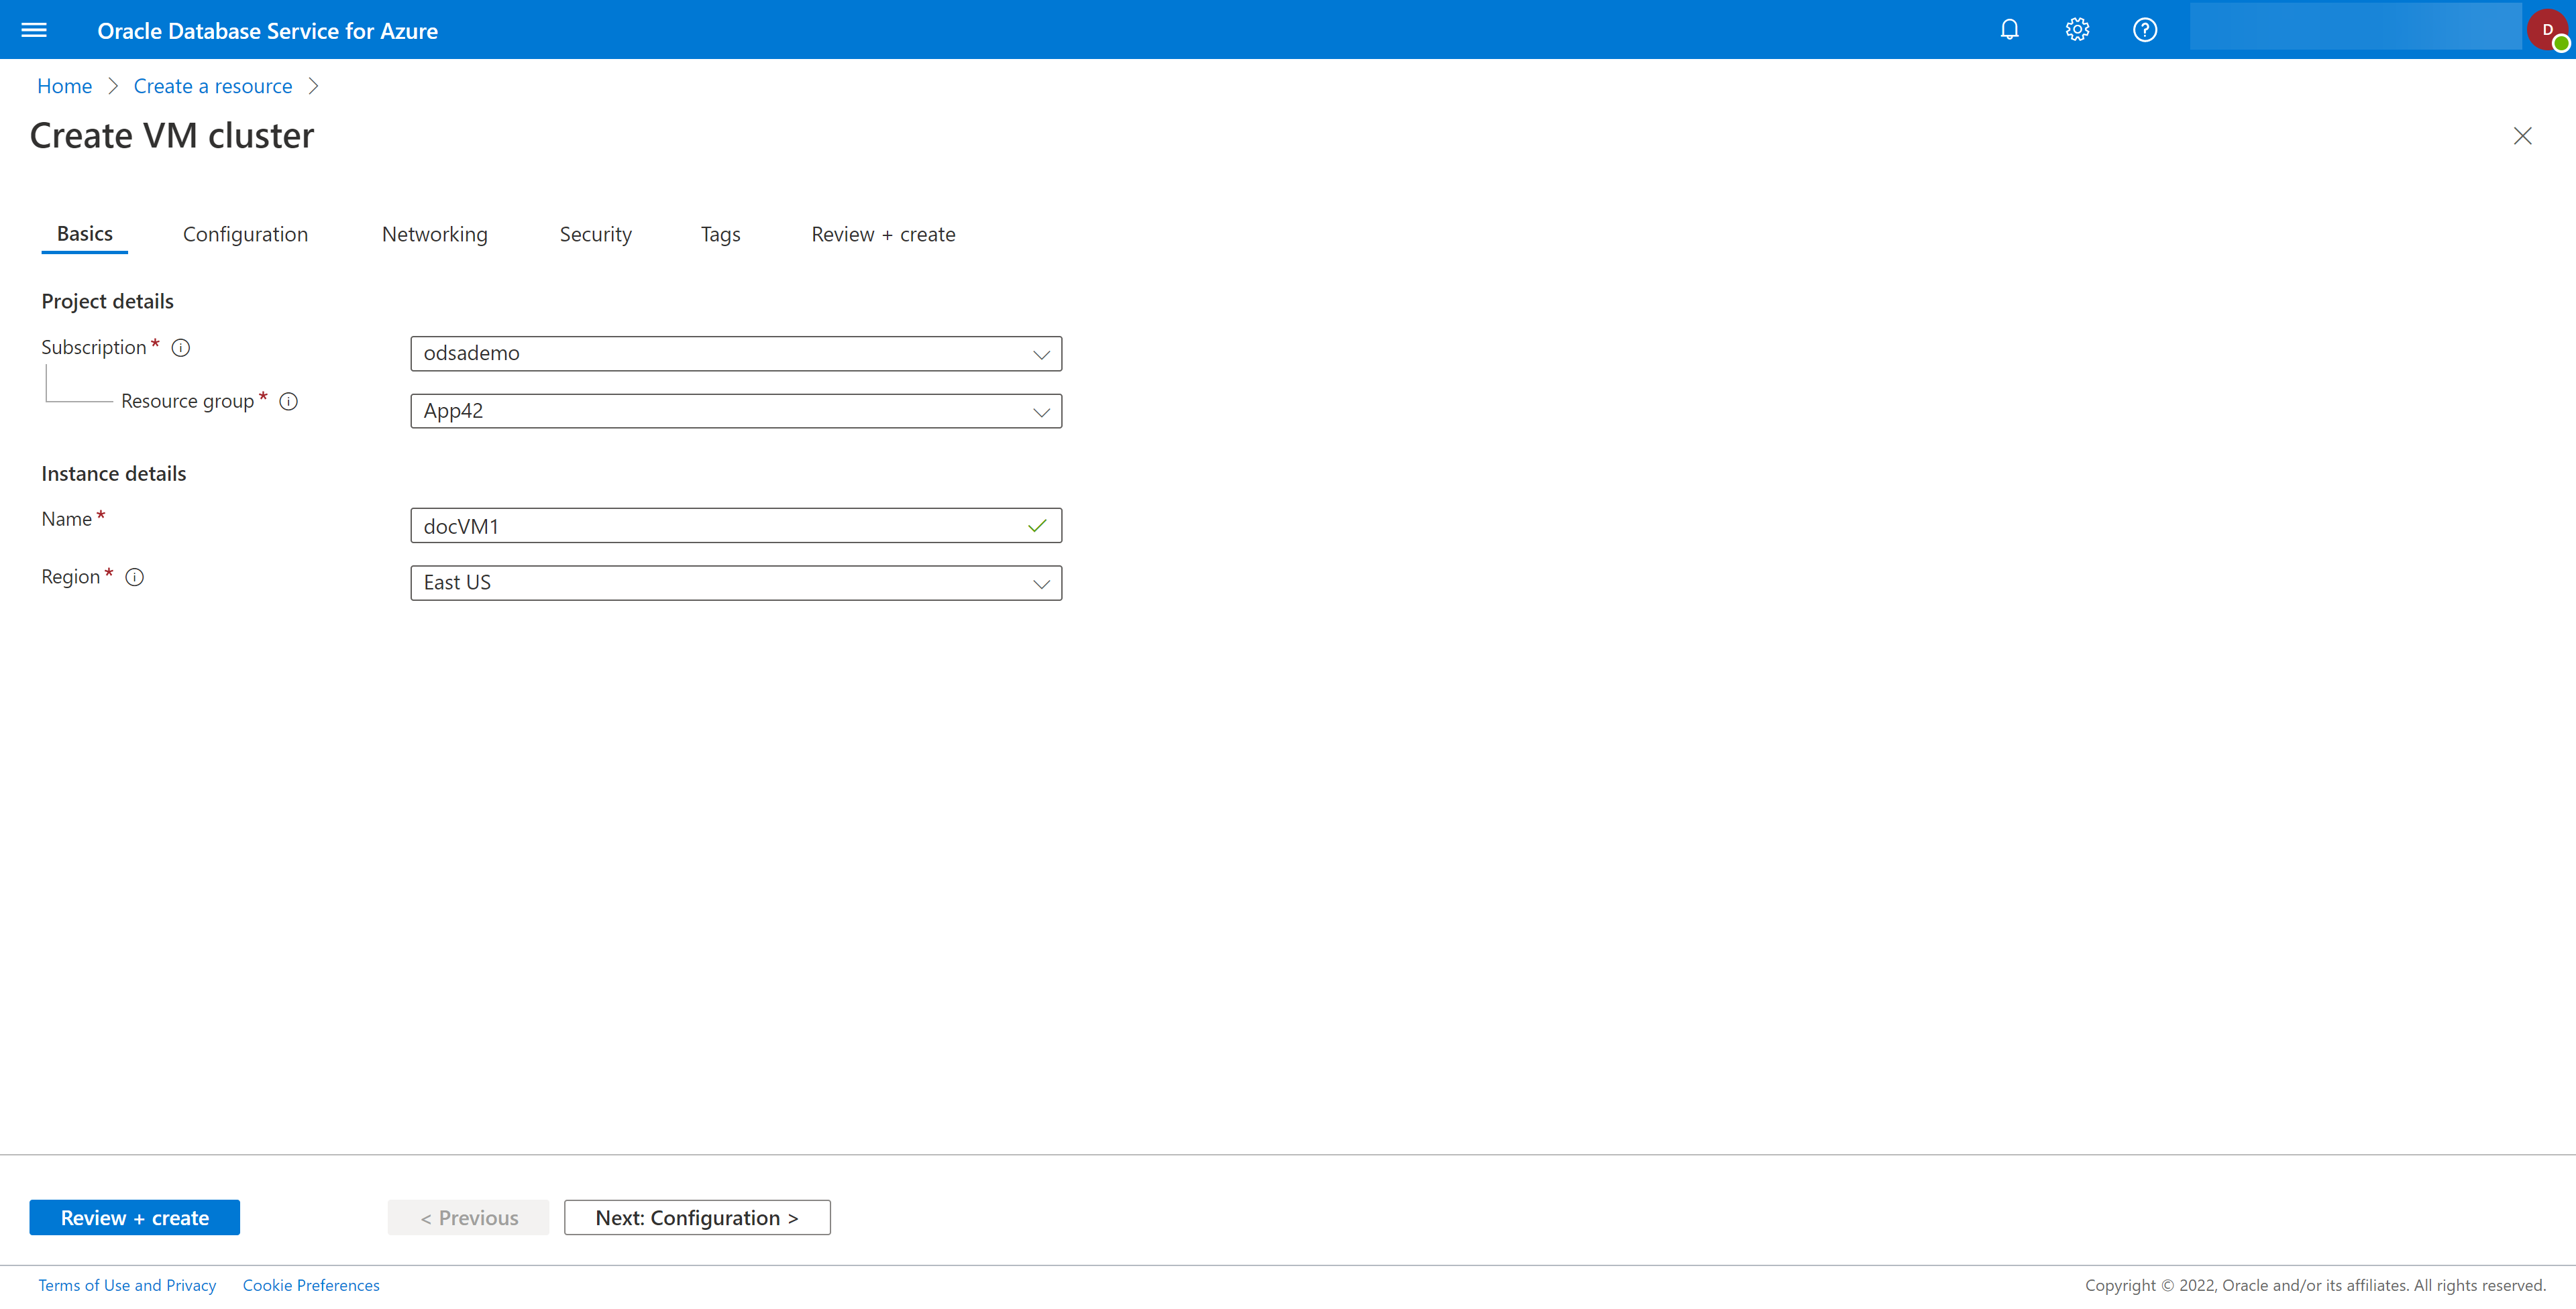
- Enter Project details for the new Exadata VM Cluster resource:
- Select any Subscription that has been linked to your OCI tenancy through OracleDB for Azure.If you only have a single subscription, you cannot change the value in this field. If you have multiple subscriptions linked to your OCI tenancy, you can change the default value for this field following the tasks outlined in Setting Account UI Settings.
Figure 1-18 Subscription Selection

- Select a Resource group to place the resource.Follow this link for more information on Microsoft Azure Resource GroupsMicrosoft Azure Resource Groups.
Figure 1-19 Resource Group Selection

- Select any Subscription that has been linked to your OCI tenancy through OracleDB for Azure.
- Enter Instance details for the new Exadata VM Cluster resource:
- The Name must be unique for your subscription.The Oracle Exadata VM Cluster name must be between 2 to 64 characters in length, begin with a letter or number, end with a letter, number, or _ (underscore), and may contain only letters, numbers, underscores, periods, or hyphens.
- Choose the Azure Region where you want to provision the Oracle Exadata VM Cluster.If you only have a single region, you cannot change the value in this field. If you have multiple regions assigned, you can change the default value for this field following the tasks in Setting Account UI Settings.
Figure 1-20 Region Selection

- The Name must be unique for your subscription.
- Click the Next: Configuration > button to open the Configuration tab.
Figure 1-21 Create VM Cluster - Configuration Tab
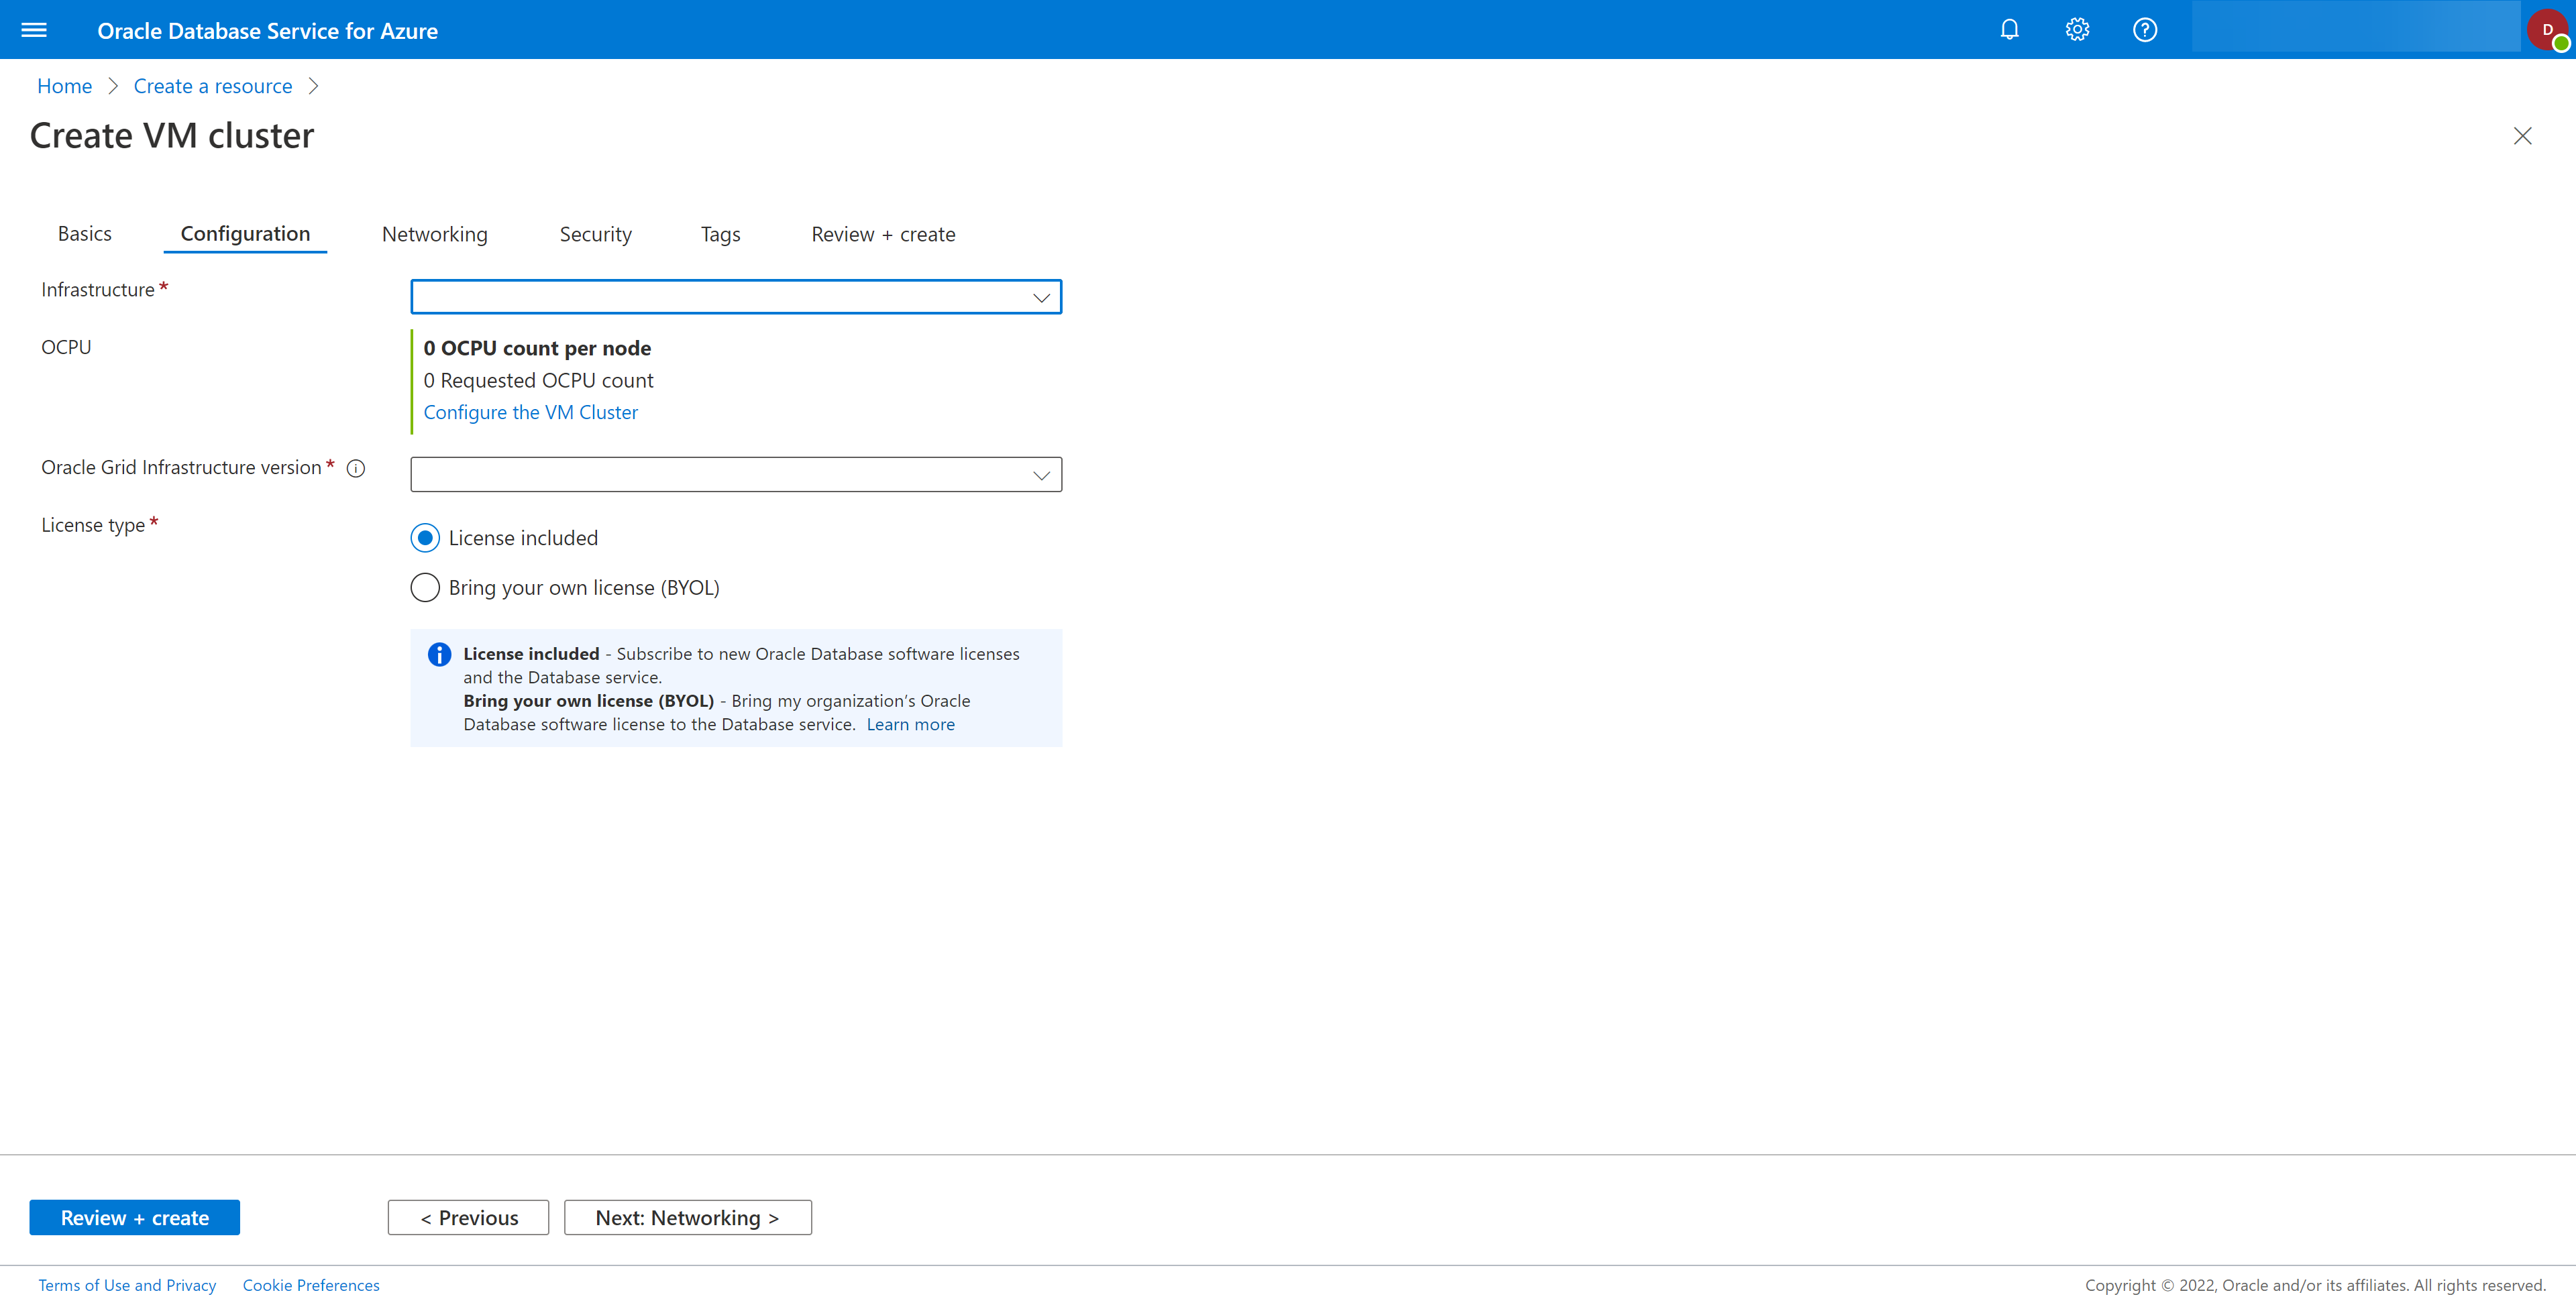
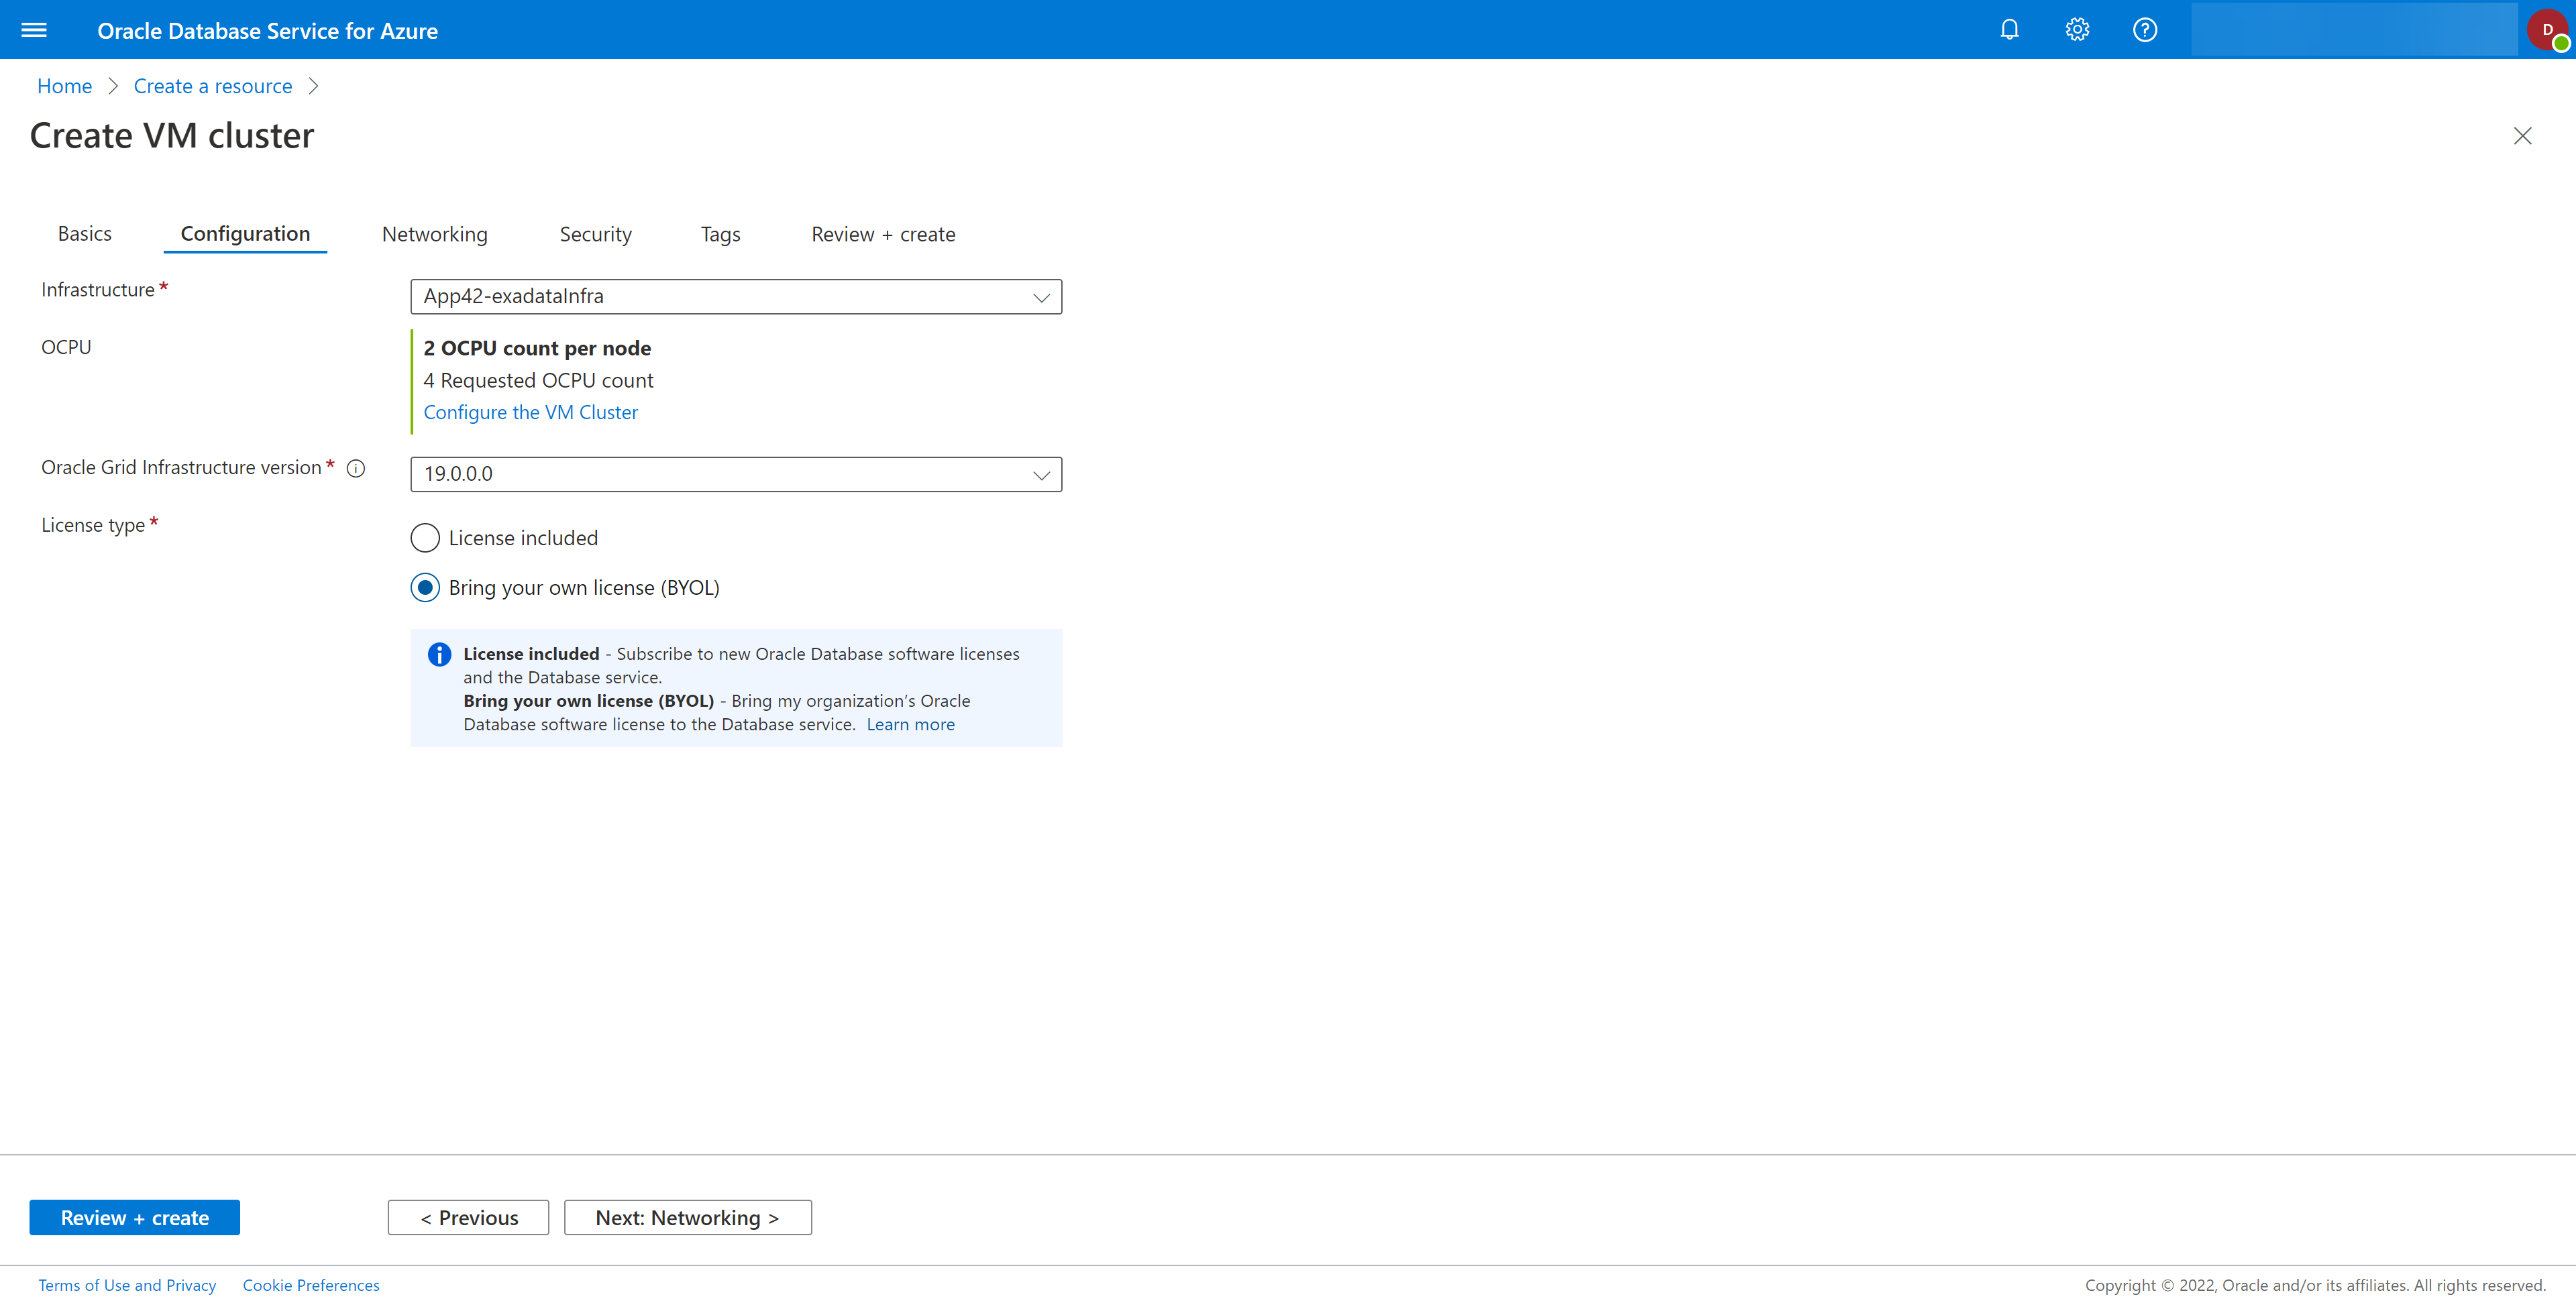
- Select an Exadata VM Cluster resource for the new Exadata VM Cluster resource being created.Note
If you have not created any Oracle Exadata Infrastructure in the selected Subscription and Resource group, follow the instructions in Provisioning Exadata Infrastructure and return to this flow.Figure 1-22 Infrastructure Selection

- OCPU displays the number of OCPUs per node as per the configuration of the Infrastructure resource selected in the previous step.For example, if the chosen Oracle Exadata Infrastructure resource was provisioned with 2 Database servers, it displays that the total Requested OCPU count is 4 with 2 OCPU count per node.
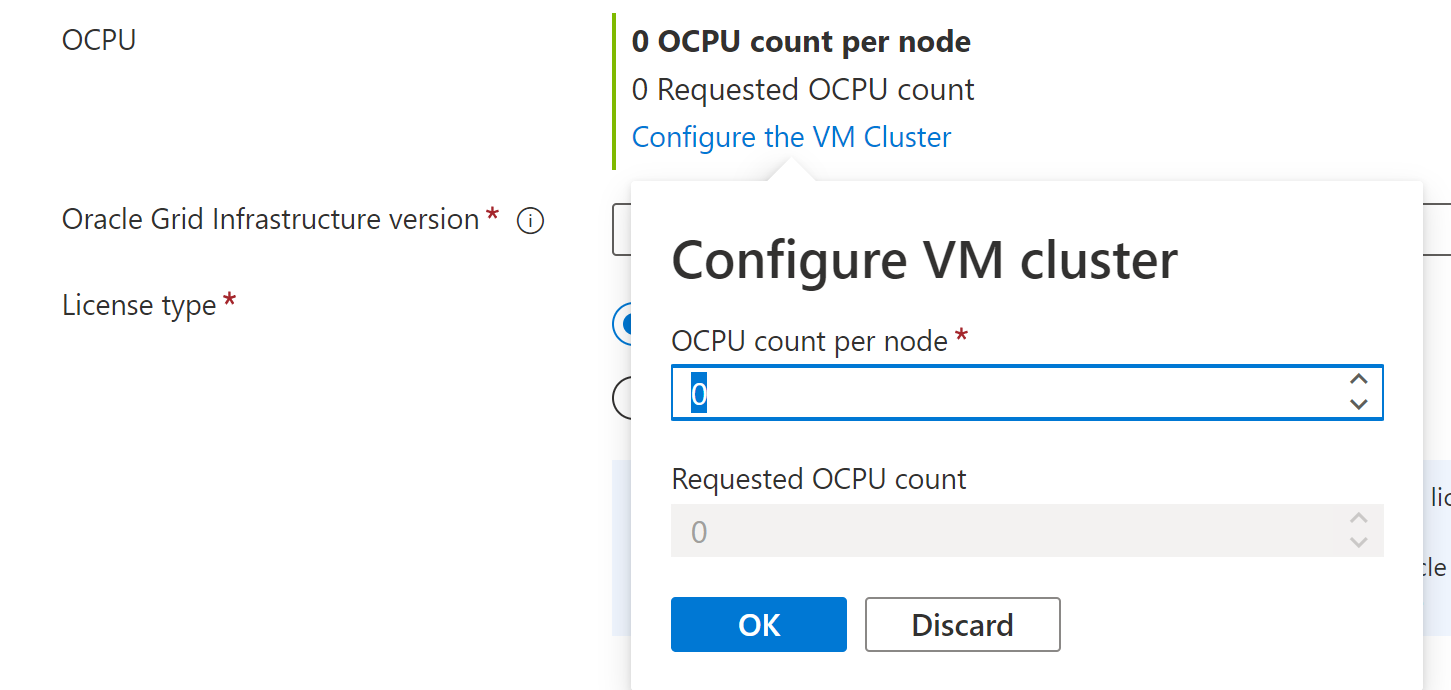
- Optionally, you can change the OCPU count per node by clicking the Configure the VM Cluster link.
- On the Configure VM cluster dialog, choose a value between 1 to 50 for OCPU count per node, and click OK.
Figure 1-23 OCPU Selection
- The Oracle Grid Infrastructure version selection sets the Oracle Exadata Infrastructure version number.
Figure 1-24 Oracle Grid Infrastructure version Selection

- If you have an existing Oracle Database license, you can choose the License type to Bring Your Own License (BYOL). Otherwise, choose License included ton include a license with this new resource.
Figure 1-25 License type Selection
- Click the Next: Networking > button to open the Networking tab.
Figure 1-26 Create Exadata VM Cluster - Networking Tab
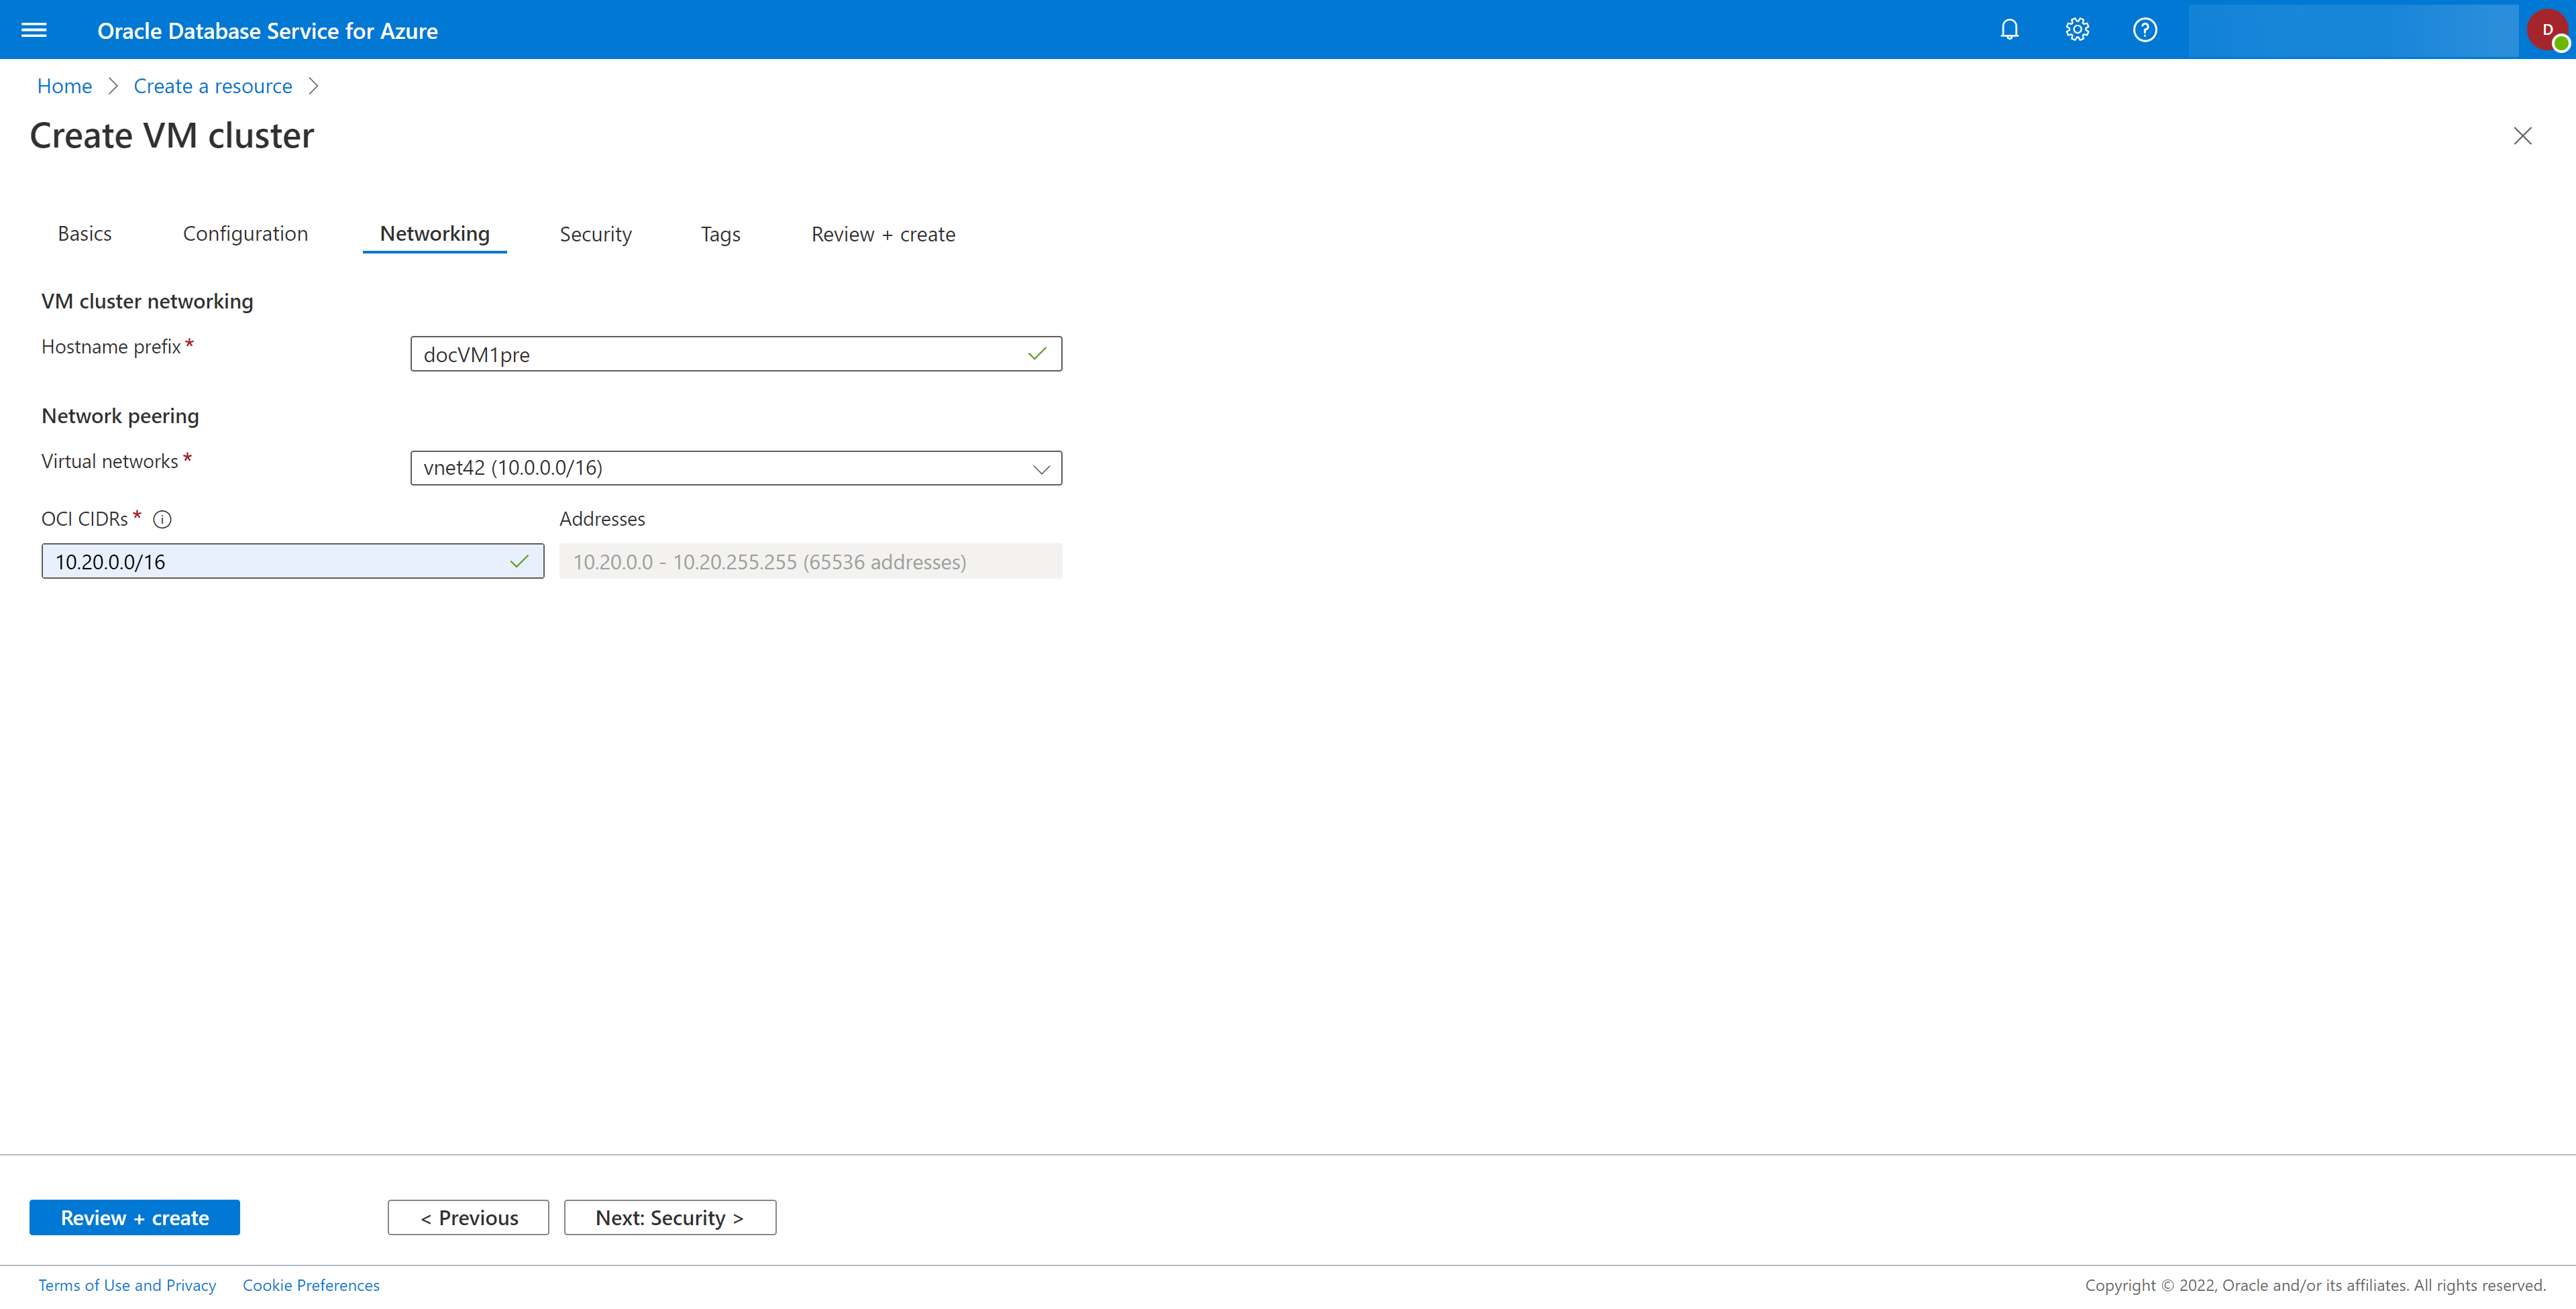
- Under VM cluster networking, enter any string value for the Hostname prefix.The hostname must be a unique resolvable hostname for the Oracle Exadata VM Cluster and will be used to connect externally to the system. The hostname must begin with an alphabetic character, can contain only alphanumeric characters and hyphens, and not exceed 12 characters in length.
- Enter Network Peering details for the new Exadata VM Cluster resource:
- The Virtual networks selection allows you to select an existing virtual network. This must already exist.For more information on this, see the What is an Azure Virtual Network.
Figure 1-27 Virtual networks Selection

- The OCI CIDRs field requires a CIDR block notation designation of IP address ranges to be assigned to your network. For more information on setting an appropriate range of IP address, see Network CIDR Sizing.Note
Choose an OCI CIDR value whose range does not overlap the CIDR range of the Virtual network selected in the previous step.Figure 1-28 OCI CIDRs

- The Virtual networks selection allows you to select an existing virtual network. This must already exist.
- Select the Next: Security > button to open the Security tab.
Figure 1-29 Create VM Cluster - Security Tab
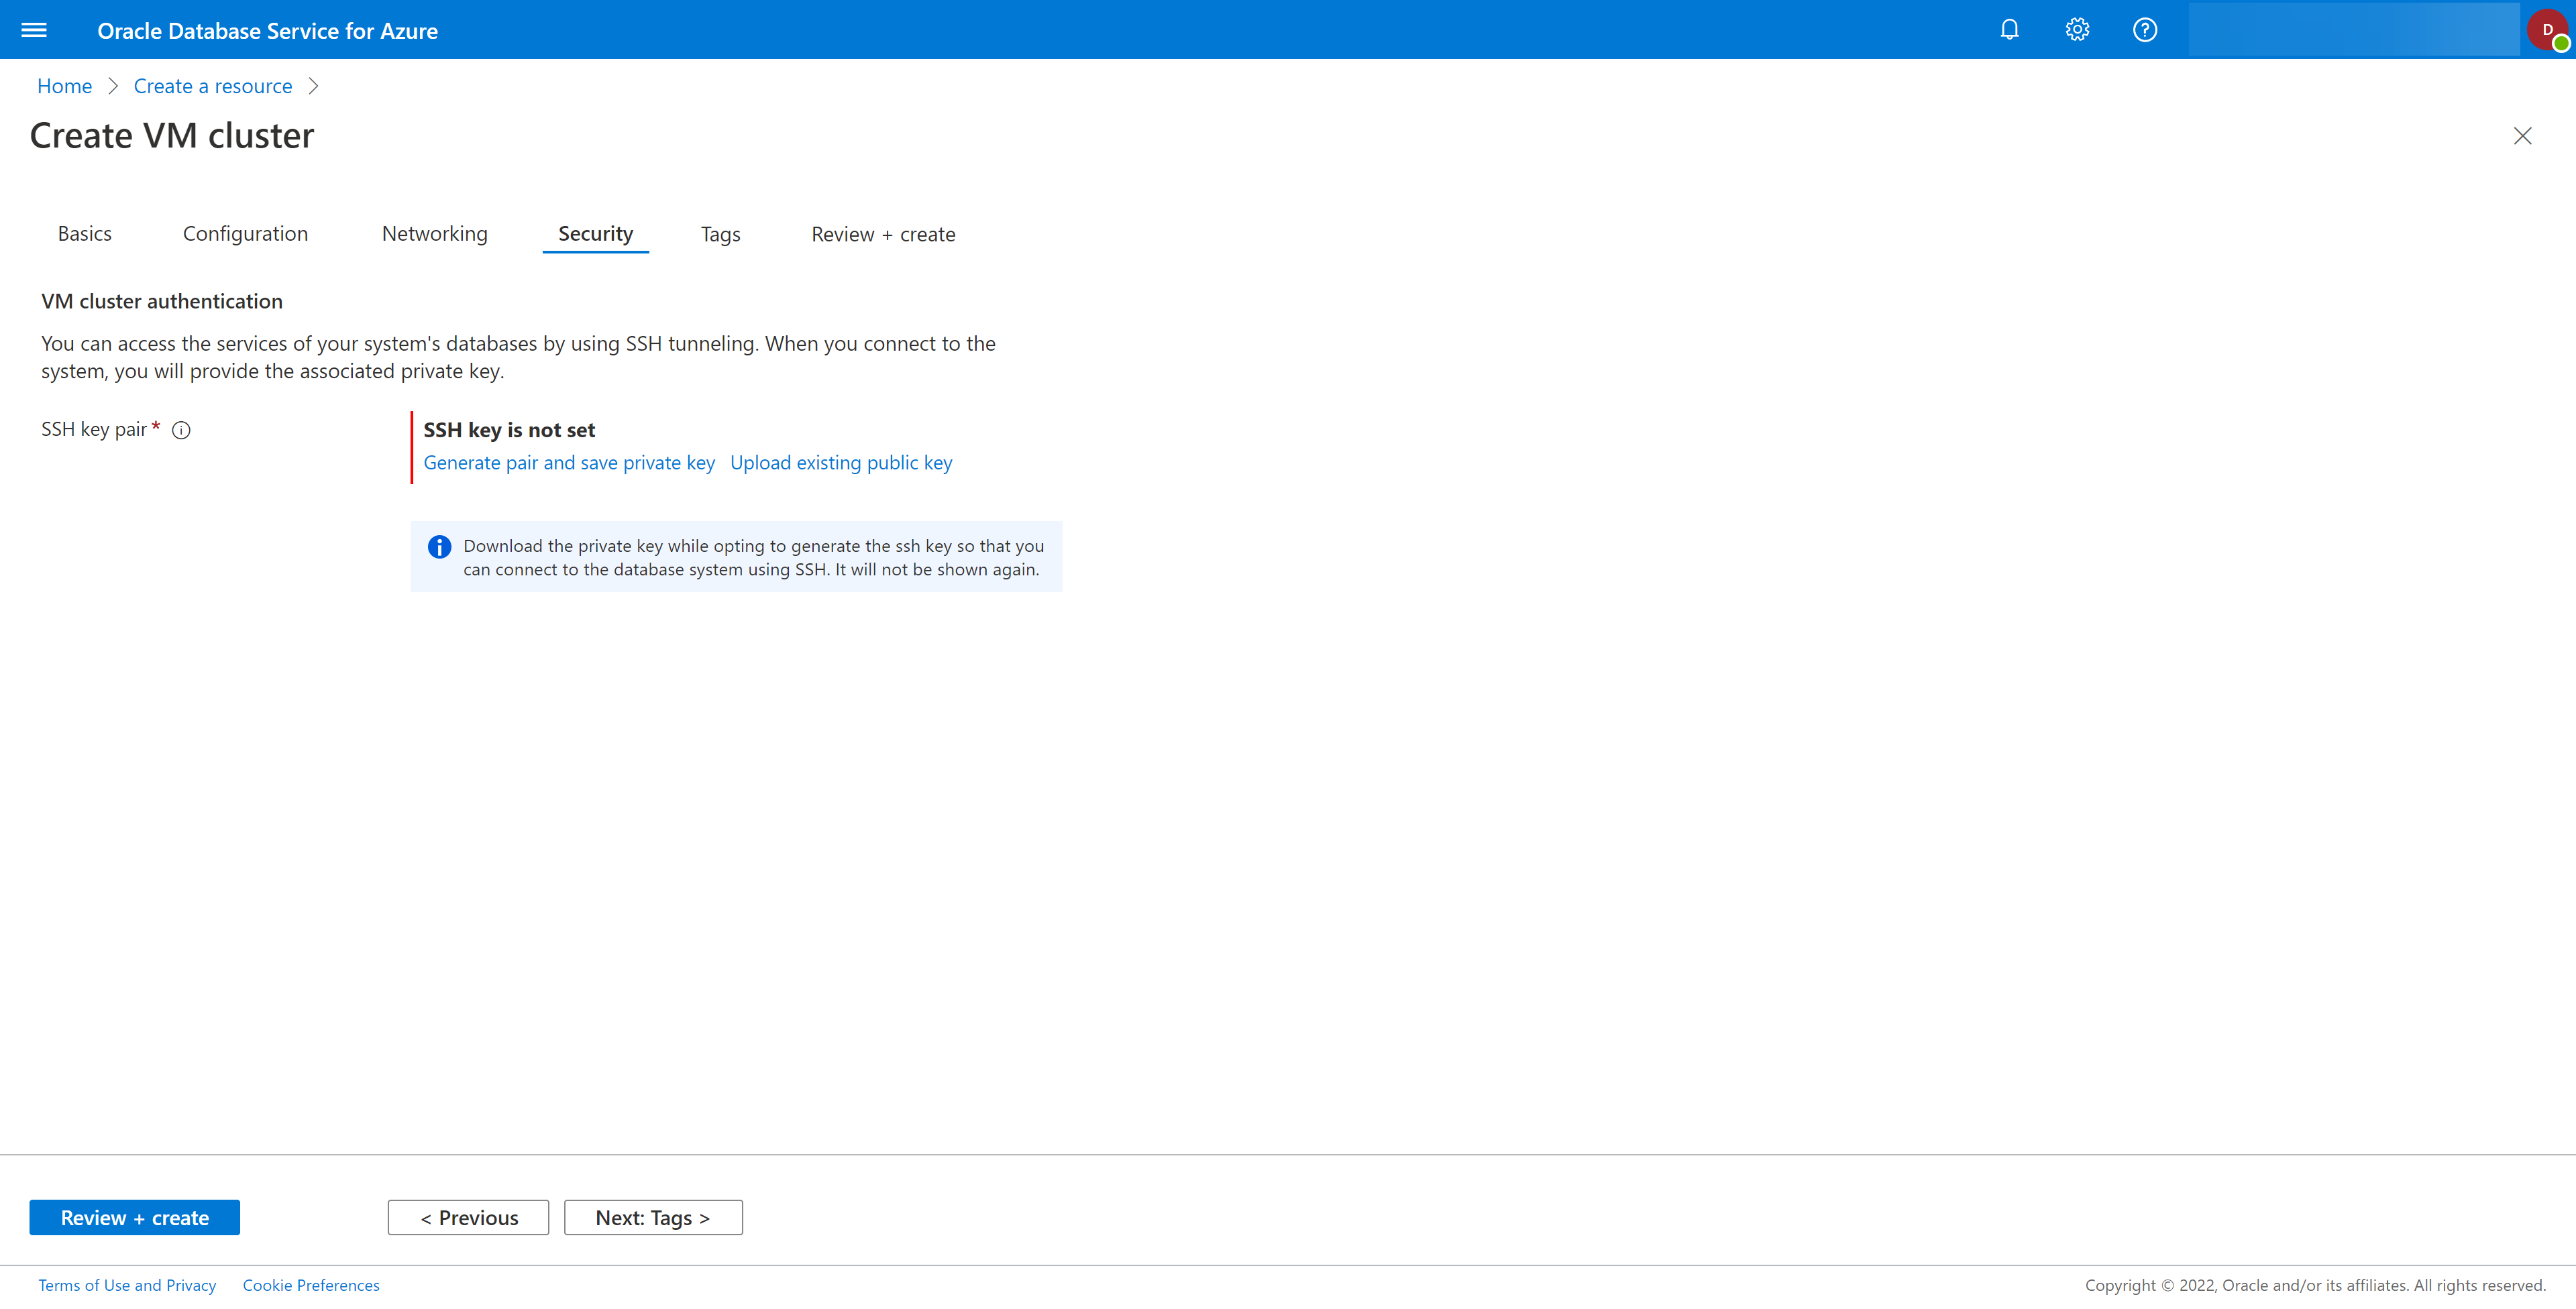
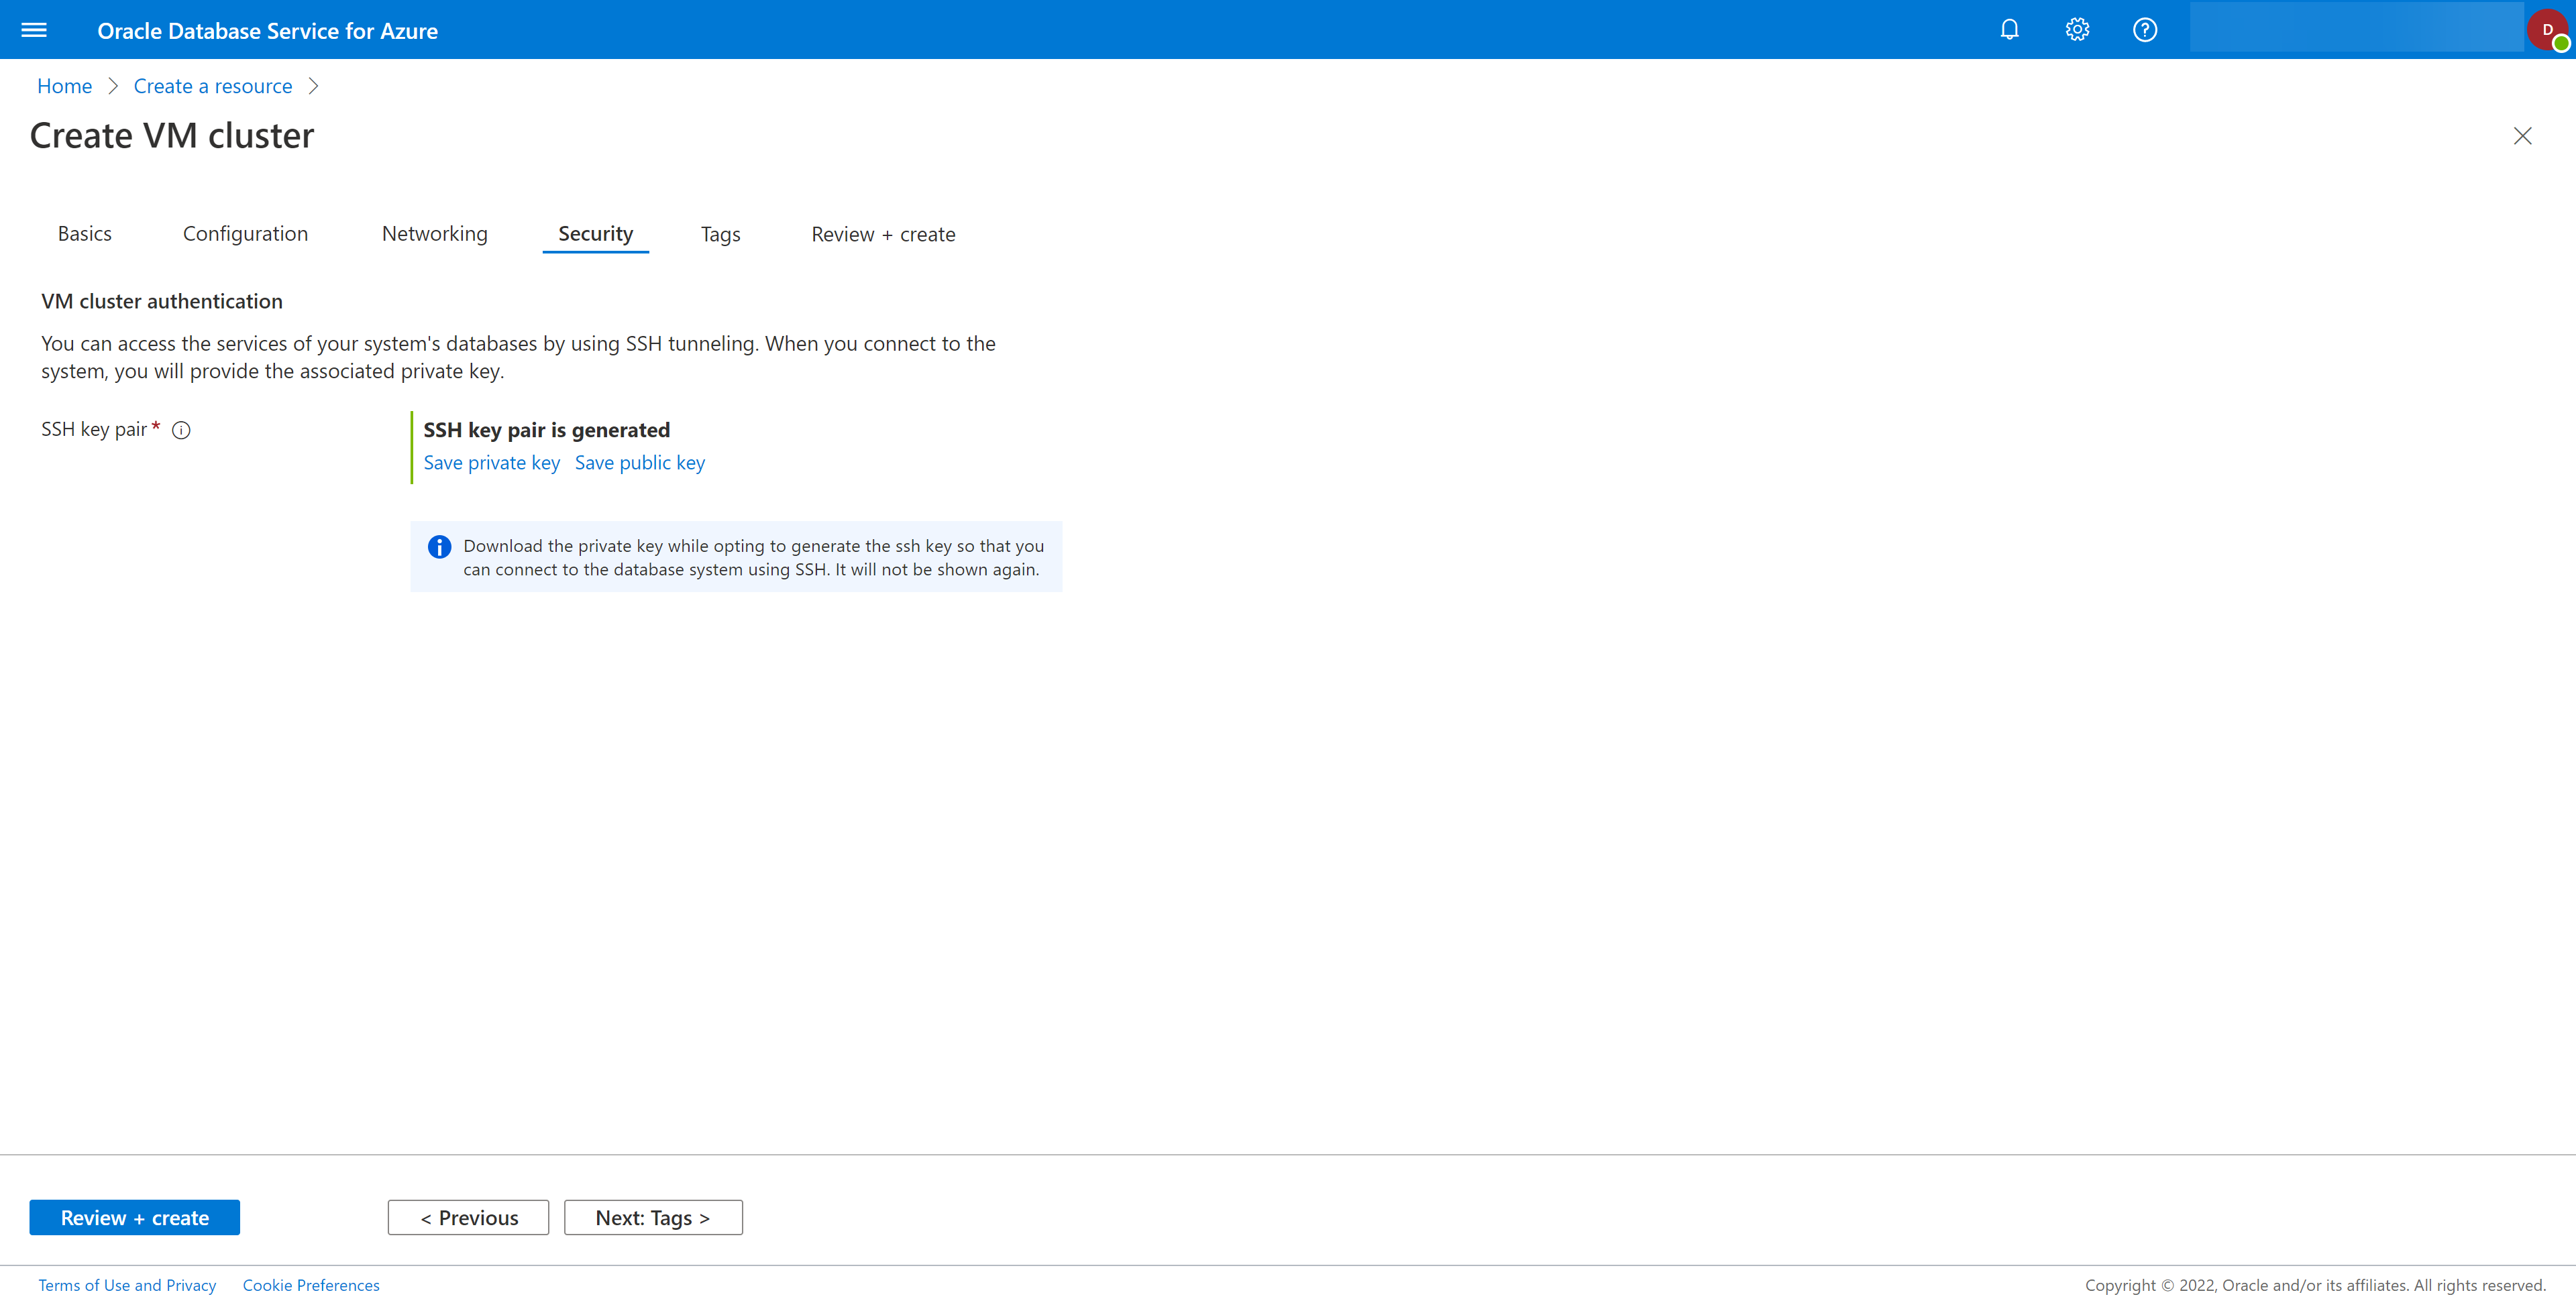
- You must either generate a new public key - private key pair or upload an existing public key for the SSH key pair field. To upload an existing public key, select the Upload existing public key link. To generate a new pair, select the Generate pair and save private key link.
Figure 1-30 Upload existing public key

Figure 1-31 Generate pair and save private key Link
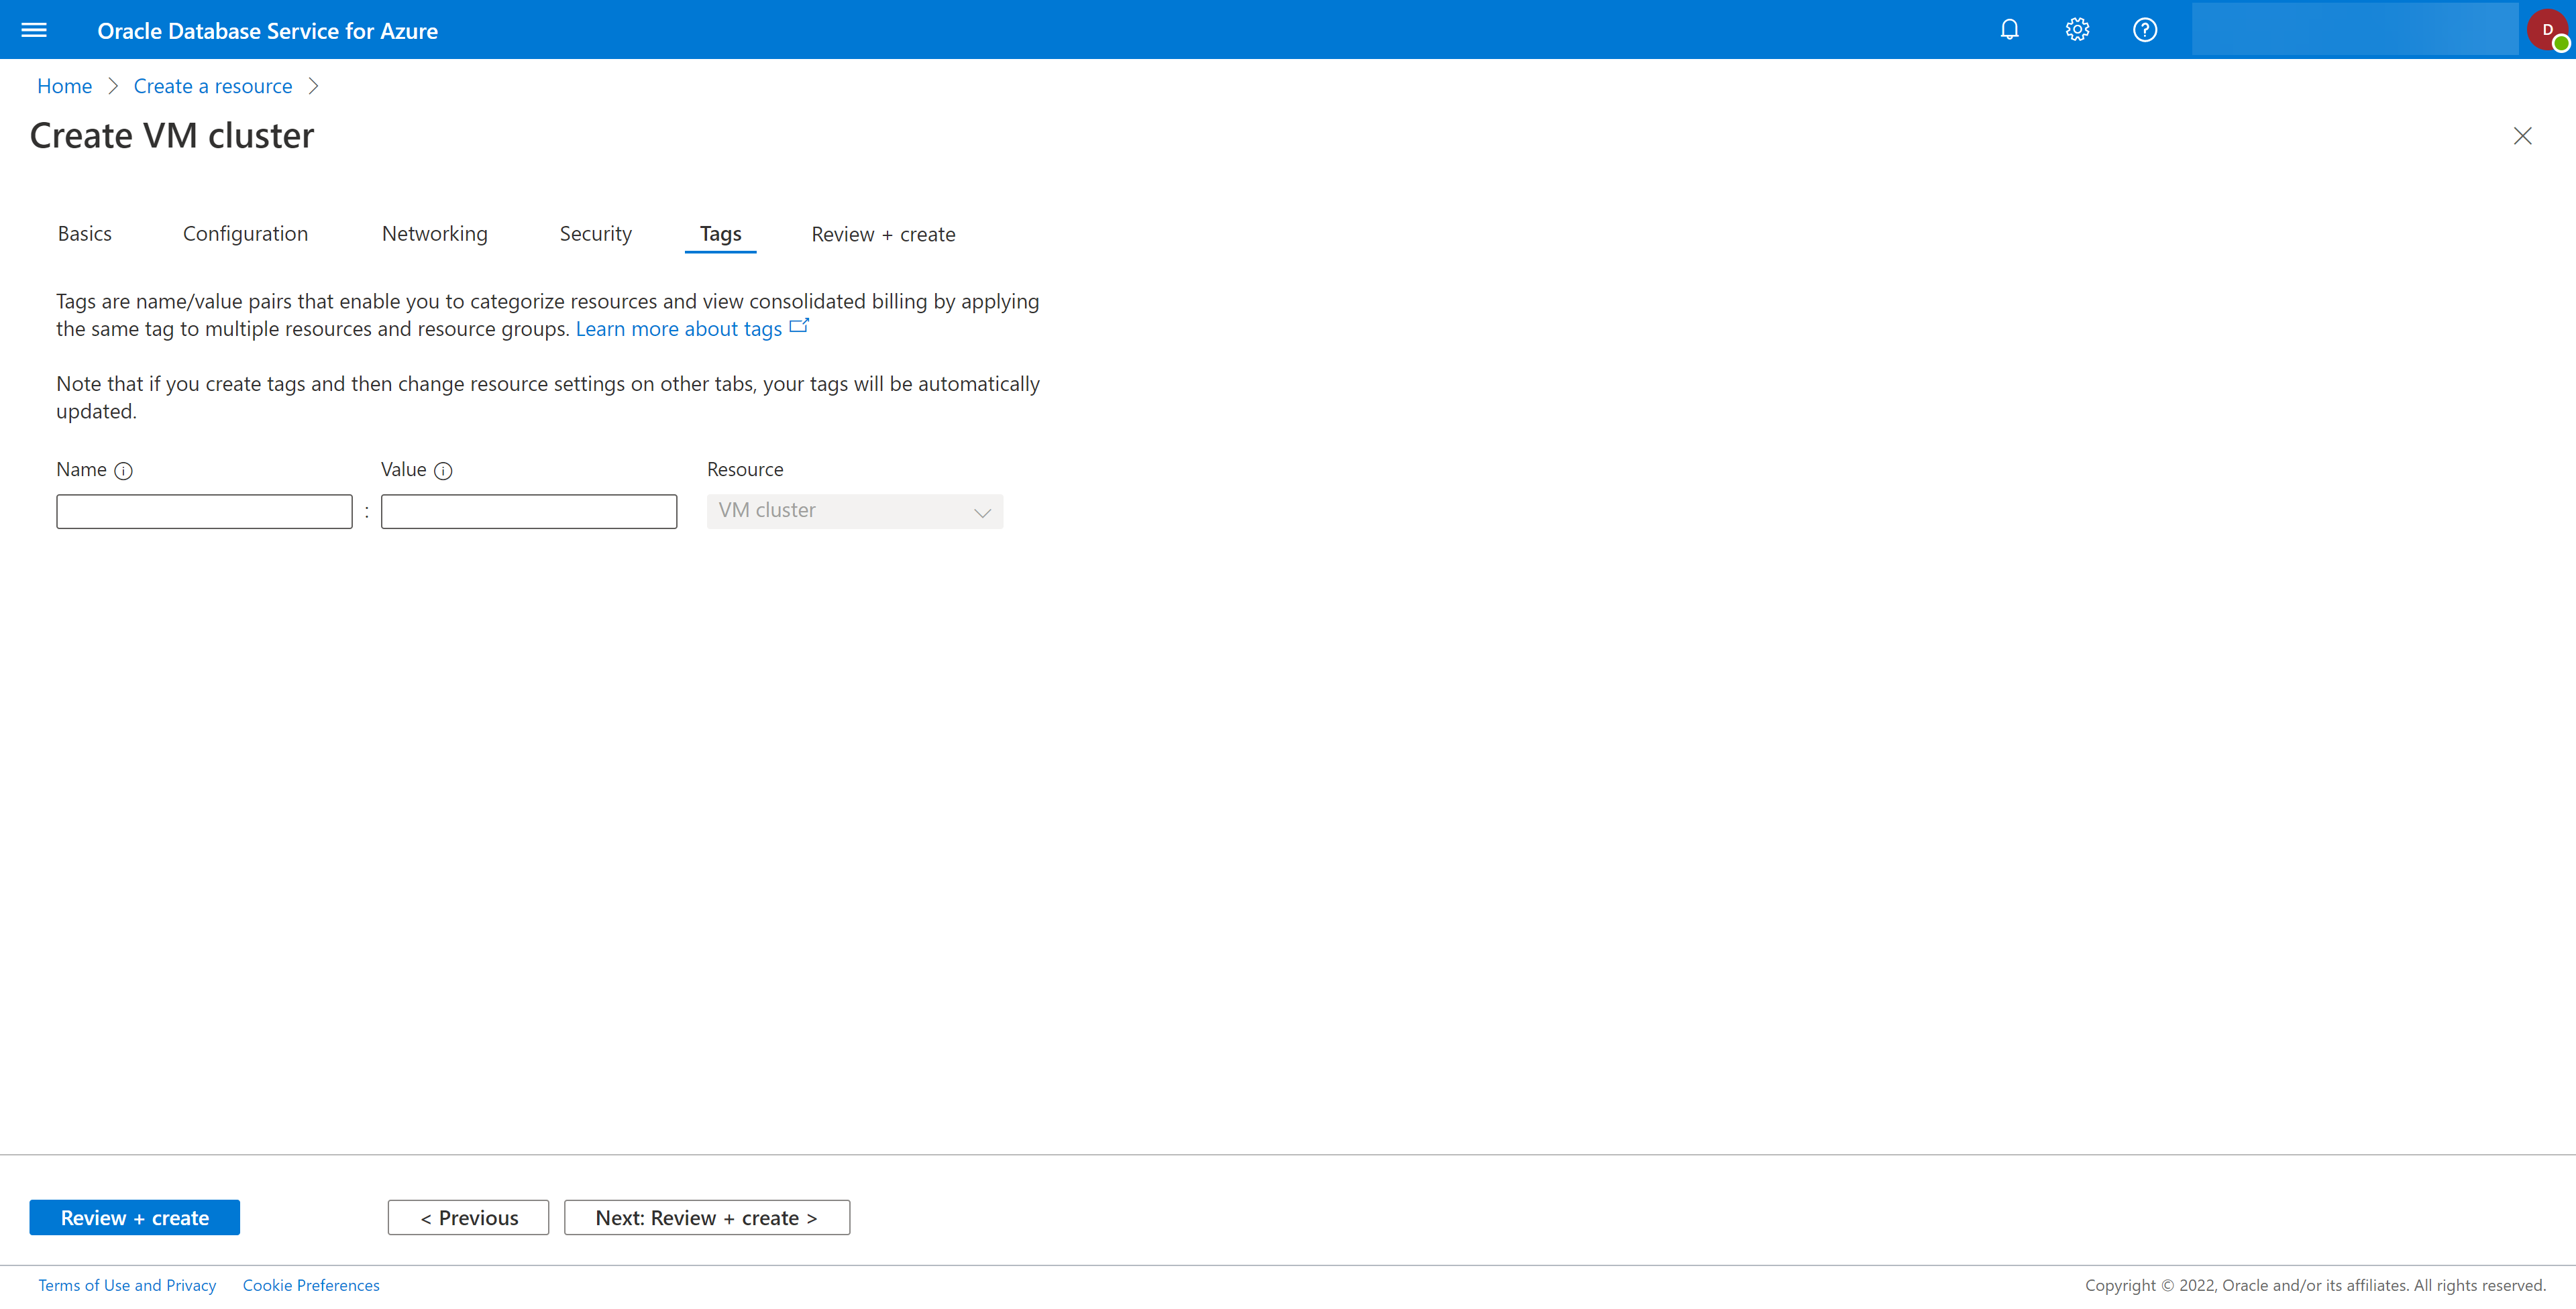
- Click the Next: Tags > button to open the Tags tab.Tags are name/value pairs that enable you to categorize resources and view consolidated billing by applying the same tag to multiple resources and resource groups. Refer to Tagging Overview to know more about tags.Any tags created here are applied to OCI provisioned resources.
Figure 1-32 Create VM Cluster - Tags Tab
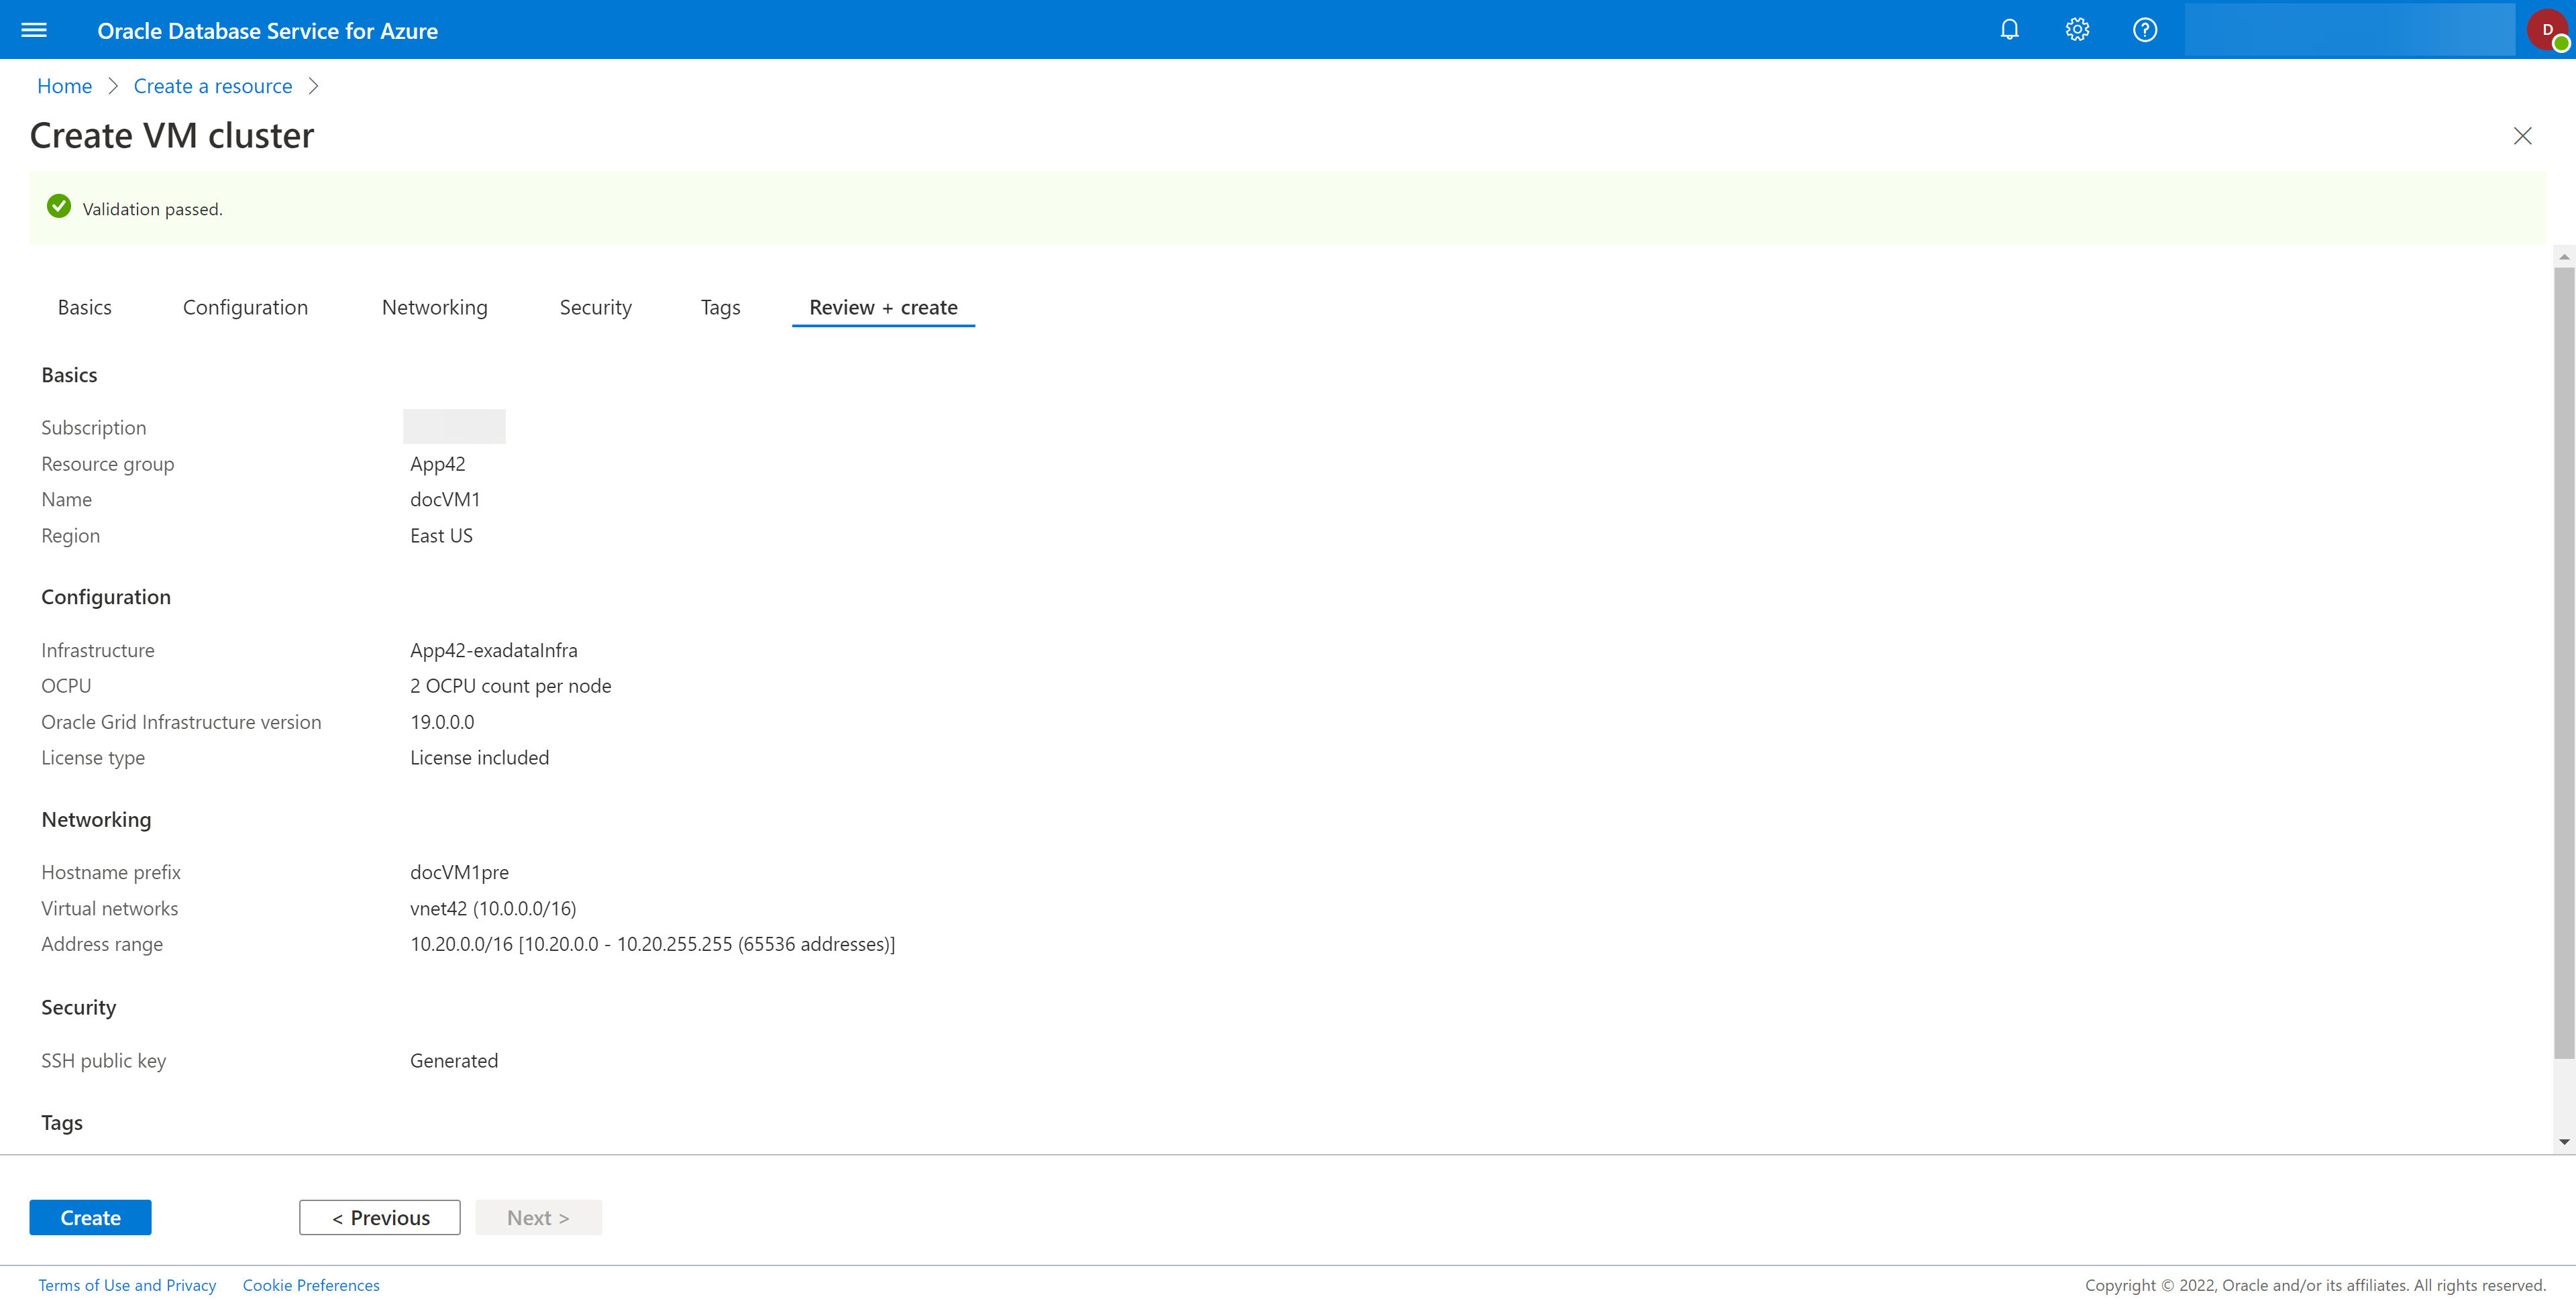
- Click the Next: Review + create > button to open the Review + create tab.
Figure 1-33 Create VM Cluster - Review + create Tab - Passed Validation
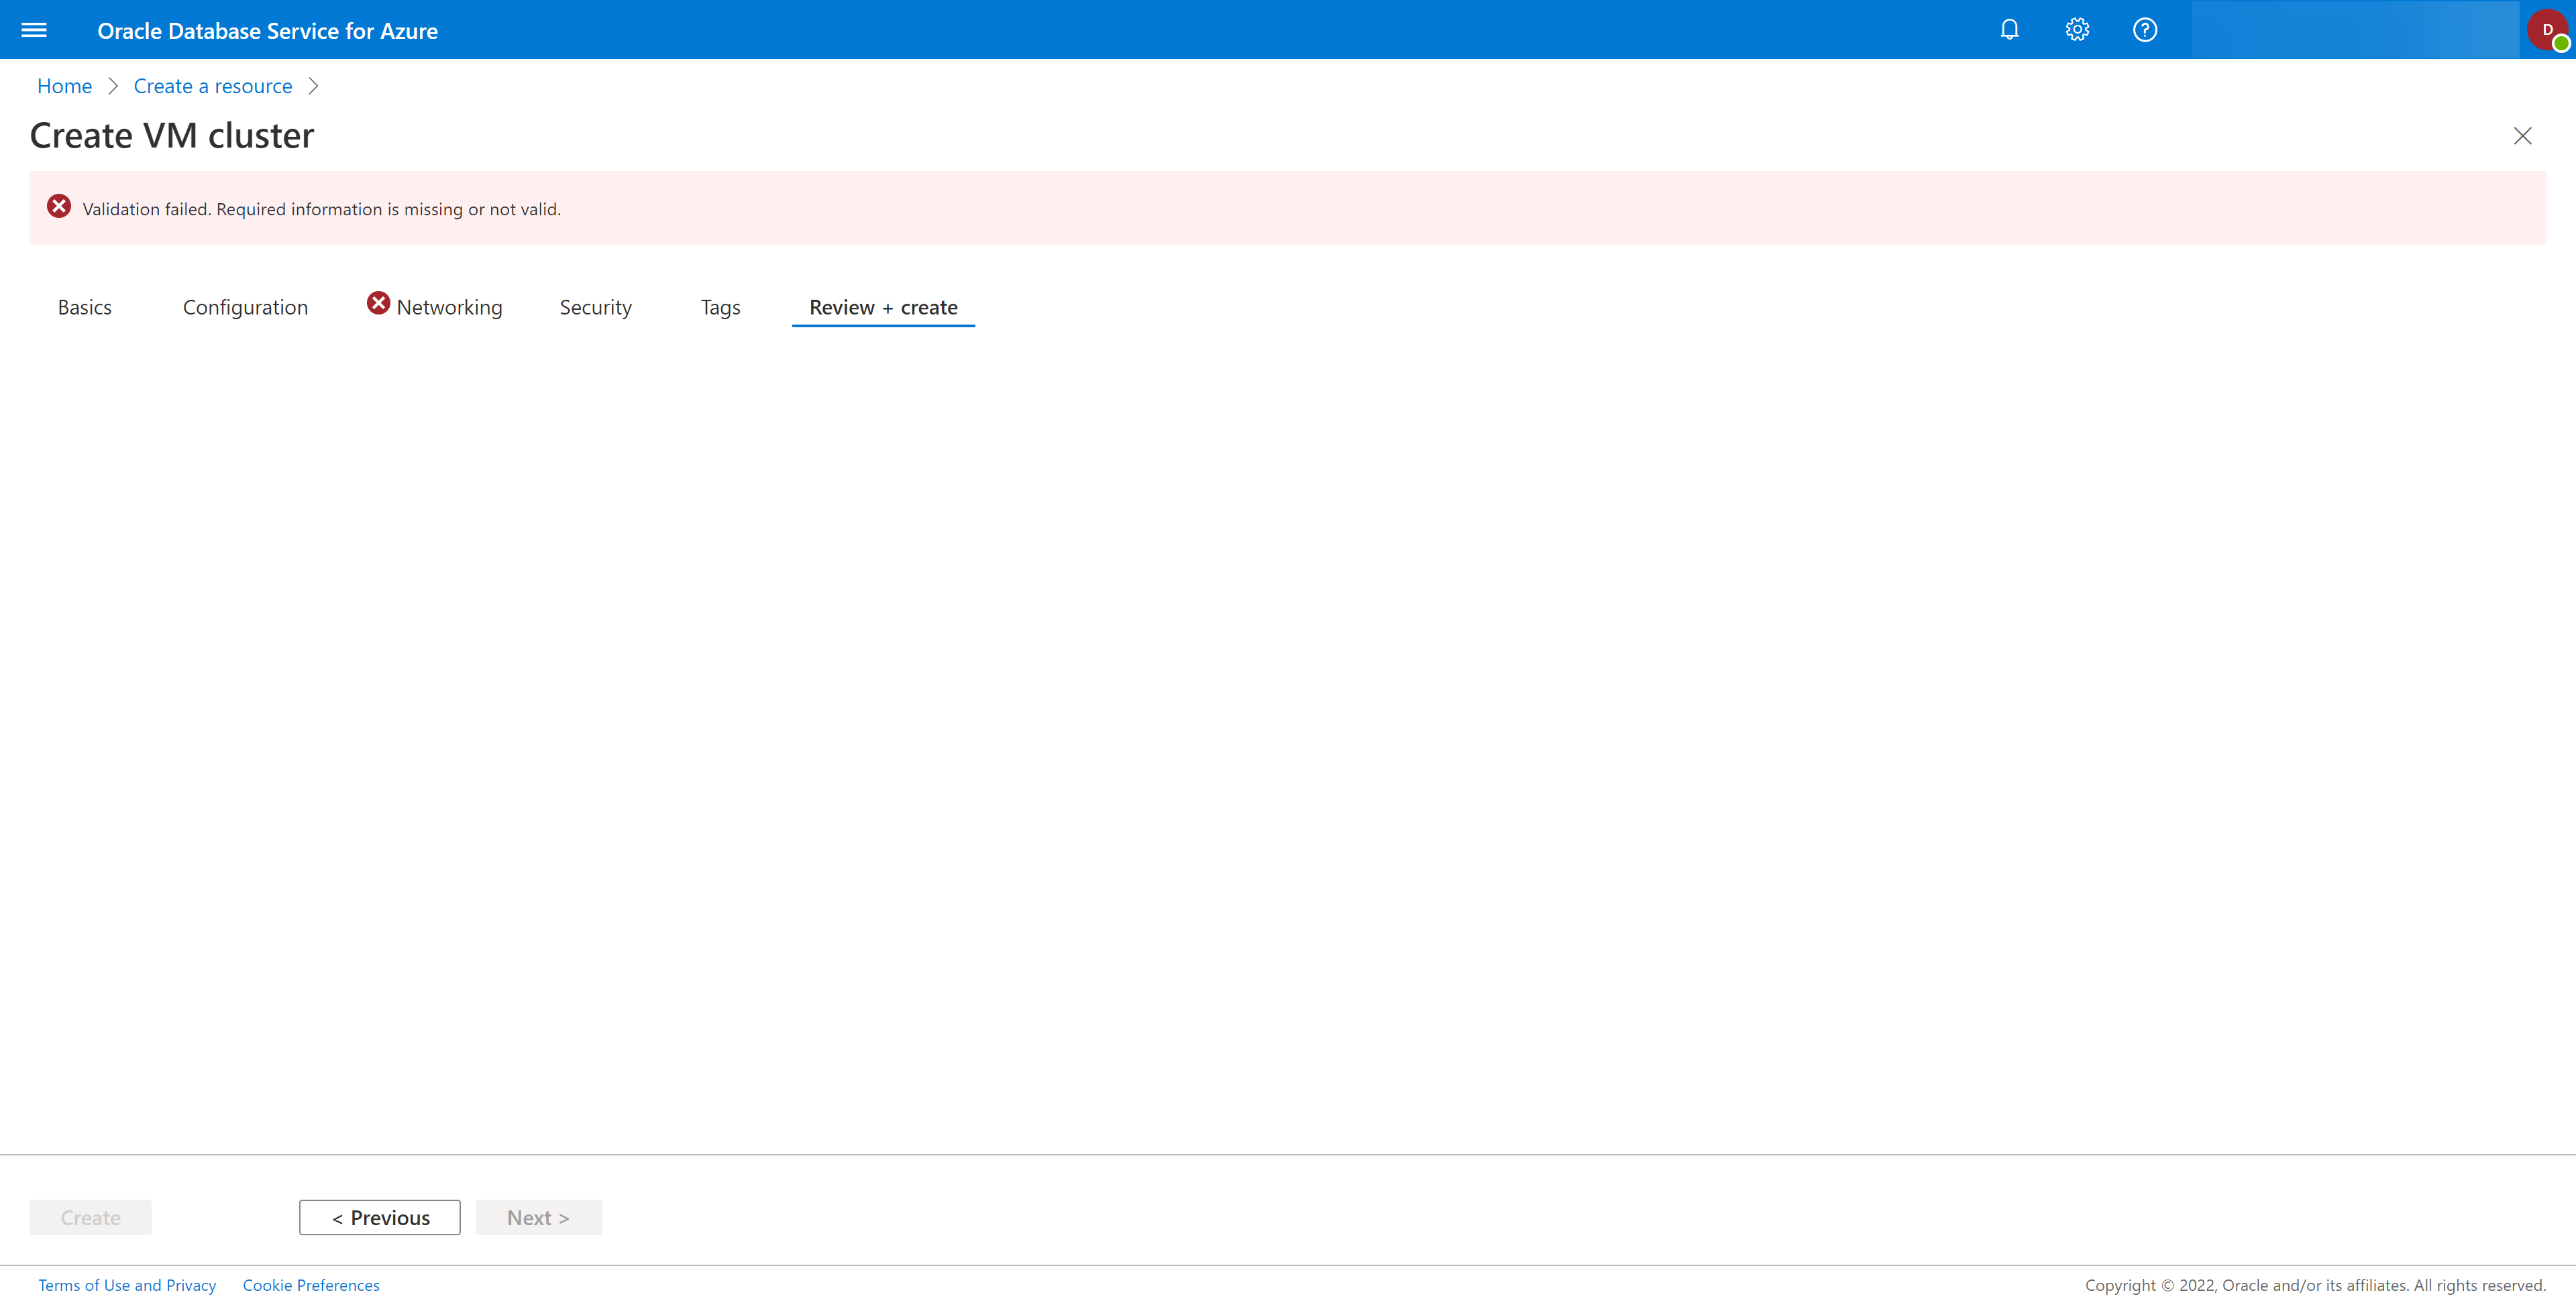
- If any of your Oracle Exadata VM Cluster creation settings are incorrect, you will see a failed validation message. You must correct these error to create an Oracle Exadata VM Cluster successfully.
Figure 1-34 Create VM Cluster - Review + create Tab - Failed Validation
- Review the configuration details, and click the Create button to create the Oracle Exadata VM Cluster.
- Should you need to change any settings, select the < Previous button.
- To cancel creation of the Oracle Exadata VM Cluster, select either the Home breadcrumb or the X (close) icon at the top-right of the page.
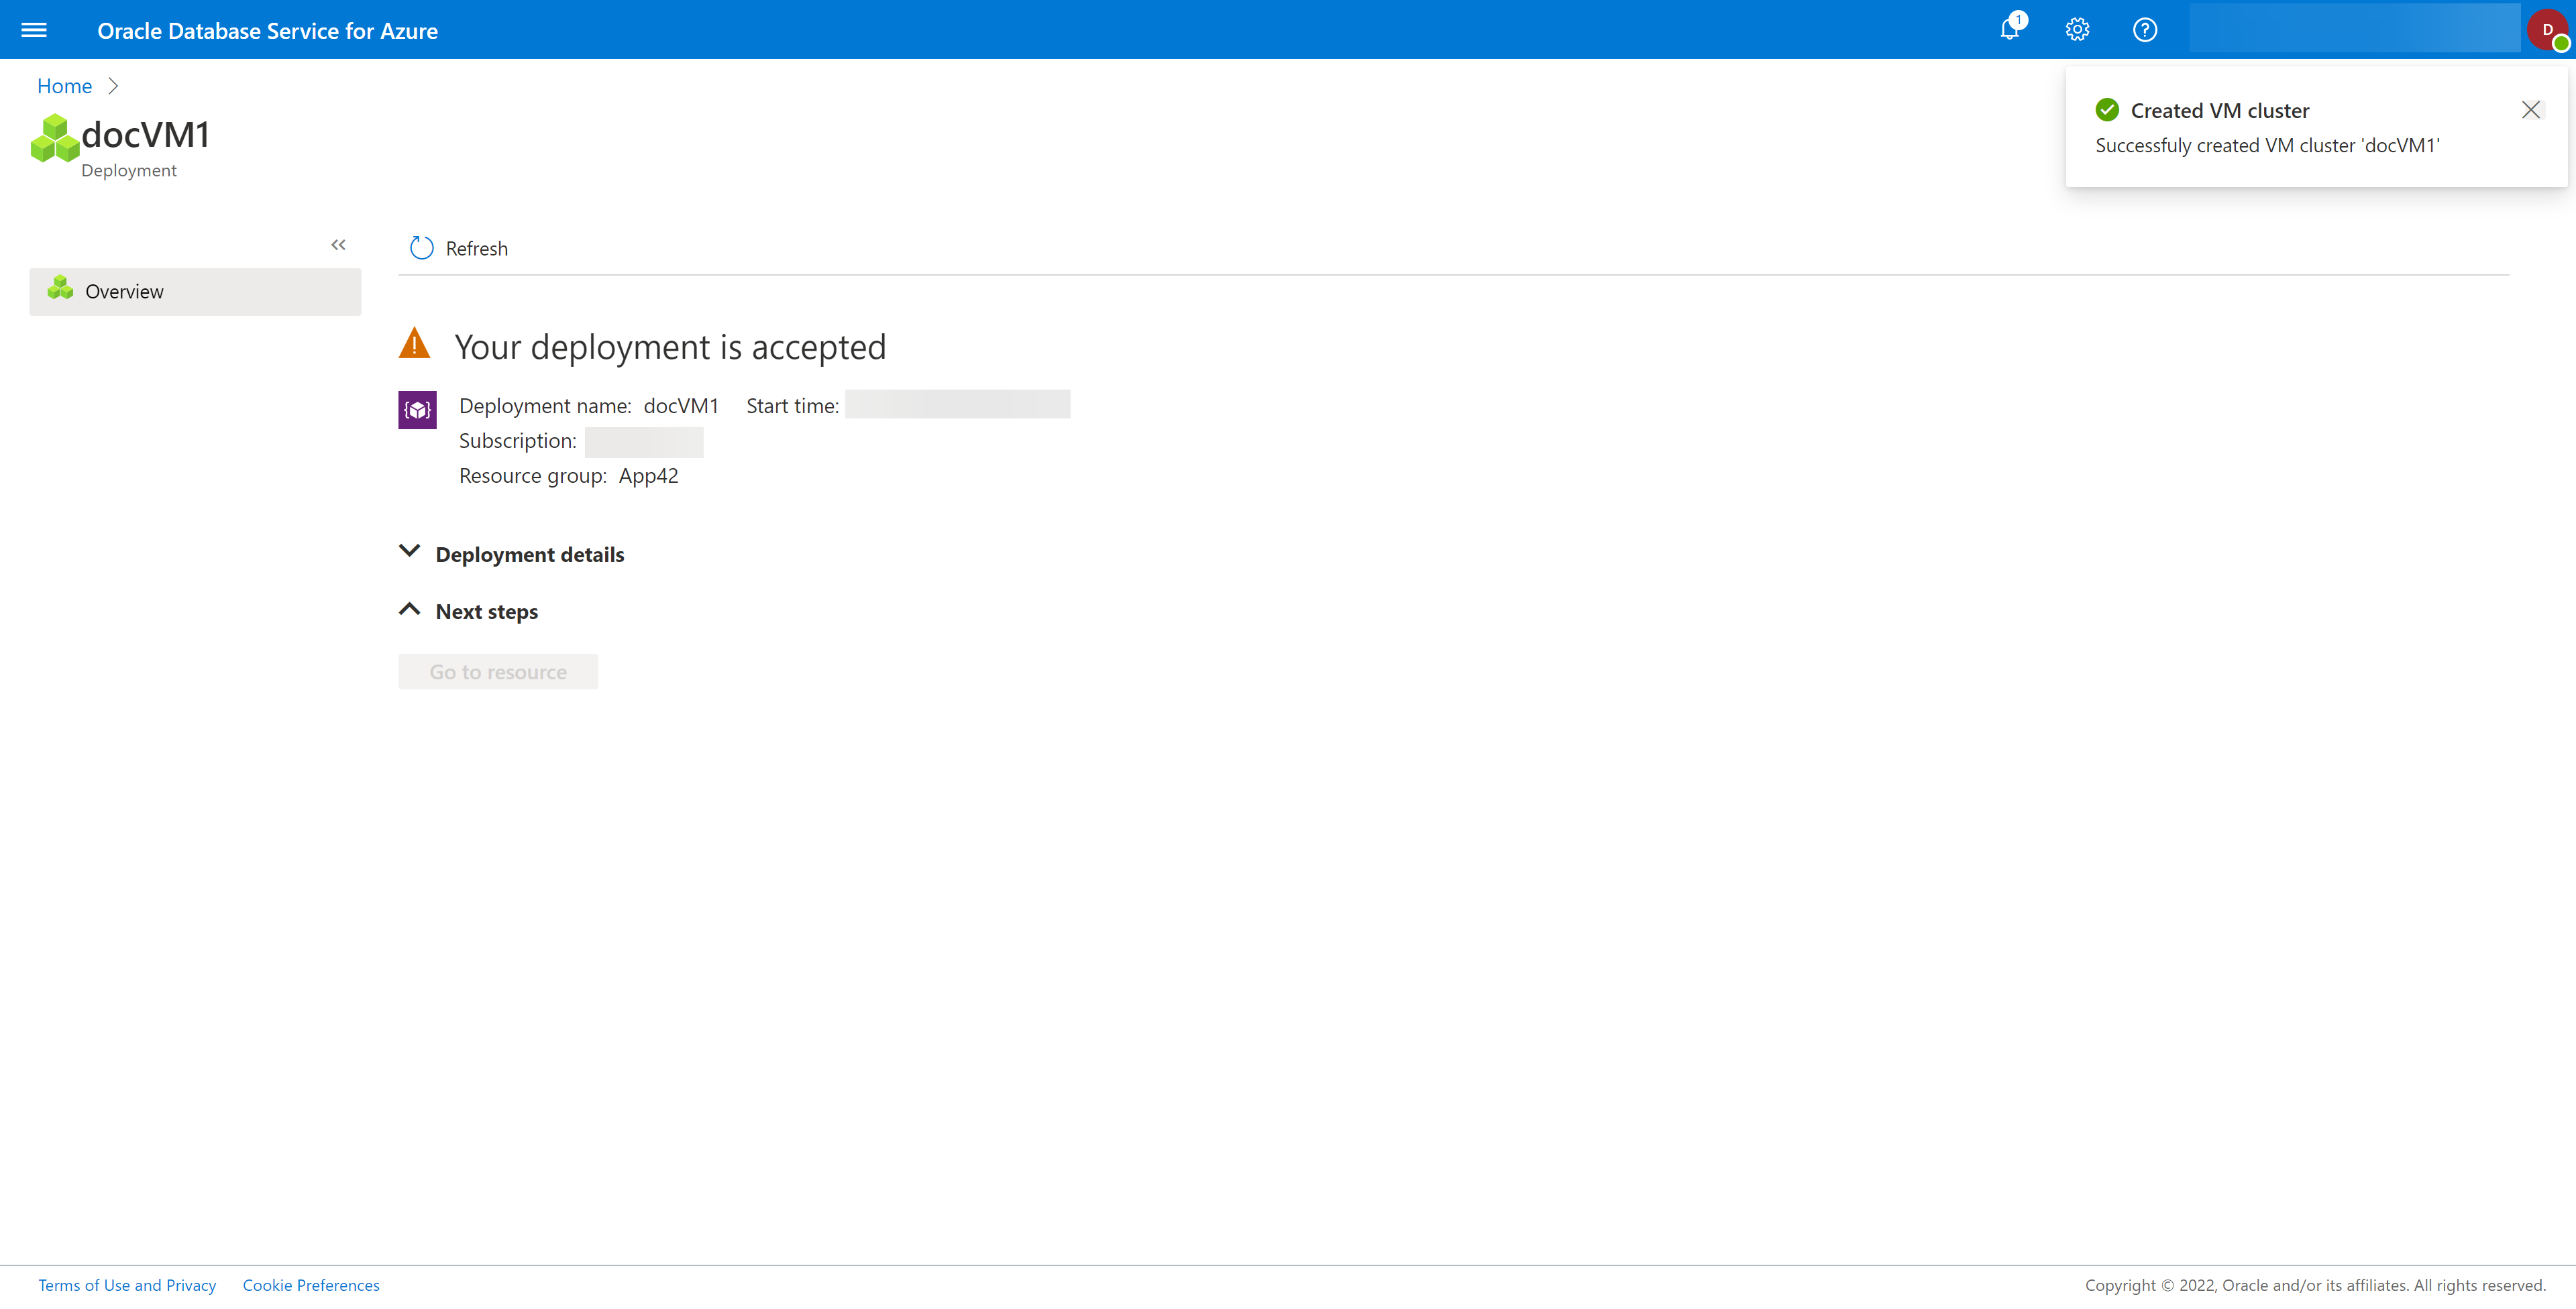
- If you select the Create button, the provisioning process for the Oracle Exadata VM Cluster will be queued. The flow for this process is shown below.
Figure 1-35 Create VM Cluster Submission
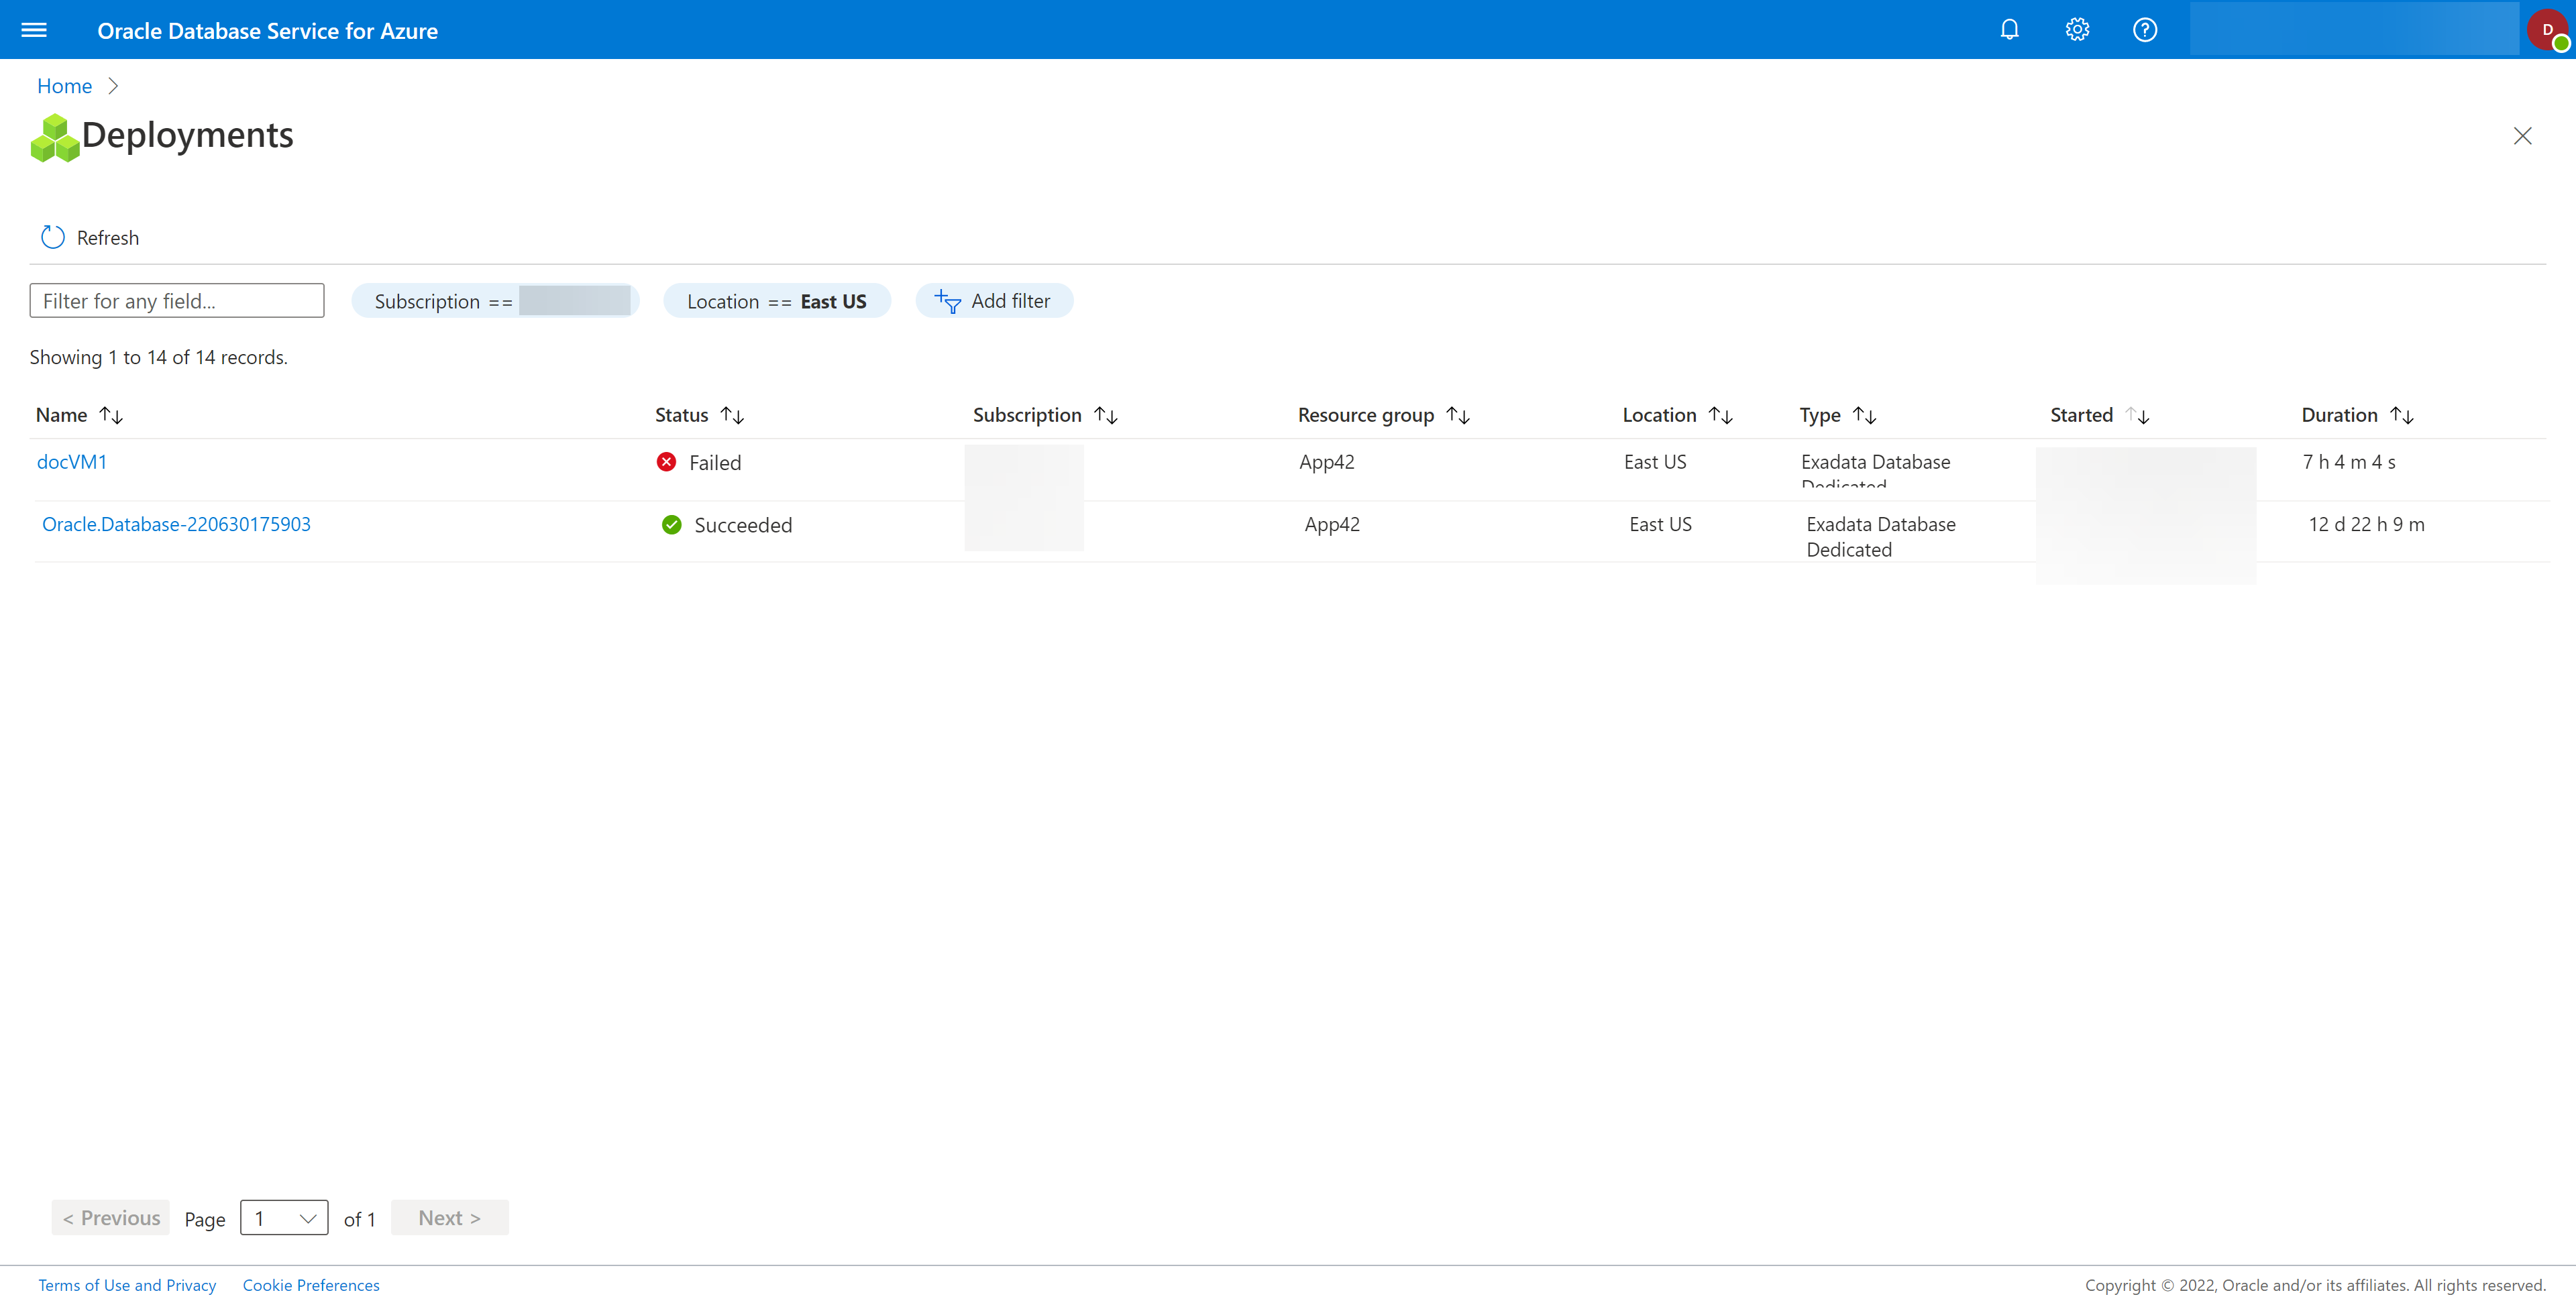
- To check on all Oracle Exadata VM Cluster deployments, successful, failed, or in-progress, check the Deployments blade or the Oracle Exadata Database blade.
Figure 1-36 Deployments Blade
- This completes the steps for provisioning an Oracle Exadata VM Cluster.