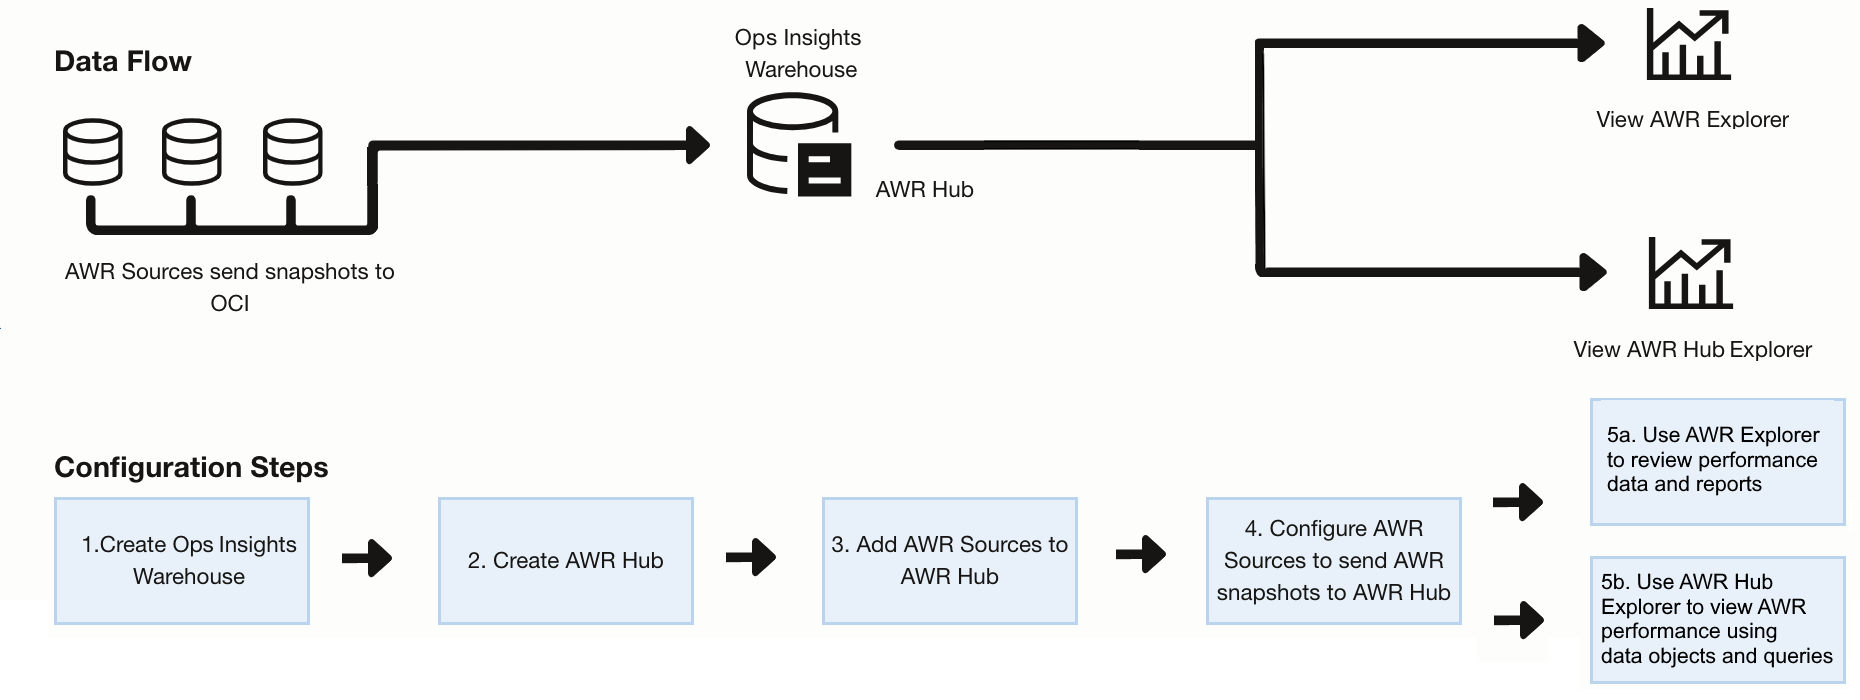
Configure the AWR Hub
Before using the AWR Hub feature, you must first configure Ops Insights to work with your existing database environment. Use this method when setting up your AWR Hub to obtain additional control over snapshots, and allowing you to start/stop uploads on.
Create the Warehouse and AWR Hub

- Open the navigation menu, click Observability & Management. Under Ops Insights, click Overview. Ops Insights console displays.
- From the Ops Insights menu, click AWR Hub. The AWR Hub Sources page displays.
- You will see the message The AWR Hub does not exist. Go to the Ops Insights Warehouse Page to create a warehouse and then the AWR HUB. Click on Ops Insights Warehouse Page.The Ops Insights Warehouse page displays.
- Enter a Warehouse Name, select the Compartment where the warehouse will reside, and the number of ECPU cores to enable. The following table gives an estimated guideline for how many ECPU cores to enable depending on your planned warehouse size:
Size No. of ECPUs Small (10DBs) 2 ECPU Medium (50 DBs) 2 – 16 ECPU Large (100 DBs) 16 ECPU Note
ECPU databases need to be provisioned with a minimum of 2 ECPUs. - Click Create, a work request will be submitted to create the Ops Insights Warehouse. The Ops Insights Warehouse page will appear. The Ops Insights Warehouse State will show as Creating.
- Once the process completes it will show as Active. The warehouse has been successfully created.
Note
At this point the AWR Hub State will show as Ready to Create, and a new link AWR Hub will also appear on the left hand menu under Ops Insights Warehouse. - To continue, click on Ready to Create.
- The AWR Hub page is displayed, to create the AWR Hub click on Create.
- At this point a work request is submitted to create the AWR Hub. The AWR Hub page will be populated with information, and the Lifecycle Status will show Creating.
When complete the Lifecycle Status will show as Active. At this point both the warehouse and AWR Hub have been created.