Selecting, Searching, and Filtering
Find what you're looking for in the Console.
Understanding Compartments
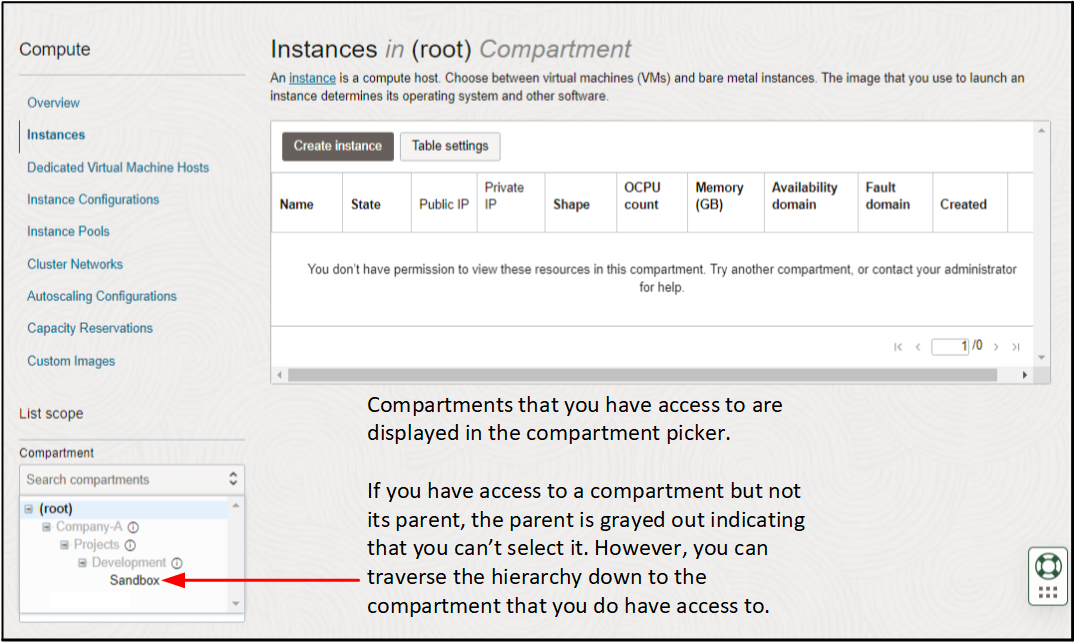
After you navigate to a service, the menu on the left side of the page includes the compartments list.
Compartments help you organize resources to make it easier to control access to them. Your root compartment is created for you by Oracle when your tenancy is provisioned. An administrator can create more compartments in the root compartment and then add the access rules to control which users can see and take action in them. To manage compartments, see Managing Compartments.
The list of compartments is filtered to show only the compartments that you have permission to access. Compartments can be nested, and you might have access to a compartment but not its parent. The names of parent compartments that you don't have permission to access are dimmed, but you can traverse the hierarchy down to the compartment that you do have access to.
After you select a compartment, the Console displays only the resources that you have permission to view in the compartment for the region that you are in. To see resources in another compartment, you must switch to that compartment. To see resources in another region, you must switch to that region, or use the tenancy explorer.
For more details about compartments, see Learn Best Practices for Setting Up Your Tenancy and Managing Compartments.
Filtering the Displayed List of Resources
To help you locate a resource, you can use filters to limit the list that is displayed. Following are common filters:
State: Display only the resources that are in the state you select. Valid values for this filter can vary by resource. Some example states are:
- Any state (includes all lifecycle states for the resource)
- Available
- Provisioning
- Terminating
- Terminated
Availability domain: Limit the list of resources to those that reside in the availability domain s that you select. For a list of availability domain-specific resources, see Resource Availability.
Tags filters: Resources that support tagging let you filter the list by tags.
- Next to Tag filters, select add.
- In the Add a tag filter dialog, enter the following:
- Tag namespace: Select the tag namespace.
- Tag key: Select the key.
- Tag value: Select from the following:
- Match any value - returns all resources tagged with the selected namespace and key, regardless of the tag value.
- Specify matching values - returns resources with the tag value you enter in the text box. Enter a single value in the text box. To specify multiple values for the same namespace and key, select + to display another text box. Enter one value per text box.
- Select Apply filter.
- Next to Tag filters, select add.
- In the Add a tag filter dialog, enter the following:
- Tag namespace: Select None (free-form tag).
- Tag key: Enter the key.
- Tag value: Select from the following:
- Match any value - returns all resources tagged with the selected namespace and key, regardless of the tag value.
- Specify matching values - returns resources with the tag value you enter in the text box. Enter a single value in the text box. To specify multiple values for the same namespace and key, select + to display another text box. Enter one value per text box.
- Select Apply filter.
