Purchase
Learn how to purchase an Oracle Database@Azure offer in the Azure Marketplace.
Oracle has the following options for purchasing Oracle Database@Azure:
- Private Offer
- Public Offer (Pay As You Go)
Private Offer
This section describes the following Private Offer tasks:
Accept a Private Offer
After a contract is negotiated between Oracle and your organization, Oracle Sales creates a private offer in Azure Marketplace and sends you an email confirming the offer availability. Complete the following tasks after you receive the email from Oracle Sales confirming that your private offer is ready.
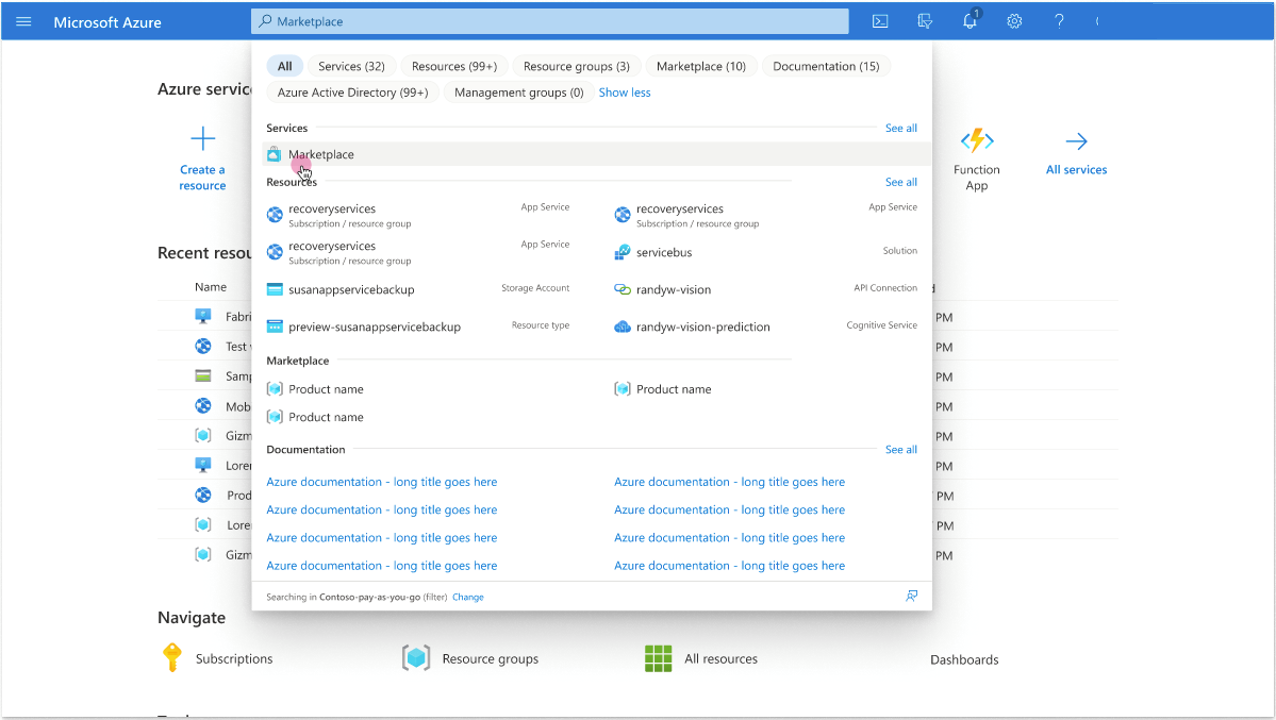
- Sign in to the Azure portal.
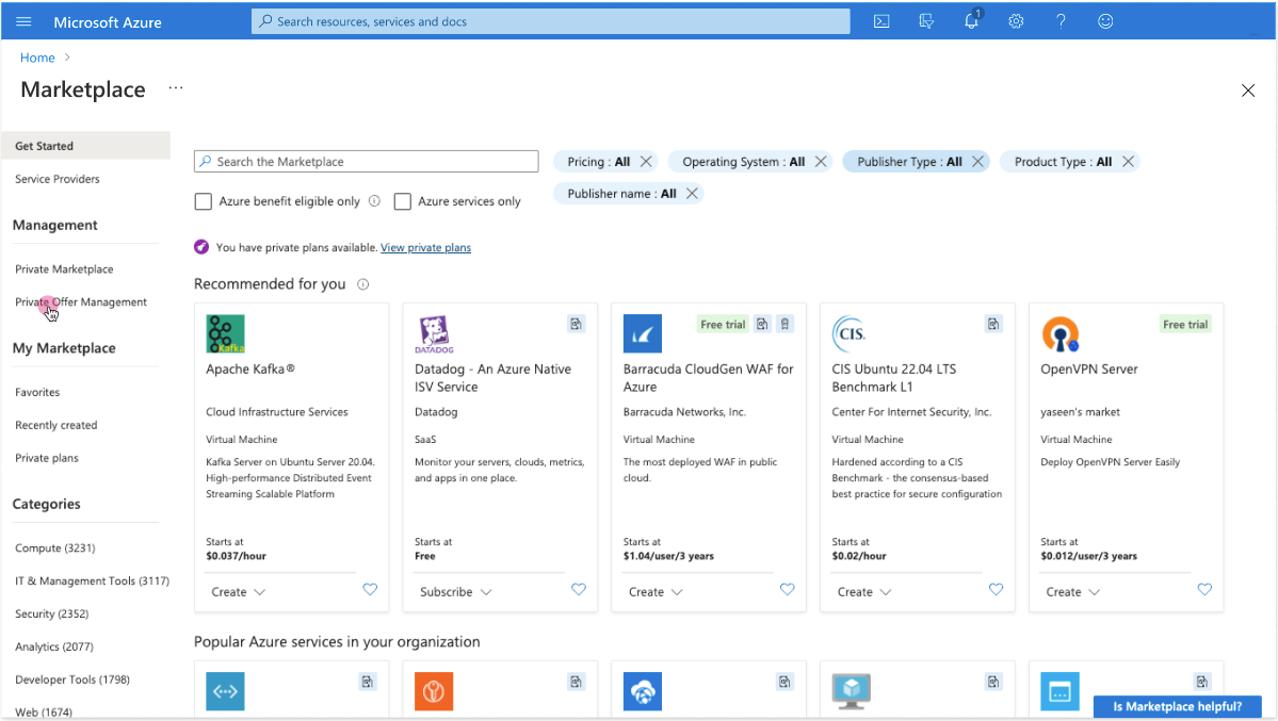
-
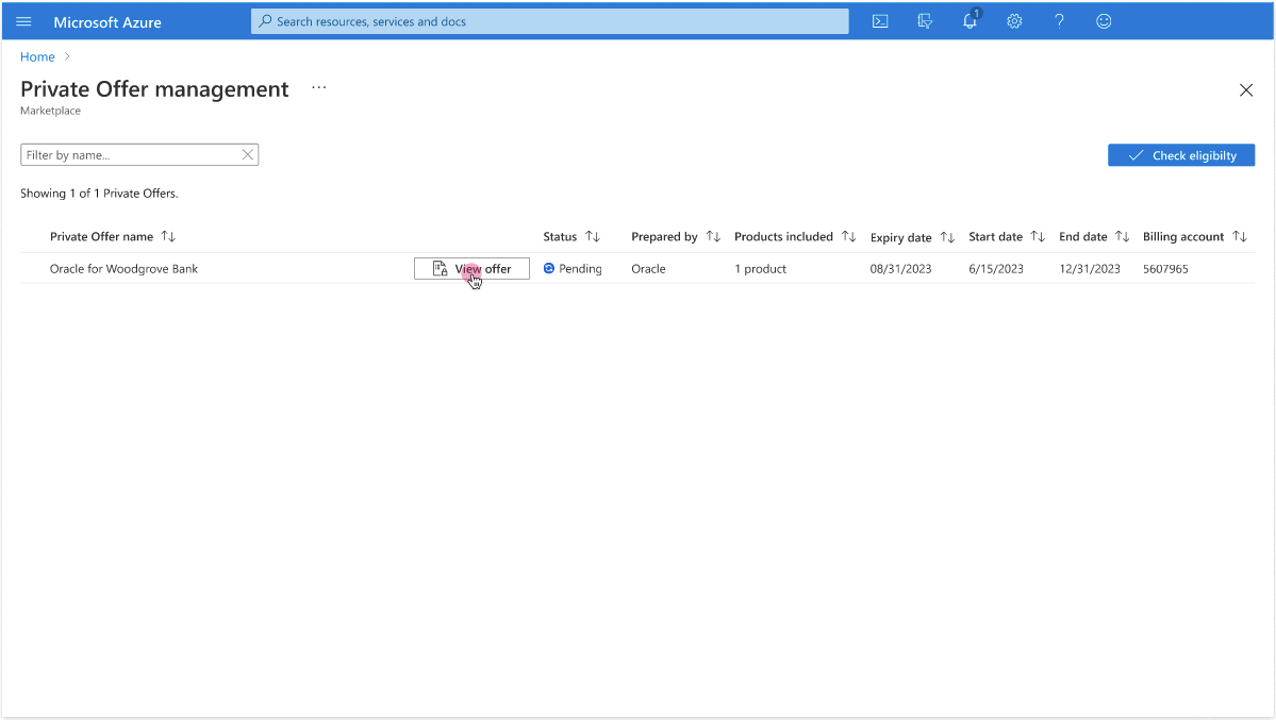
On the Private Offer management page, find the offer the Oracle Sales team has created for you and click View offer to see the offer details.
-
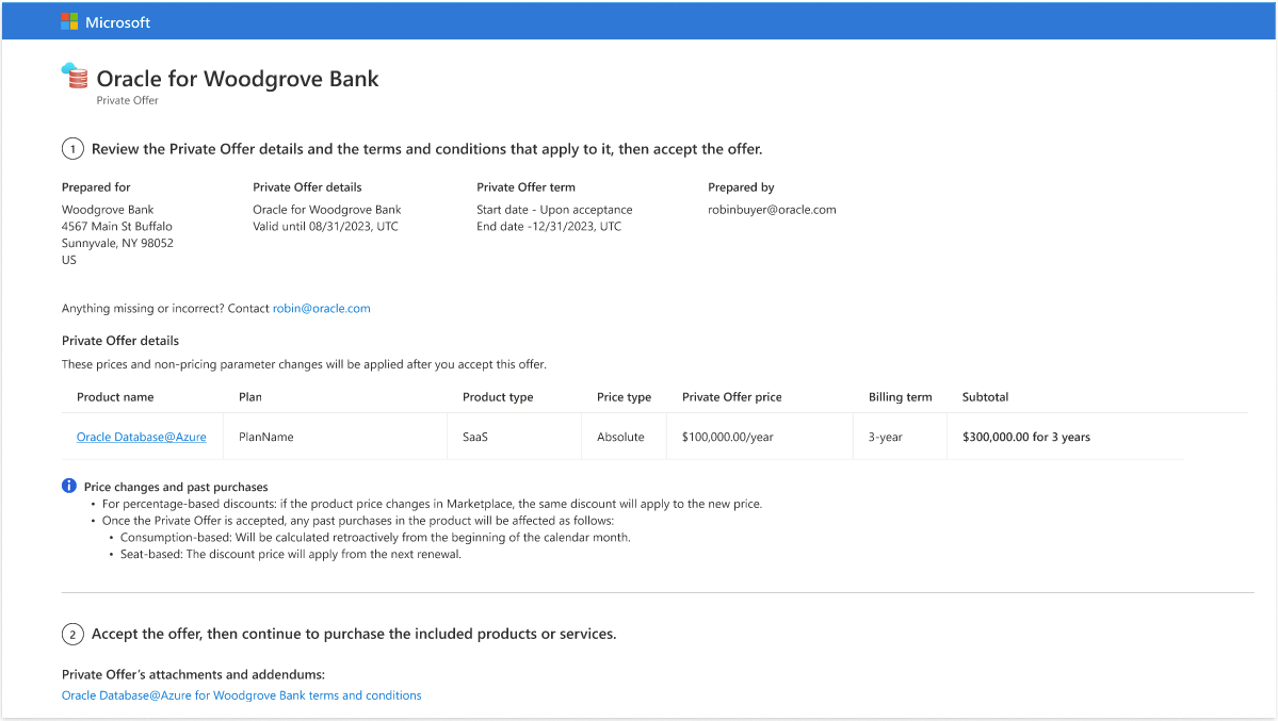
Review the offer details, then accept and subscribe to the Private Offer. For more information on private offers in the Azure Marketplace, see Private offers in Azure Marketplace.
- Review the terms and conditions by clicking the "terms and conditions" link on the Private Offer page under Private Offer's attachments and addendums.
- Select the checkbox for I have read the offer's terms and conditions after reviewing the terms and conditions.
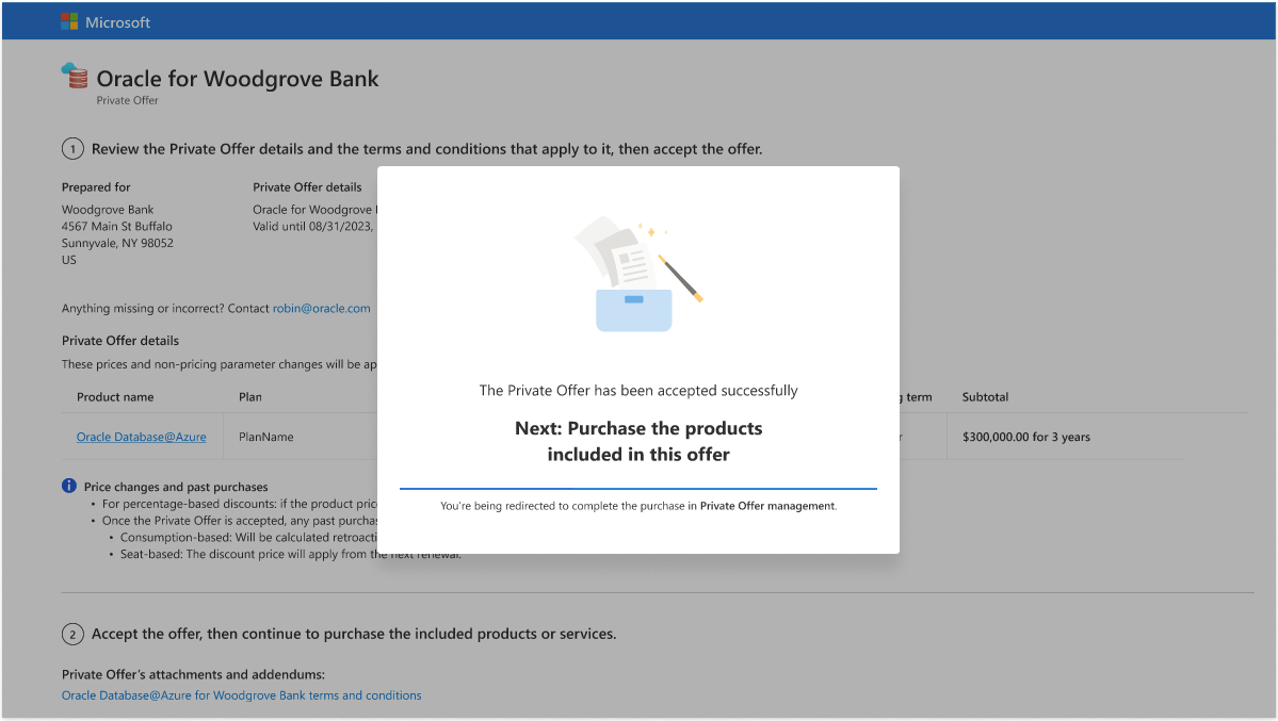
- Select the Accept Private Offer button.
- After a few moments, the Azure portal displays a confirmation message that says "The Private Offer has been accepted successfully." Your browser is then redirected to the next screen in the workflow.
-
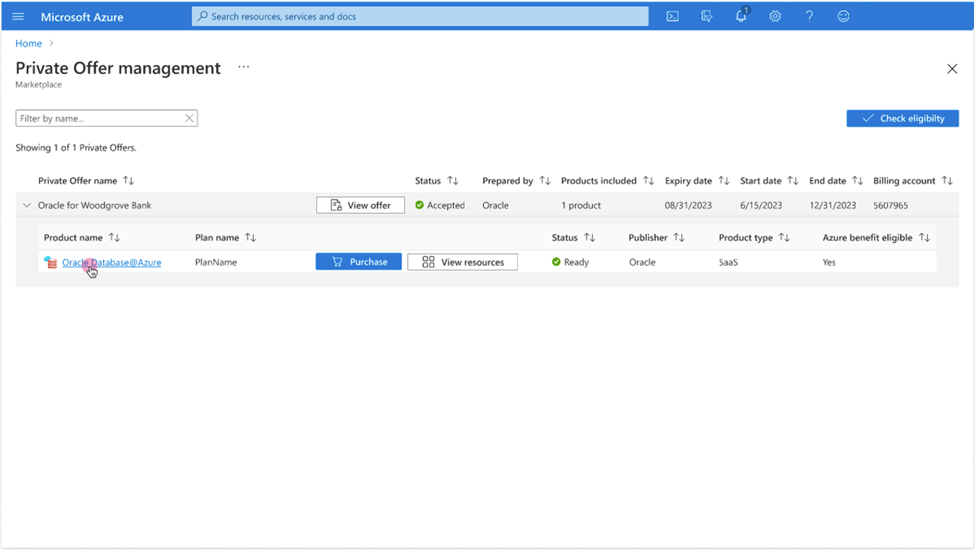
The Azure portal redirects to the Private Offer management page.
Note
It can take up to 60 minutes for your Private Offer to be ready for purchase.
Purchase a Private Offer
Follow steps 1 to 4 to navigate to the Private Offer management page of Azure Marketplace. If the status of your order isn't "Ready", wait a few minutes for the status to change, then continue with the steps to purchase the offer.
- Sign in to the Azure portal.
-
Find your offer in the list of offers and confirm that the Status is "Ready."
-
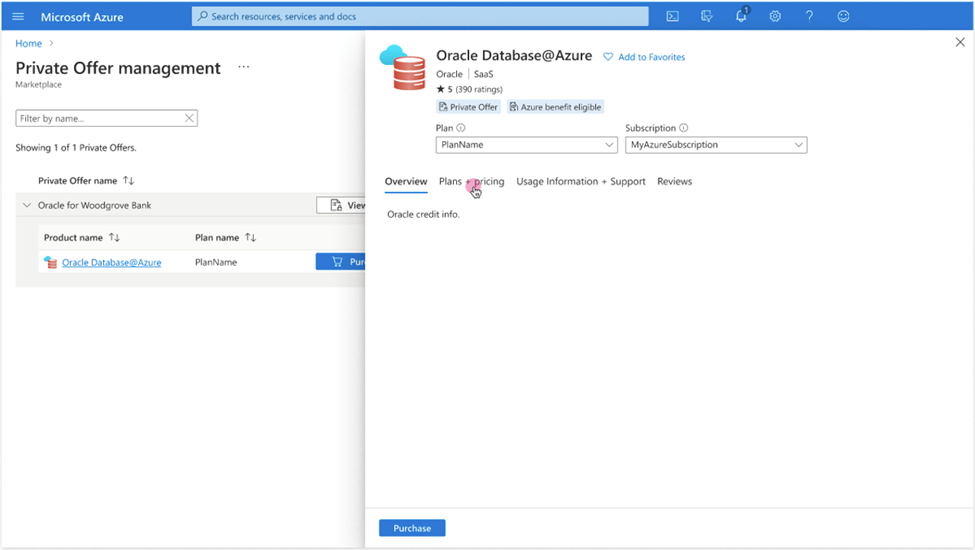
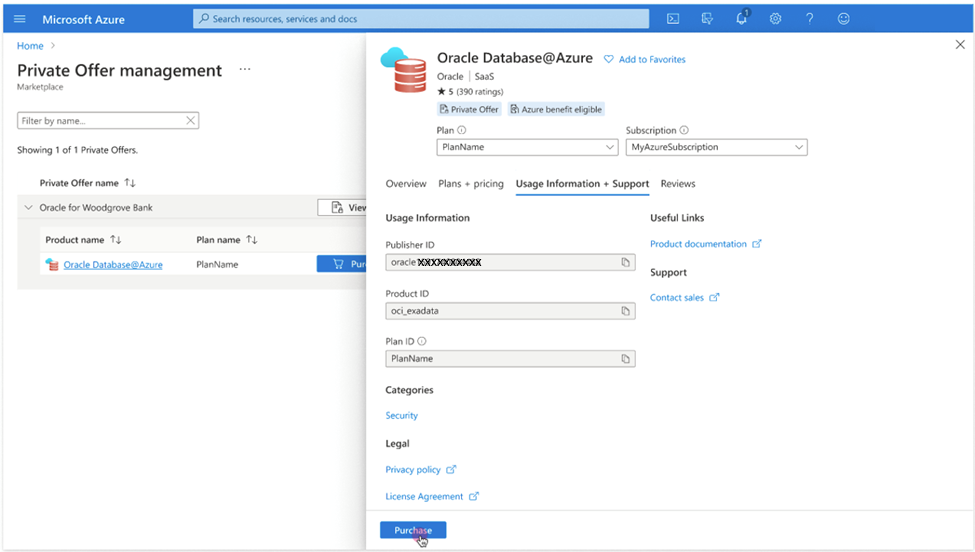
Select the name of the offer to open the purchasing details page. Review the Overview tab, then click the Plans + pricing tab.
-
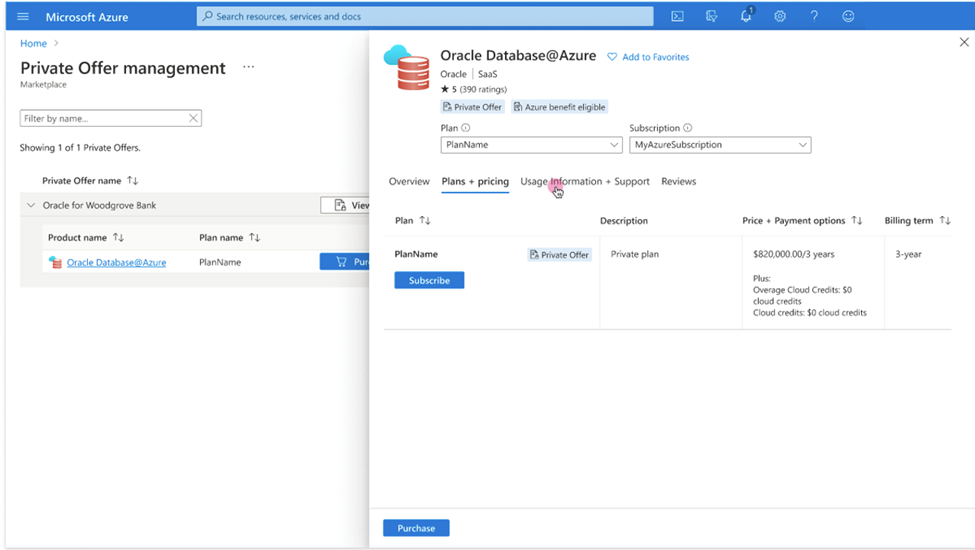
On the Plans + pricing tab, review the Price + Payment options and Billing term details. Ensure that these details are what you expect based on the offer terms you received from Oracle Sales. After reviewing this tab, select Usage Information + Support.
-
On the Usage Information + Support tab, review the product details in the Usage Information section, then select Purchase to open the Create Oracle purchase page.
-
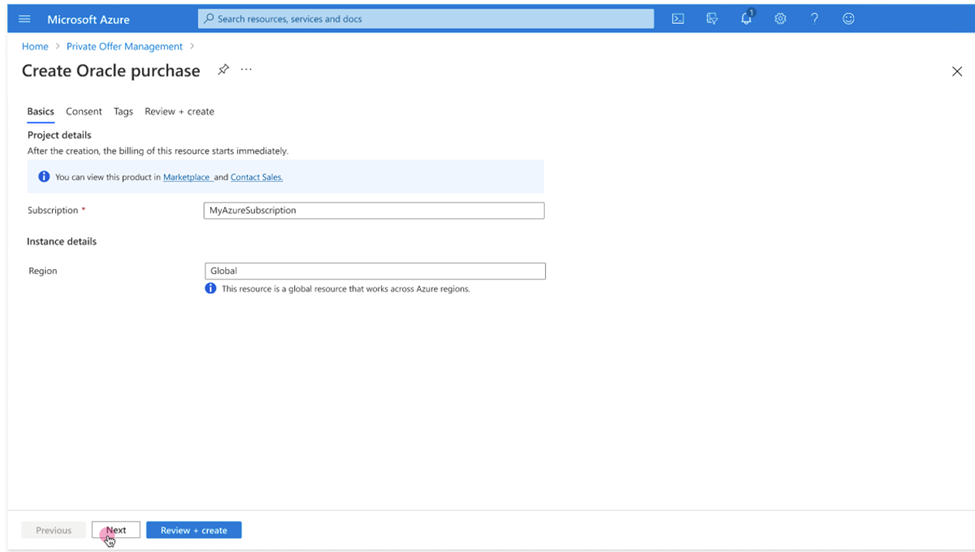
On the Create Oracle purchase page, enter the following details:
- Subscription: Enter the name of the subscription you're using for onboarding.
- Region: This value is set as "Global" by the service.
Select Next.
-
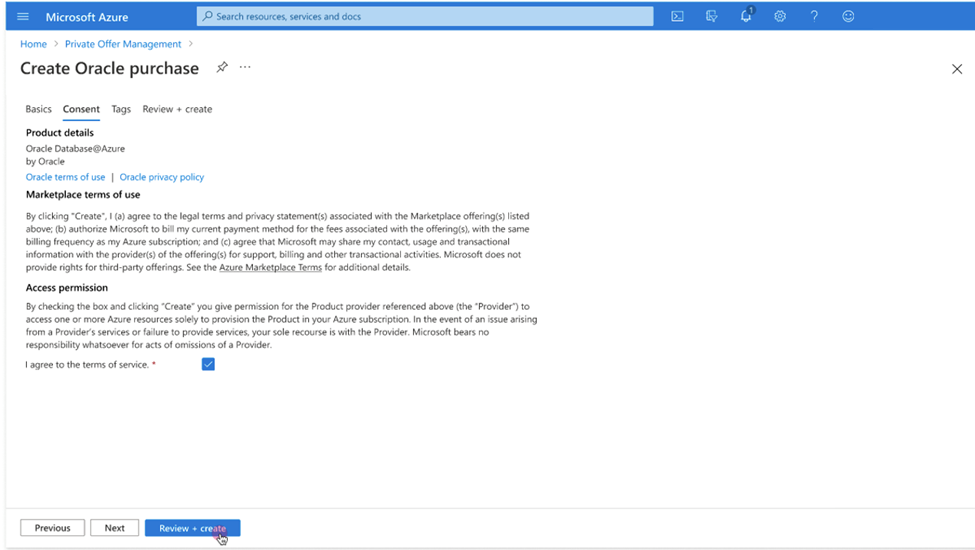
On the Consent tab of the Create Oracle purchase page, review the provided information, then check I agree to the terms of service. Click Review + create to continue.
-
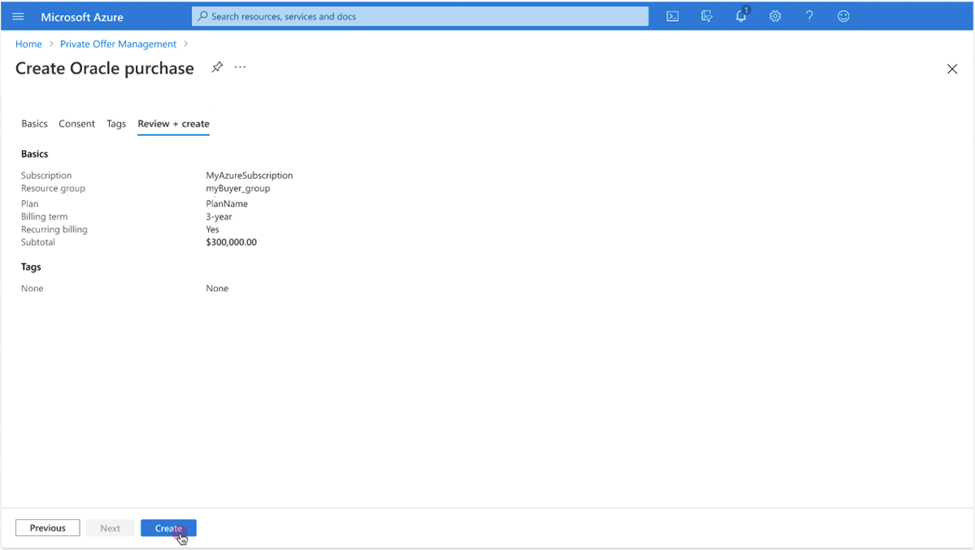
On the Review + purchase tab, review the offer details under Basics. Click Create to purchase the offer. When you click Create, the Azure portal redirects to the deployment Overview page.
-
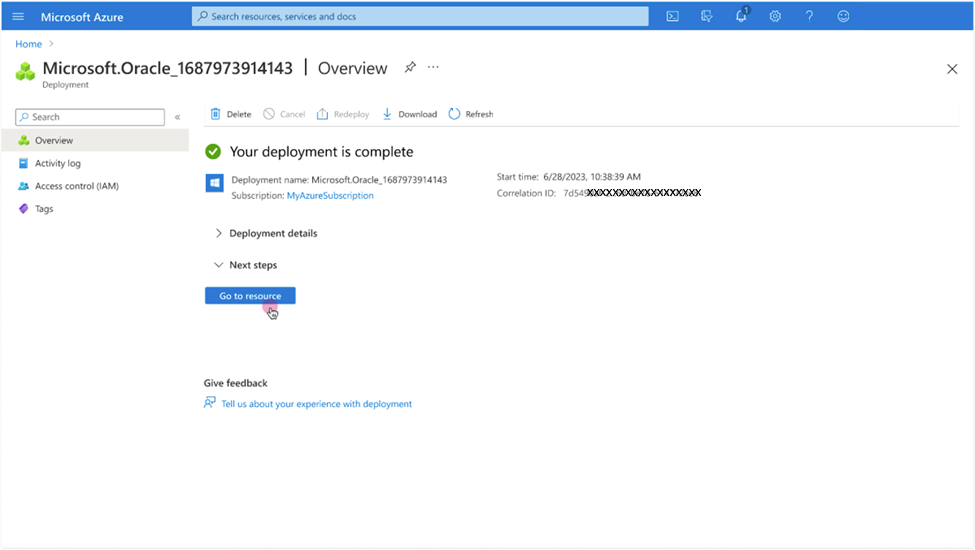
On the deployment Overview over page, watch for the Your deployment is complete message to display. It can take up to five minutes for the deployment to complete. When the deployment is complete, the Go to resource button is active.
- Select Go to resource to navigate to the details page for your Oracle Database@Azure purchase. Before continuing with Link, wait for Oracle to email you the "Action Required: Welcome to New Oracle Cloud Service Subscription(s)" email that lets your know your order has been processed. This takes between 5 and 30 minutes.
Public Offer
After you complete the prerequisites, follow the instructions in this section to purchase the Public Offer.
-
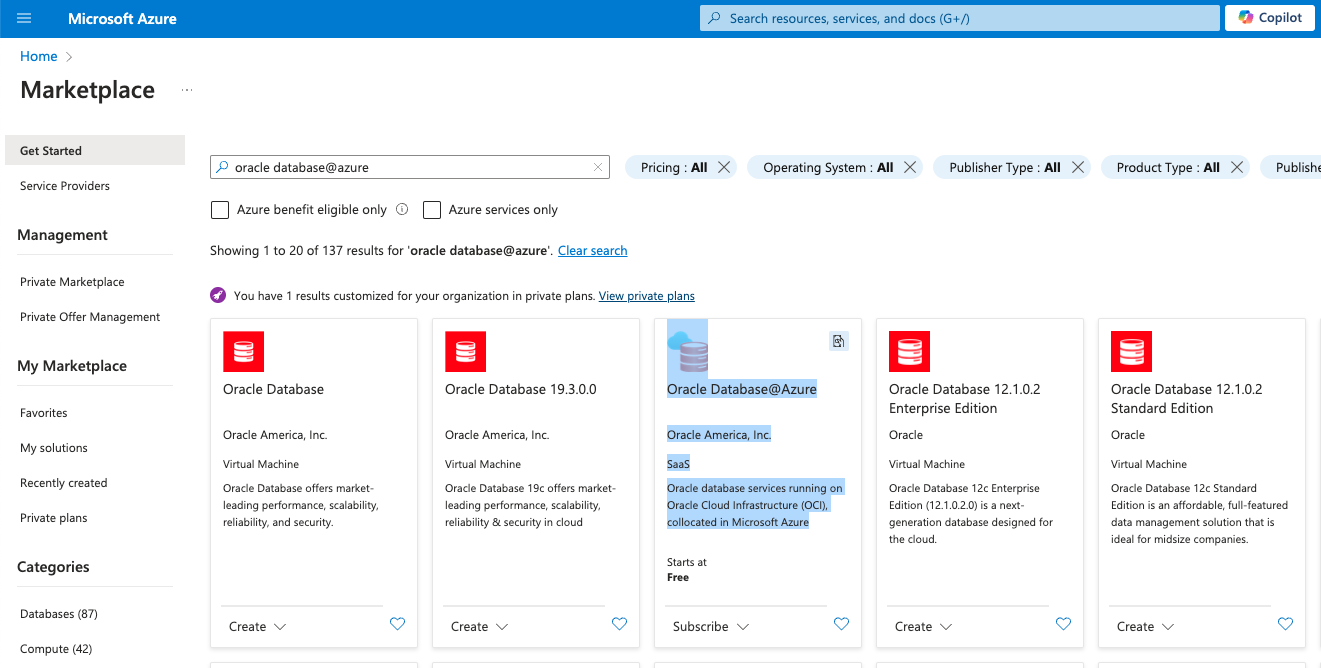
On the Marketplace page, use the Marketplace search tool to search for "Oracle." Select the "Oracle Database@Azure" search result to navigate to the Marketplace product page for the service.
-
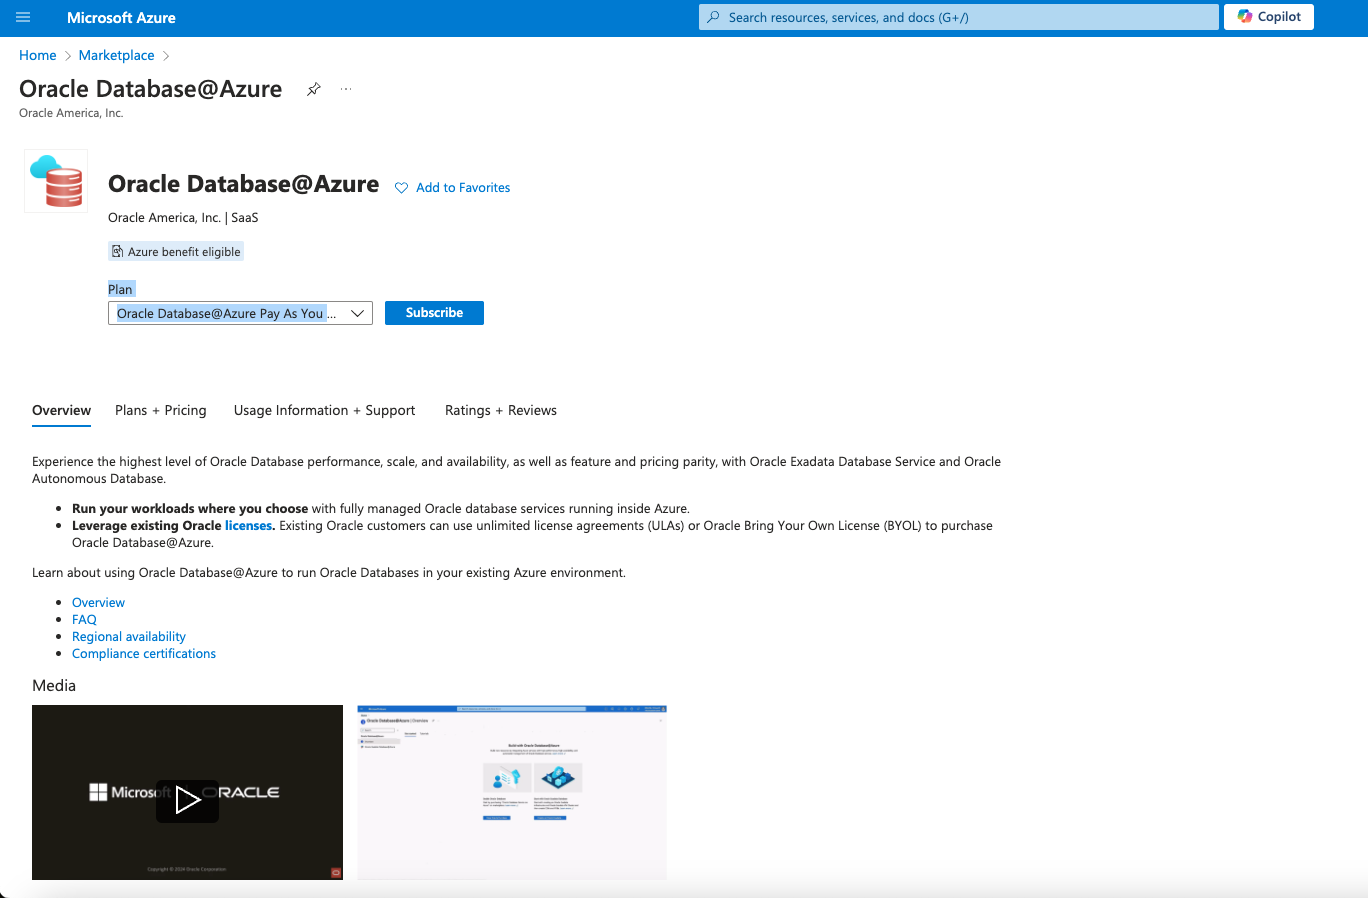
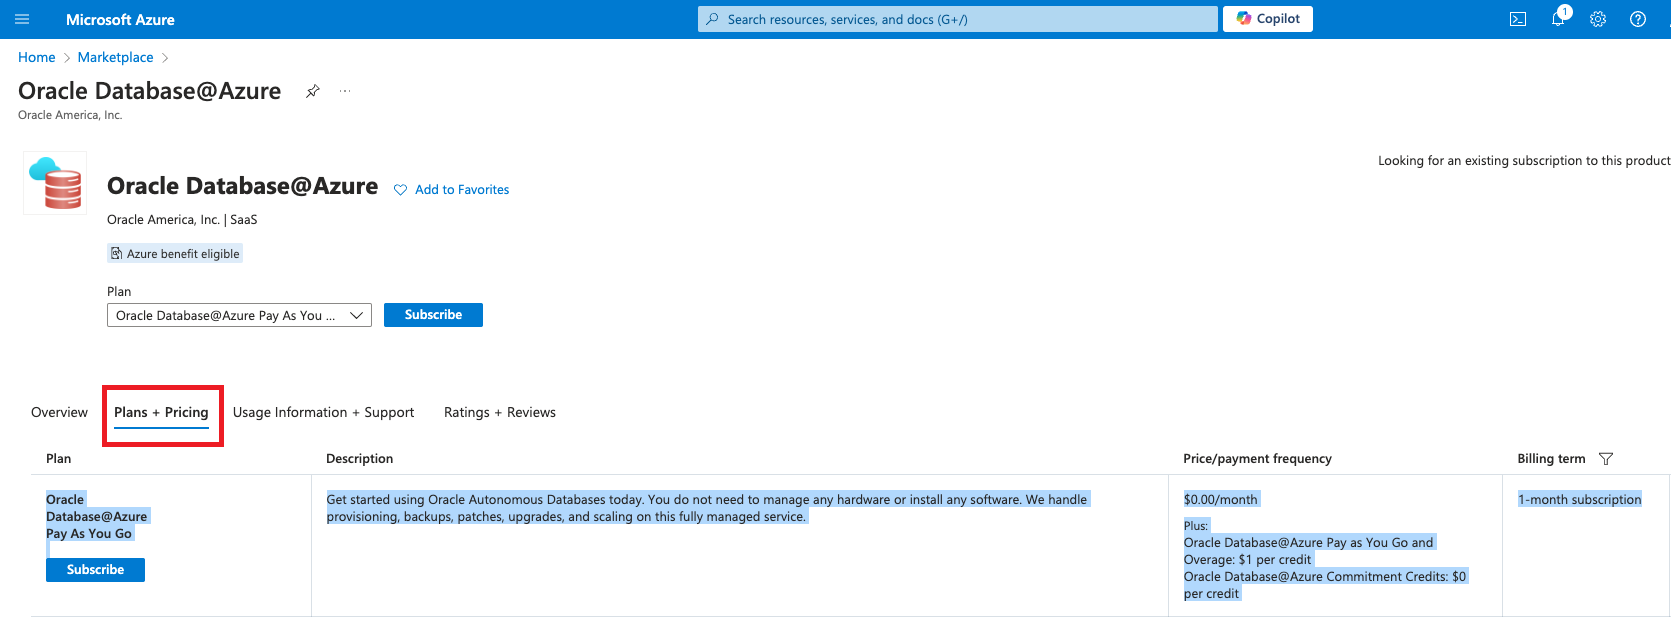
On the Oracle Database@Azure product page, review the information in the Overview, Plans + Pricing, and Usage Information + Support to ensure you understand the pricing, terms, and conditions. Then click Subscribe.
Plans + Pricing tab:
-
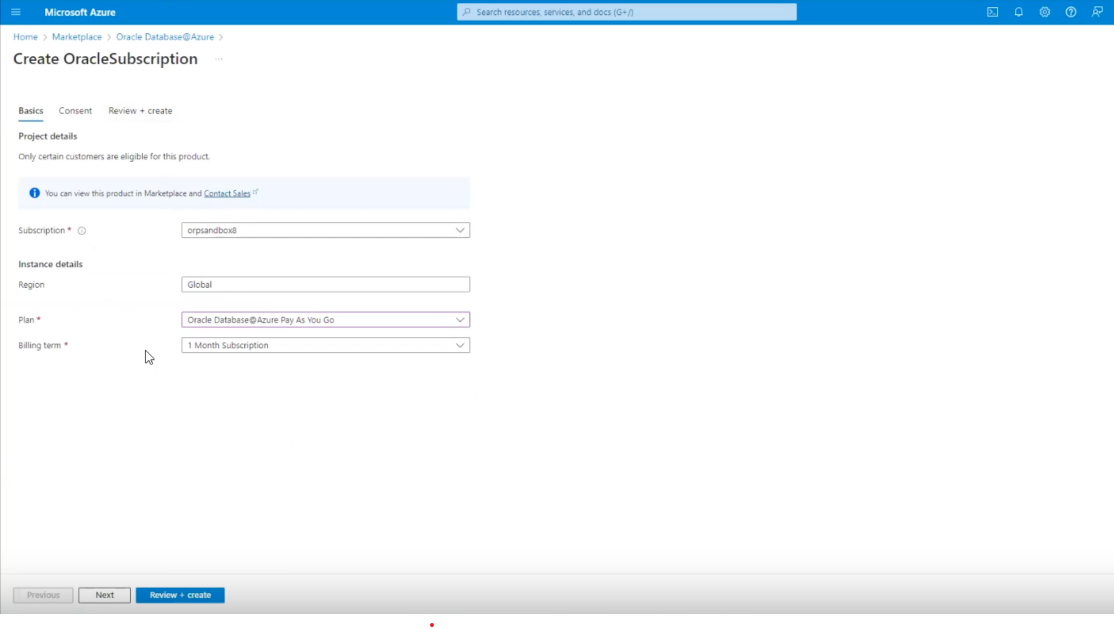
On the Create OracleSubscription page, in the Basics tab, select the following:
- Subscription: Select the Azured subscription you want to use for provisioning your database resources.
- Plan: Select "Oracle Database@Azure Pay As You Go".
- Billing term: Select the billing term that meets your requirements.
Click Next to continue.
-
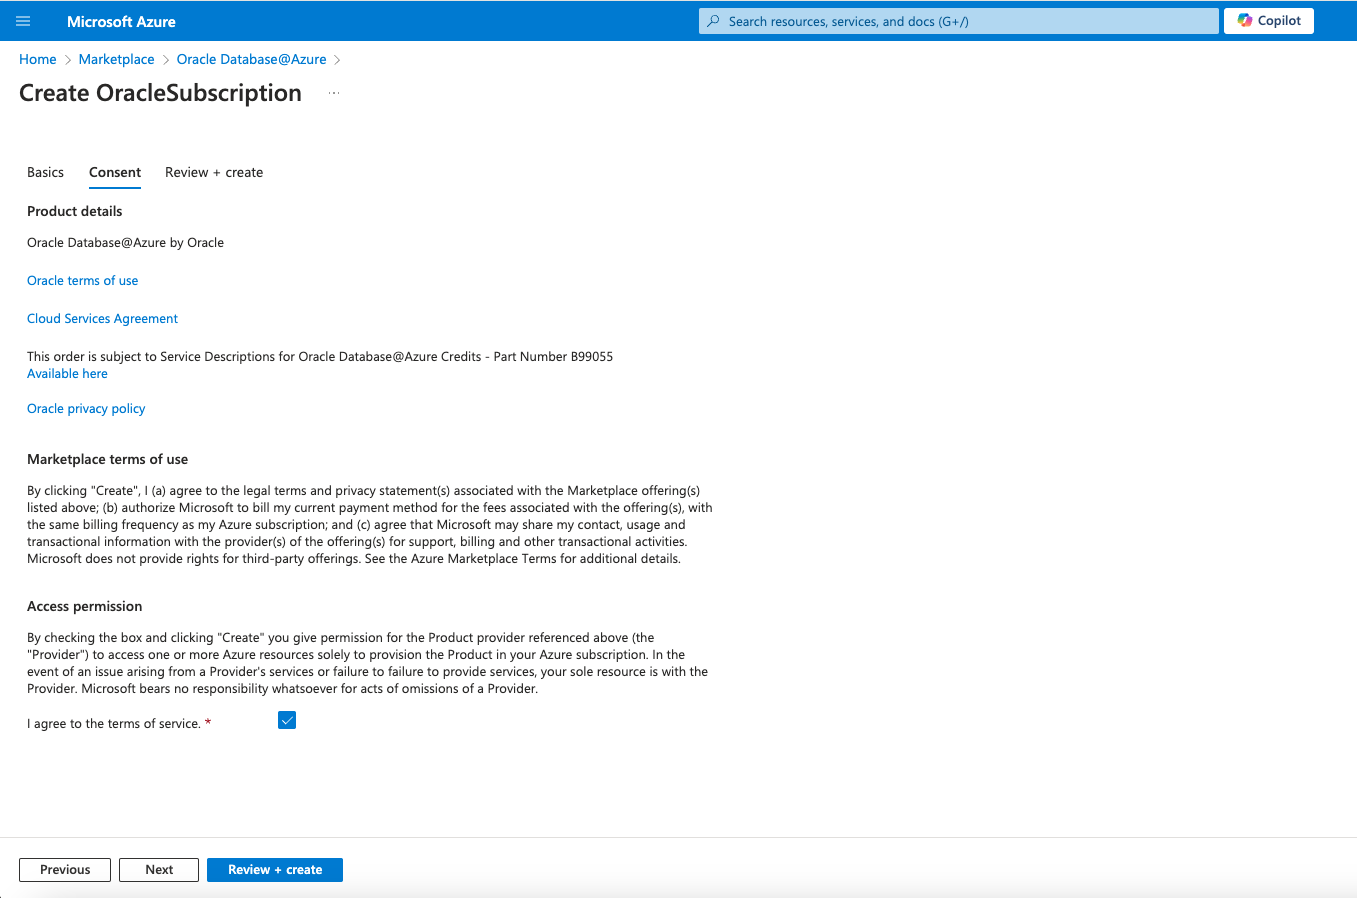
In the Consent tab, read the terms, then check I agree to the terms of service. Select Next to continue.
-
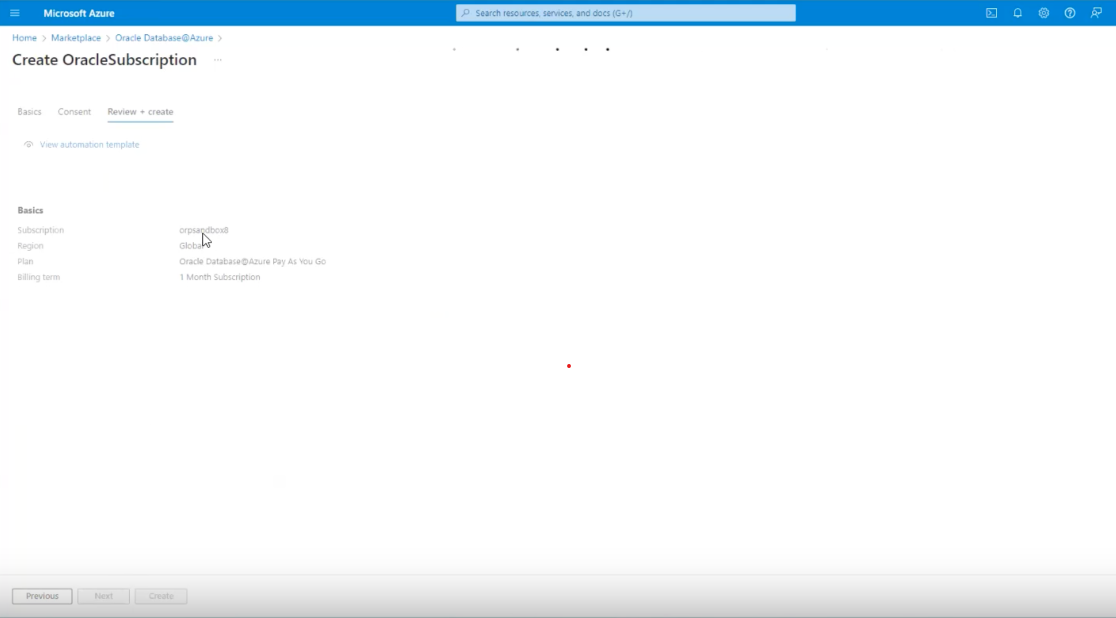
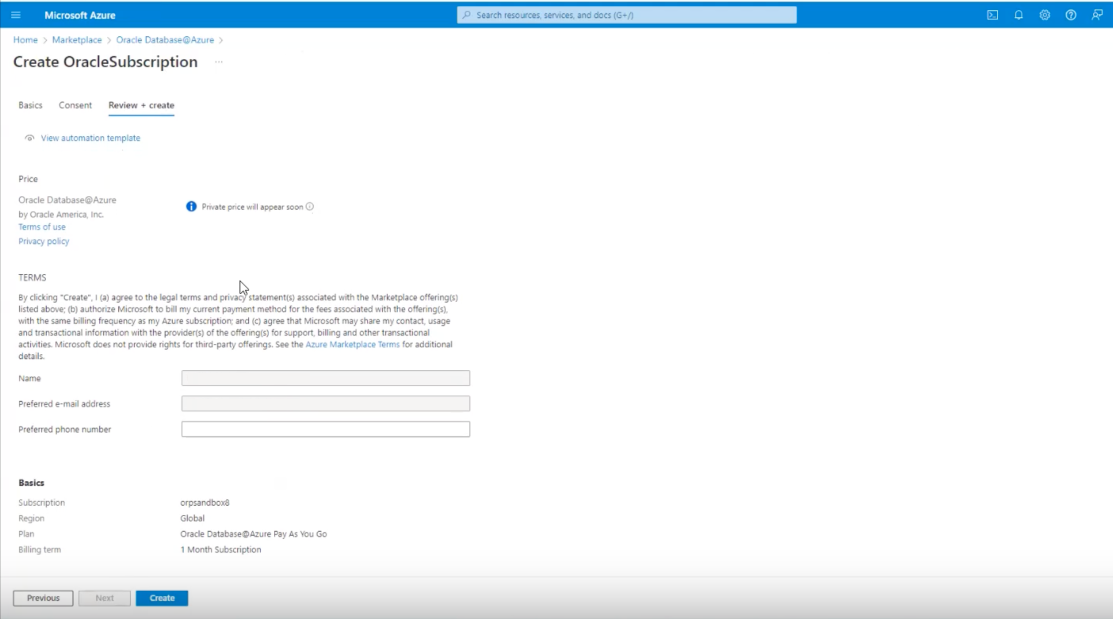
In the Review + create tab, review the purchase details. The complete purchase details might take a few moments to load on the page. After you review the details, Select Create to complete the purchase.
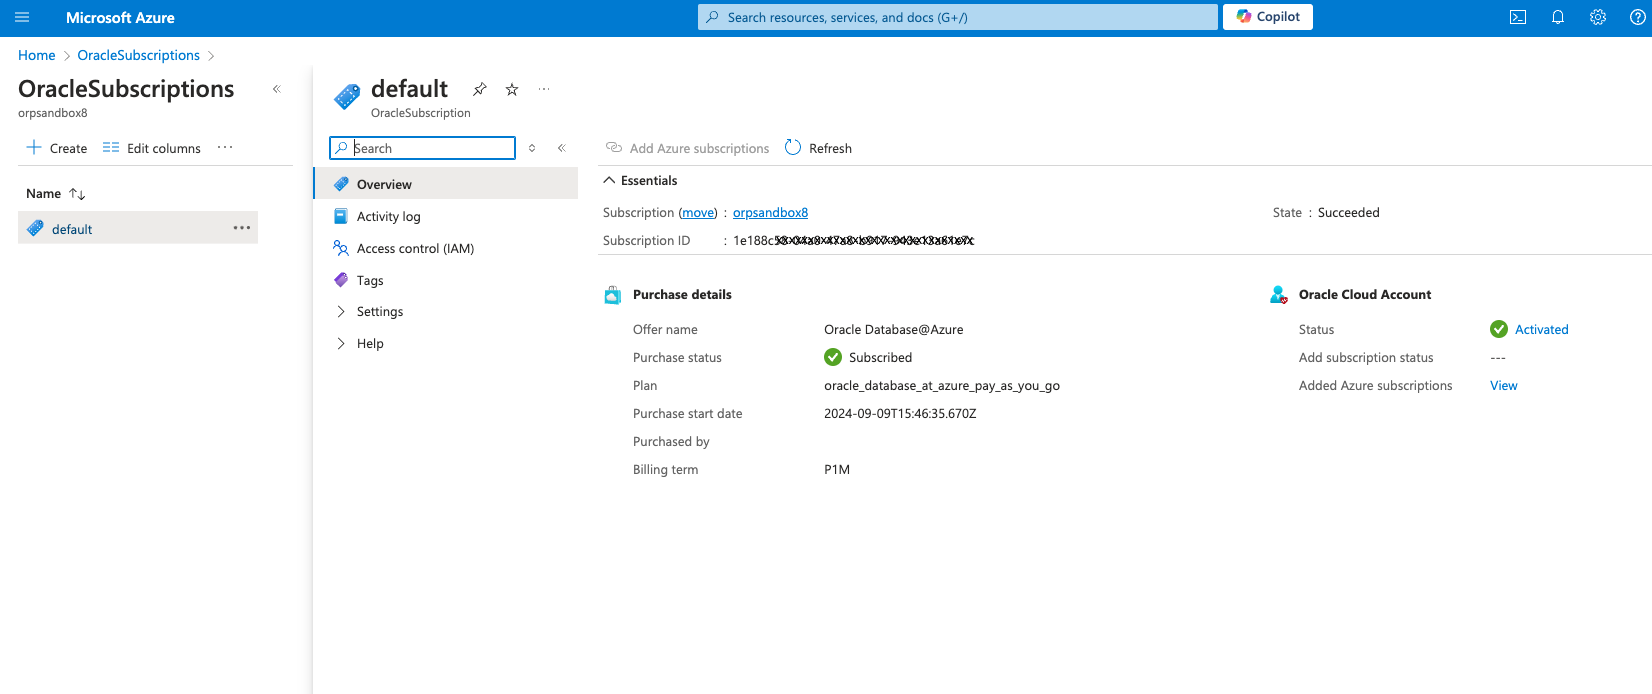
The Azure portal redirects to the OracleSubscription resource page.
- Review the OracleSubscription resource page. In the Oracle Cloud account section, the Status is Pending. This indicates that your OCI account hasn't been linked to your Azure account for the Oracle Database@Azure service deployment.
You receive an email from Oracle after the purchase is complete. After you receive the email, follow the steps in Link to link your cloud accounts. After you link your OCI account, the status is updated to "Activated."
What's Next?
After you purchase your offer, you receive an email from Oracle with the subject line "Action Required: Welcome to New Oracle Cloud Service Subscription(s)." After you have received this email, continue onboarding by completing the steps in Link.
