Cloud Shell Networking
This section describes the three networking modes provided by Cloud Shell.
- OCI Service Network: this is the default mode, and provides access only to other OCI resources in your home region for your tenancy
- Cloud Shell Public Network: this networking mode allows access to the public internet, but must be enabled by your adminstrator
- Private Network Access: a configurable network that allows you to access resources in your private network without having the network traffic flow over public networks
The networking mode for your Cloud Shell session depends on how your administrator has configured your Identity policy.
Cloud Shell OCI Service Network
The Cloud Shell OCI Service Network allows you to access OCI wide services without providing access to the public internet. This is the default Cloud Shell network access if your administrator has not configured an Identity policy.
If your administrator has not set up an Identity policy, you will see the following dialog when Cloud Shell starts:
Cloud Shell restricted network dialog
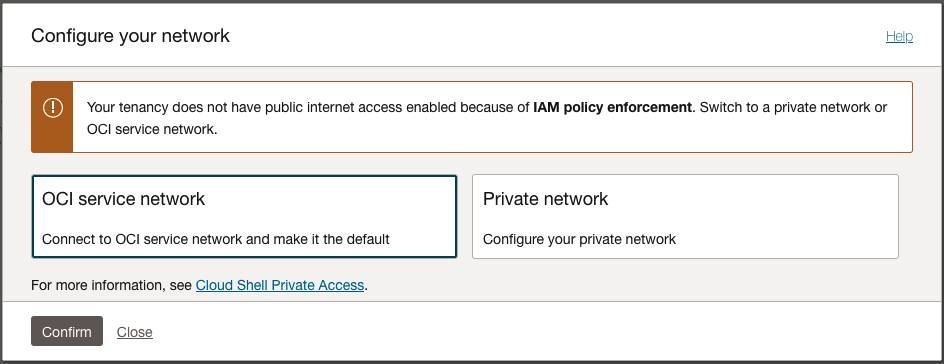
Select Private Network to connect to or create and configure a new Private Network, or select OCI Service Network to keep the default setting.
Cloud Shell Public Network
Cloud Shell Public Network allows access to the public Internet from your Cloud Shell session.
Your adminstrator must configure access to the Cloud Shell Public Network using an Identity policy.
Requirements and IAM Policy
To allow users to access the Cloud Shell managed Public Network, you'll need to grant user access via an Identity policy.
allow group <GROUP-NAME> to use cloud-shell-public-network in tenancyPublic network IAM policies and Security Zone policies may take up to 24 hours to take effect for existing Cloud Shell Sessions. You can enact policy updates immediately by restarting your Cloud Shell from the Actions menu.
Cloud Shell Administrators can use the Cloud Shell Security Zone policy to restrict Public Network usage for all users in the tenancy (including tenancy administrators) regardless of the IAM policy. Security zone policy restricts cloud shell managed Public Network usage for all users in the tenancy including tenancy administrators. See Security Zones for more details.
Cloud Shell Private Networking
Cloud Shell Private Networking allows you to connect a Cloud Shell session to a private network so you can access resources in your private network without having the network traffic flow over public networks. Examples of where Private Networking can be useful include using it to SSH into compute instances inside of a private network or managing a private OKE cluster.
A Cloud Shell instance is a private instance, and works like a private instance for the purposes of network setup. Using only an internet gateway will not allow egress to the internet from a private subnet - you must use a service gateway or a NAT gateway. For more information, see the Internet Gateway documentation.
Requirements and IAM Policy
To use Private Networking, you (or an administrator) will need to specify the following policies:
-
allow group <group> to use subnets in compartment <compartment> -
allow group <group> to use vnics in compartment <compartment> -
allow group <group> to use network-security-groups in compartment <compartment> -
allow group <group> to inspect vcns in compartment <compartment>
If you're new to policies, see Managing Identity Domains and Common Policies.
You'll also need to create private VCNs and Subnets in the appropriate compartments. For more information, see VCNs and Subnets in the Networking documentation.
Cloud Shell Private Networking Limitations
- You'll need to create private VCNs and Subnets in the appropriate compartments. For more information, see VCN and Subnet Management in the Networking documentation.
- You can have up to 5 favorite private networks assigned.
- A temporary ephemeral network is only valid for the length of your Cloud Shell session, and will not be persisted to your list of defined private networks.
- Only VCNs and Subnets in your home region are available for creating a Private Network. If you need to access a subnet in a region that is not your home region, you can use peering from the subnet used by Private Networking to reach it. For more information, see VCN Cross-Region Peering.
- A subnet chosen for a Cloudshell Private Network must have at least one non-reserved IP address for the subnet's CIDR block available. If all non-reserved IP addresses have been allocated, Cloudshell cannot attach to that subnet.
- A subnet can only have a maximum of 5 associated network security groups.
- Resolving endpoints through custom DNS resolvers is not supported.
Using Cloud Shell Private Networking
This section covers how to use Cloud Shell Private Networking.
Selecting a Network
To change which network your Cloud Shell session is using, use the drop-down Network menu at the top of the Cloud Shell terminal window: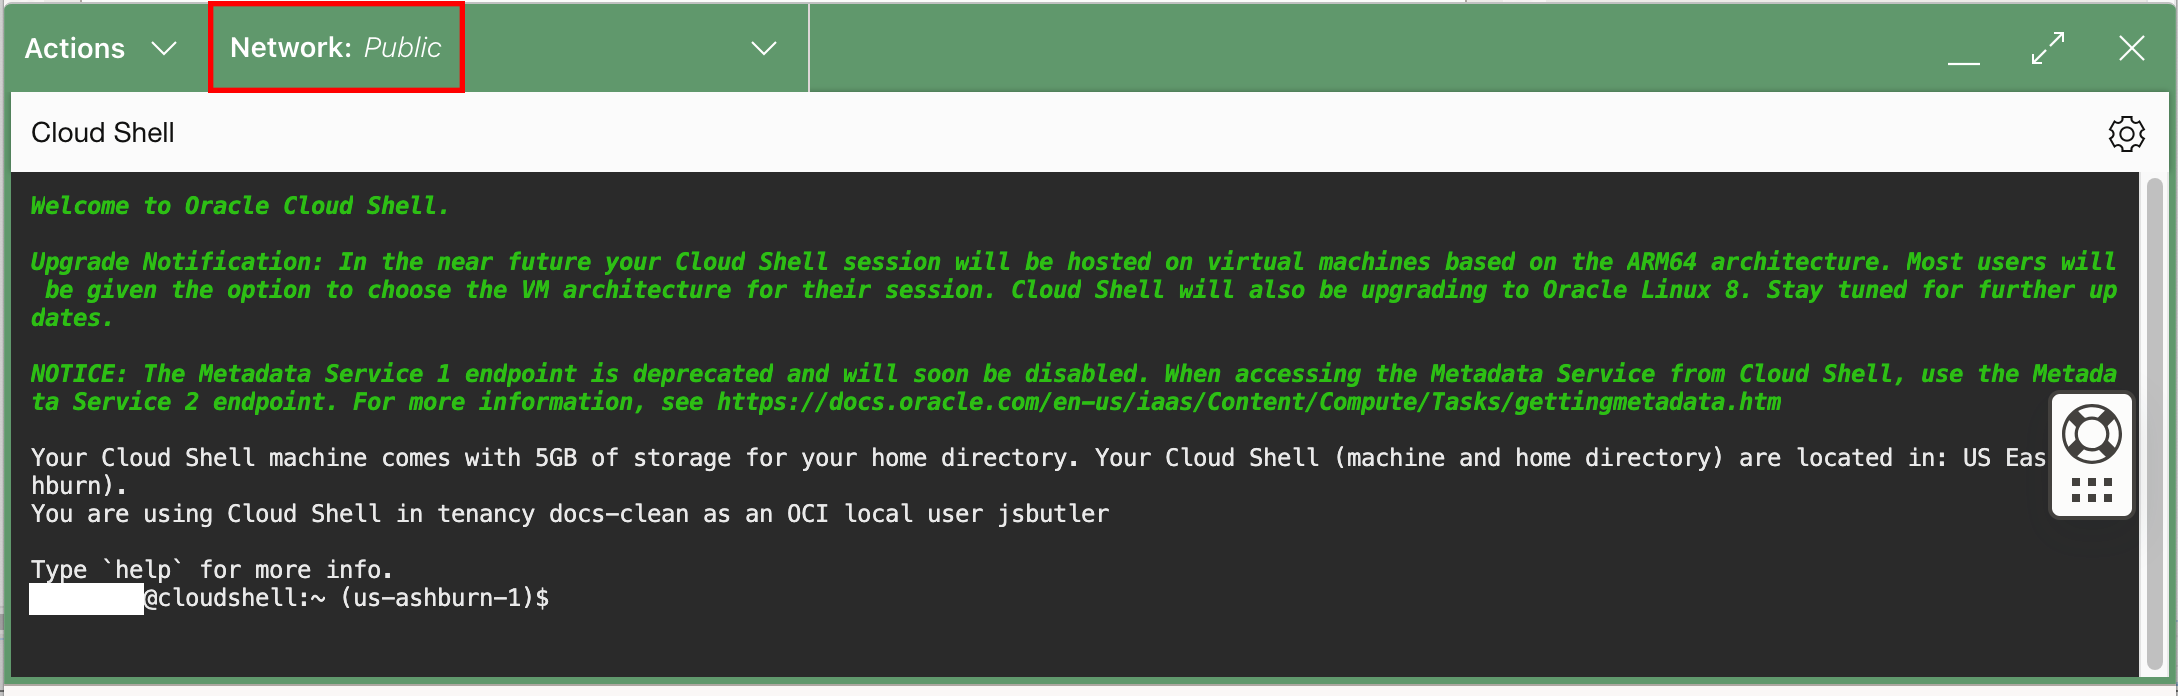
The network selection menu appears:

From this menu you can select a network connection, access the list of private network definitions, or create an ephemeral (temporary) private network.
Using the Private Network Definition List
The Private Network Definition List item on the network selection menu
displays the Private Network Definition List panel: 
This panel allows you to create or modify private networks, designate favorite private networks, and select a default network.
Designating favorite networks
You can designate up to 5 favorite networks. To designate a network network as a favorite, click the star in the Favorite column.
Selecting a default network
You can select a default network from the drop-down list in the Default network panel. This is the network that is used when a new Cloud Shell session starts.
Creating a new private network definition
To create a temporary ephemeral network, select Ephemeral Private Network Setup from the network selection drop-down. This is temporary network is only valid for the length of your Cloud Shell session, and will not be persisted to your list of defined private networks.
Enter a name for your private network definition in the Name text box.
Only VCNs and Subnets in your home region are available. If you need to access a subnet in a region that is not your home region, you can use peering from the subnet used by Private Networking to reach it. For more information, see VCN Cross-Region Peering.
A subnet chosen for a Cloudshell Private Network must have at least one non-reserved IP address for the subnet's CIDR block available. If all non-reserved IP addresses have been allocated, Cloudshell cannot attach to that subnet.
For example:

If you want to set this definition as the active network, enable the Use as active network checkbox.
Click the Create button to create your Cloud Shell private network definition.
If you selected the Use as active network checkbox, your Cloud Shell session will be connected to your private network, as indicated in the Network drop-down at the top of the Cloud Shell terminal session:
![]()
You can see details about your private network connection by clicking the Details link:
