Security
These are the components that are available in the Security category of YAML-based dialog flow editor.
System.OAuth2Client
This topic covers use of this component in YAML mode. For information on using it in the Visual Flow Designer, see OAuth 2.0 Client.
Use this component to obtain an OAuth2 access token of grant type Client Credentials. That is, you use it to get an access token that's based on the client's credentials, and not the user's name and password. You can use this component to get a token that enables access to client resources that are protected by Oracle Identity Cloud Service or Oracle Access Manager (OAM).
If you need to access resources on behalf of a user, see System.OAuth2AccountLink and System.OAuthAccountLink.
Before you can use this component in a skill, you must do the following tasks:
- If it isn't already registered, register the client with the identity provider as described in Identity Provider Registration.
- Add a client-credentials authentication service for the identity provider, as described in Authentication Services.
| Property | Description | Required? |
|---|---|---|
authenticationService |
The name of the client-credentials service that you created in the Authentication Services UI for the OAuth2 identity provider. | Yes |
accessTokenVariableName |
Specifies the variable to store the access token in. You can declare it in the context node as a variable, a string, or another supported variable type. It also can be a user-scoped variable. For example: user.accessToken.
|
Yes |
This component doesn't have any actions. To handle system problems that might occur, add a next transition that goes to a state that can handle such errors.
Here's an example of a state that uses this component:
  getAccessToken:
    component: "System.OAuth2Client"
    properties:
      authenticationService: "myAuthenticationService"
      accessTokenVariableName: "myAuthServiceToken"
    transitions:
      next: "next"
      error: "error" # handle auth service issues
System.OAuth2AccountLink
This topic covers use of this component in YAML mode. For information on using it in the Visual Flow Designer, see OAuth 2.0 Account Link.
Use this component to obtain an OAuth2 user access token (grant type Authorization Code) for resources that are secured by OCI IAM, Oracle Access Manager (OAM), Microsoft identity platform, or Google OAuth 2.0 authorization. This component completes all the steps for the 3-legged OAuth2 flow and returns the OAuth2 access token.
You can use the requiresAuthorization setting to indicate which states require authorization before they can be invoked. For the states that require authorization, if the user hasn't authorized yet, the System.OAuth2AccountLink state is invoked, and then the flow invokes the state that required authorization. You can learn how to use this feature in User Authorization in Group Chats (it works for all types of chats, not just group chats).
If you need to obtain an access token of grant type Client Credentials to access client resources, see System.OAuth2Client.
Before you can use this component in a skill, you must do the following tasks:
- If it hasn't been registered already, then register the client with the identity provider as described in Identity Provider Registration.
- Add an authentication service for the identity provider, as described in Authentication Services.
Some identity providers issue refresh tokens. When you use this component, Digital Assistant stores the refresh token for the retention period that's specified for the authentication service. The Digital Assistant backend can use the refresh token, if available, to get a new access token without the user having to sign in again.
Tip:
In skills with platform version 21.04 and later, the default values for thecancelLabel, linkLabel, and prompt properties are stored in the skill's resource bundle. To change a default, open the skill's Resources Bundle page, click You also can change the Other - oauthCancelPrompt and the Other - oauthSuccessPrompt messages in the configuration bundle.
| Property | Description | Required? |
|---|---|---|
accessTokenVariableName
|
Specifies the variable to store the access token in. If the variable is user-scoped, such as user.accessToken, then it can be shared across skills.
Defaults to |
No |
authenticatedUserVariableName
|
Specifies the variable in which to store the authenticated user name (the name that’s known by the identity provider). If the variable is user-scoped, such as user.authenticatedUser, then it can be shared across skills.
Defaults to |
No |
authenticationService
|
The name of the authorization-code service that you created in the Authentication Services UI for the OAuth2 identity provider. | Yes |
autoNumberPostbackActions
|
When set to true, this option prefixes a number to the cancel option, which is a server-side postback action. It doesn't prefix a number to the option to get an access token because that is a URL action, which is a client-side action that can't be prefixed with a sequence number.
Even when you haven’t set this option to See Auto-Numbering for Text-Only Channels in YAML Dialog Flows and |
No |
cancelLabel
|
Use to override the label for the button that the users can click to leave state without invoking the authentication dialog. The default label is Cancel.
|
No |
enableSingleSignOn
|
(MS Teams only) If you have set up Microsoft Teams single sign on (SSO), then you can set this to true so that users who have already signed into MS Teams don't have to sign into the skill. The default is false. See SSO Configuration for Microsoft Teams Channels.
SSO isn't supported for use with the calendar components. |
No |
footerText
|
Enhances the login dialog by adding text beneath the login and cancel options. As described in Footers, you can use FreeMarker expressions to conditionalize the footer text for text-only channels. | No |
linkLabel
|
Use to override the label for the button that the users can click to invoke the authentication dialog. The default label is Get an access token.
|
No |
prompt
|
The string to use to prompt the user instead of the default Please sign in.
|
No |
showCancelOption
|
(Optional) Enables you to specify whether or not to display the Cancel button. By default, this option is set to true, meaning that the Cancel button is displayed. In some cases, such as for SMS channels, you might not want to display this button. You can configure such behavior with an expression like: |
No |
translate
|
Use this optional boolean property to override the boolean value of the autoTranslate context variable. Note that autoTranslate is false (exclude from autotranslation) unless that context variable has been explicitly set to true.
|
No |
updateUserProfile
|
If the identity provider is an OCI IAM identity domain, and you want to store the user's profile from IAM for the duration of the session, then set this property to true. When a user is challenged for authentication, if this property is set to true, the component will try to fetch the user profile data from the identity provider and set the results in the userProfile.<authorization service> map. By default, the value is false. See Store User Profile for the Duration of the Session.
|
No |
This component can return the following actions:
| Action | Description |
|---|---|
fail
|
The user clicked the cancel button. |
pass
|
The access token was retrieved successfully. |
textReceived
|
The user entered text instead of clicking the cancel button or authenticating successfully. |
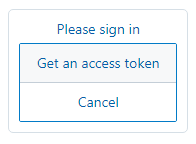
When the dialog engine encounters the component, the skill bot prompts the user with two links: Get an Access Token and Cancel (you can use linkLabel and cancelLabel to change the link text).

Description of the illustration oauth2accountlinksignin1.png
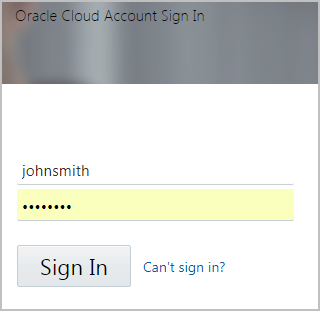
If the user clicks the link to get an access token, it displays the identity provider’s login page or authentication dialog as specified by the authentication service. After successful login, it obtains the access token, sets the values for the variables identified by accessTokenVariableName and authenticatedUserVariableName, and then flows to the state that's named by the pass action (or to the next state if there isn't a pass action). If the user cancels, the postback action is set to fail. If the user enters text, it returns the textReceived action.

Description of the illustration oauth2accountlinksignin2.png
As mentioned earlier, you can set requiresAuthorization for a state to ensure that the user is authorized before invoking the state's component. If the user hasn't authorized yet, the dialog invokes the system.authorizeUser action in defaultTransitions. Here's an example:
main: true
name: RequiresAuthorizationExample
context:
  variables:
    iResult: "nlpresult"

defaultTransitions:
  actions:
    system.authorizeUser: "login"

states:
  intent:
    component: "System.Intent"
    properties:
      variable: "iResult"
    transitions:
      actions:
        reg.general.showPasscode: "showPasscode"
        reg.general.showPhoneNumber: "showPhoneNumber"
        unresolvedIntent: "handleUnresolved"

  showPasscode:
    component: "System.Output"
    requiresAuthorization: true
    properties:
      text: "XYZABC123"
    transitions:
      return: "done"

  showPhoneNumber:
    component: "System.Output"
    requiresAuthorization: false
    properties:
      text: "555-1212"
    transitions:
      return: "done"

  handleUnresolved:
    component: "System.Output"
    requiresAuthorization: false
    properties:
      text: "You can ask for my phone number or ask for the passcode."
    transitions:
      return: "done"

  login:
    component: "System.OAuth2AccountLink"
    properties:
      prompt: "${profile.firstName}, please login"
      authenticationService: "MyAuthenticationService"
      accessTokenVariableName: "user.accessToken"
      authenticatedUserVariableName: "user.authenticatedUserId"
    transitions:
      actions:
        pass : "${system.requestedState}"
        fail : "handleFailedLogin"
        textReceived: "intent"

  handleFailedLogin:
    component: "System.Output"
    requiresAuthorization: false
    properties:
      text: "Sorry, you aren't authorized to do that"
    transitions:
      return: "done"
Store User Profile for the Duration of the Session
If your skill needs to control the dialog flow based on the user's OCI IAM identity domain profile, then set the System.OAuth2AccountLink component's updateUserProfile property to true. This enables you to get the IAM user's profile information from the userProfile.<authorization service> map.
When updateUserProfile is set to true, the System.OAuth2AccountLink component fetches the user profile from IAM and stores the data in an object in the userProfile.<authorization service> map.
Say, for example, that your dialog flow has this state:
  oauth2AccountLink:
    component: "System.OAuth2AccountLink"
    properties:
      authenticationService: "myIAMProvider"
      authenticatedUserVariableName: "user.authuser"
      accessTokenVariableName: "user.accessToken"
      updateUserProfile: true
    transitions:
      actions:
        pass: "askGreeting"
        fail: "fail"
        textReceived: "authTextReceived"
After the user signs in, the userProfile.myIAMProvider object is seeded with the user's profile from IAM, as shown in this example:
"userProfile.myIAMProvider": {
  "sub": "myUsername",
  "website": "",
  "birthdate": "",
  "email_verified": false,
  "gender": "",
  "updated_at": 1584561296,
  "name": "First Last",
  "preferred_username": "myUsername",
  "given_name": "First",
  "family_name": "Last",
  "email": "first.last@oracle.com",
  "appRoles": [
    {
      "appName": "some-instance-1_APPID",
      "displayName": "RoleName",
      "appID": "1234567abcd12345",
      "name": "some-instance-1_APPID",
      "adminRole": false,
      "legacyName": "some-instance-1.RoleName",
      "id": "1234567abcdefg",
      "$ref": "http://some/path/v1/AppRoles/a111234567abcdefg"
    }
  ]
}
Handle Multiple Authentication Services
If the skill bot needs access tokens from multiple authentication services, you can specify unique access-token and authenticated-user variable names for each use of this component as shown in this example:
...
states:
# First Authentication Service
  getAccessToken1:
    component: "System.OAuth2AccountLink"
    properties:
      authenticationService: "AuthService1"
      accessTokenVariableName: "user.accessToken1"
      authenticatedUserVariableName: "user.authenticatedUser1"
    transitions:
      actions:
        pass: "getAccessToken2"
        textReceived: "handleAuthTextResponse"
        fail: "authCancelled"
# Second Authentication Service
  getAccessToken2:
    component: "System.OAuth2AccountLink"
    properties:
      authenticationService: "AuthService2"
      accessTokenVariableName: "user.accessToken2"
      authenticatedUserVariableName: "user.authenticatedUser2"
    transitions:
      actions:
        pass:  "getBankUserProfile"
        textReceived: "handleAuthTextResponse"
        fail: "authCancelled"
...
System.OAuth2ResetTokens
This topic covers use of this component in YAML mode. For information on using it in the Visual Flow Designer, see Reset OAuth 2.0 tokens.
Use this component to revoke all the logged-in user's refresh and user access tokens from the identity provider that the authentication service represents. It also removes the refresh tokens from the database. To use this component, you must provide the identity provider's revoke refresh token URL in the Authentication Service UI.
The skill must include a state that uses the OAuth2AccountLink component for the same authentication service, and it must be invoked before the state that uses the System.OAuth2ResetTokens component.
| Property | Description | Required? |
|---|---|---|
authenticationService |
The name of the service that you created in the Authentication Service UI for the OAuth2 identity provider. This service must have a valid revoke refresh token URL. | Yes |
This component can return the following action:
| Action | Description |
|---|---|
noRefreshTokenFound |
The authentication service doesn't have any refresh tokens for the user. |
System.OAuthAccountLink
This topic covers use of this component in YAML mode. For information on using it in the Visual Flow Designer, see OAuth Account Link.
Use this component to obtain the authorization code for services that are secured by the authorization code grant flow, such as LinkedIn, Twitter, Google, or Microsoft. The skill’s custom components can exchange the authorization code for an access token, which they then use to invoke the end service.
The component first directs the user to the identity provider’s login page. After a successful login, the component returns the authorization code in a variable, which you use to pass the authorization code to the custom component. The custom component API must exchange the authorization code, client ID, and client secret for an OAuth2 user access token.
You can use the requiresAuthorization setting to indicate which states require authorization before they can be invoked. For the states that require authorization, if the user hasn't authorized yet, the System.OAuthAccountLink state is invoked, and then the flow invokes the state that required authorization. You can learn how to use this feature in User Authorization in Group Chats (it works for all types of chats, not just group chats).
Tip:
In skills with platform version 21.04 and later, the default values for thecancelLabel, linkLabel, and prompt properties are stored in the skill's resource bundle. To change a default, open the skill's Resources Bundle page, click You also can change the Other - oauthCancelPrompt and the Other - oauthSuccessPrompt messages in the configuration bundle.
| Property | Description | Required? |
|---|---|---|
authorizeURL |
The login URL. The authorizeURL Property describes how to configure this URL. | Yes |
autoNumberPostbackActions |
When set to true, this option prefixes a number to the cancel option. Even when you haven’t set this option to true, auto-numbering can be enforced on list items when the digital assistant’s Enable Auto Numbering on Postback Actions configuration is set to true. Channel-specific auto-numbering can be applied to any skill bot that's registered to a digital assistant: |
No |
cancelLabel |
Use to override the label for the button that the users can click to leave state without invoking the authentication dialog. The default label is Cancel.
|
No |
footerText |
Enhances the login dialog by adding text beneath the login and cancel options. As described in Footers, you can use FreeMarker expressions to conditionalize the footer text for text-only channels. | No |
linkLabel |
Use to override the label for the button that the users can click to invoke the authentication dialog. The default label is Log In.
|
No |
prompt |
The string to use to prompt the user to sign in. | Yes |
showCancelOption |
(Optional) Enables you to specify whether or not to display the Cancel button. By default, this option is set to true, meaning that the Cancel button is displayed. In some cases, such as for SMS channels, you might not want to display this button. You can configure such behavior with an expression like: |
Yes |
translate |
Use this optional boolean property to override the boolean value of the autoTranslate context variable. Note that autoTranslate is false (exclude from autotranslation) unless that context variable has been explicitly set to true.
|
No |
variable |
Specifies the variable to store the authorization code in. You can declare it in the context node as a variable, a string, or another supported variable type. It can also be a user variable. | Yes |
This component can return the following actions:
| Action | Description |
|---|---|
fail |
The user clicked the cancel button. |
pass |
The authorization code was retrieved successfully. |
textReceived |
The user entered text instead of clicking the cancel button or authenticating successfully. |
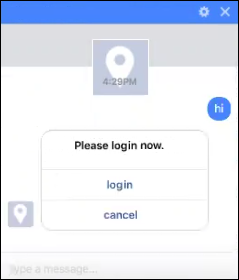
This example shows the required properties that you need to define for the System.OAuthAccountLink component: prompt, which specifies the login message, variable, which tells the component where to store the authorization code, and authorizeURL which defines both the provider’s OAuth URL and the redirect URL that receives the authorization code.
login:
  component: "System.OAuthAccountLink"
  properties:
    prompt: "Please login now."
    linkLabel: "login"
    cancelLabel: "cancel"
    authorizeURL: "https://www.linkedin.com/oauth/v2/authorization?response_type=code&client_id=75k0vq4&scope=r_basicprofile&redirect_uri=https%3A%2F%2FmyBotsinstance%2Fconnectors%2Fv2%2Fcallback"
    variable: "authCode"
  transitions:
      next: getBankUserProfile
      actions:
        textReceived: handleAuthTextResponse
        fail: authCancelled
When the dialog engine encounters this component, the skill bot prompts the user with two links — Login and Cancel.
There are several ways to transition from this component:
-
The user clicks the cancel button and the component transitions to the state that's named by the
failaction. -
The user doesn't click any buttons but enters text instead. The component transitions to the state that's named by the
textReceivedaction. -
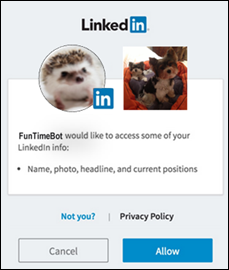
The user clicks the login link and the channel renders the identity provider’s login page or its authentication dialog as a webview, as shown in the example below. After successful authorization, the component transitions to the state that's named by the
passaction (or to the next state if there isn't apassaction), which would typically call a custom component that exchanges the authorization code for an access token.
If the test window doesn’t render the webview, cut and paste the link text into your browser.
The authorizeURL Property
To configure this property, you begin with the identity provider’s URL, such as https://www.linkedin.com/oauth/v2/authorization in the example. Next, append the following OAuth parameters to this URL:
-
response_type: Set tocodebecause the skill bot expects an authorization code. -
client_id: The API key value that you got when you registered your app with the identity provider. -
scope: A list of permissions to access resources on the user’s behalf. These are the permissions that you set when you register your app with the provider. They can vary by provider: for LinkedIn, these includer_basicprofile(shown in the example) andr_emailadress; for Microsoft, they’re defined usingopenid emailandopenid profile. -
redirect_uri: This is the redirect URI that you used to register your app with the identity provider, and tells the provider where to redirect users. This parameter, which is the Digital Assistant service host name appended withconnectors/v2/callback, is the endpoint that receives the authorization code and then associates it with the active channel. Theredirect_uriproperty is based on the Webhook URL that’s generated when you create a channel. See What Are Channels?Ensure that the value that you enter for the
redirect_urimatches the redirect URI that you provided when you registered your app exactly. In both instances, the URI must be appended withconnectors/v2/callback.
If your instance is provisioned on Oracle Cloud Platform (as all version 19.4.1 instances are), use v1 instead of v2.

