Create an Oracle Integration Instance

Create an Oracle Integration instance in a selected compartment.

Some restrictions exist for creating instances. See Restrictions.
Note

  • Your Oracle Integration 3 instance is associated with an IDCS instance during instance creation. You cannot change this association after instance creation.
  • The steps here apply to Oracle Integration 3 and Oracle Integration for SaaS. Differences in instance creation are noted. For more information about the SaaS version, see Oracle Integration for Oracle SaaS.
  • You cannot split a single instance into two shapes (for example, into test and development shapes). Instead, you must create separate instances for each shape.
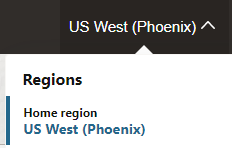
  1. After signing in to the Oracle Cloud Infrastructure Console, note your selected region.
    For information about regions, see Regions and Availability Domains.

    Description of select_region.png follows

  2. Open the navigation menu and click Developer Services. Under Application Integration, click Integration.
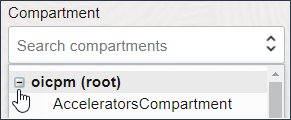
  3. From the Compartment list, click through the hierarchy of compartments and select the one in which to create the instance. You may need to expand the + icon to find the compartment to use. Compartments can contain other compartments. It may take several minutes for the new compartment to appear after the policy has been created.
    Pick a Compartment list expanded to display a hierarchy of compartments

    Note

    Do NOT create your instance in the root or ManagedCompartmentForPaaS compartment.

    The page is refreshed to show any existing instances in that compartment.
  4. Click Create.
  5. Enter the following details, and click Create:
    Field Description

    Display Name

    Enter the display name for the instance. Note that the display name becomes part of the URL for accessing the instance.

    Version

    Note: This field appears only if you can provision both Oracle Integration Generation 2 and Oracle Integration 3 instances. You can provision both instances if at least one of your instances has been upgraded to Oracle Integration 3.

    Select the version for the instance:

    • Oracle Integration Generation 2 is the full-featured premier service, providing features and infrastructure technology including Integrations, Processes, Integration Insight, Visual Builder, B2B for Oracle Integration, File Server, and our portfolio of adapters.
    • Oracle Integration 3 is the latest generation of Oracle Integration, providing the latest features and infrastructure technology including Integrations, Process Automation, Visual Builder, B2B for Oracle Integration, File Server, and our portfolio of adapters.

    Consumption Model

    Lists consumption models available in this tenancy. Typically, one model is displayed, but multiple consumption models are listed if your tenancy is enabled for more than one. Available models include:

    • Metered (Universal Credits)
    • Subscription (OIC4SaaS)
    • Oracle Integration Government

    Edition

    Two editions are provided.

    See Oracle Integration Editions to see what's licensed in each edition.

    Shape

    Choose a shape for the instance. The shape determines when the instance receives updates, which happen every other month.

    Note: You can't change the shape after you create the instance. However, you can move data to another instance using the export and import capabilities.

    • Development: Instances with this shape receive updates two weeks before instances with a Production shape.
    • Production: Instances with this shape receive updates two weeks after instances with a Development shape.

    License Type

    See Choose a License Type.

    Message Packs

    See Choose a Message Pack Number.

    Access Token

    If this field is displayed, you are creating an instance as a non-federated user. Sign in as a federated user and restart creating an instance.

    Show Advanced Options

    Identity domain: (Available only if you are provisioning an Oracle Integration 3 instance that uses identity domains. See Differences Between Tenancies With and Without Identity Domains.) Configure this tab to associate this instance with a secondary identity domain—an identity domain other than the one you're signed into. This allows you to manage all your instances in your tenancy from one domain, rather than having to sign into each domain to manage the associated instances.

    • Change compartment: The compartment you select here is the one that includes the secondary identity domain, not the one in which the instance will be created. The instance will be created in the compartment you selected in step 3.
    • Domain: Select the secondary identity domain you want to associate with this instance.

      Note: You must have read permission for the secondary identity domain. If you don't, the secondary identity domain administrator needs to add an IAM policy such as the following:

      Allow group primary_identity_domain/group_name to read domains in compartment secondary_identity_domain_compartment

      See Managing Policies and Details for IAM with Identity Domains.

    If you configure a secondary identity domain, Oracle Integration creates an Oracle Identity Cloud Service (IDCS) application in the secondary identity domain when it provisions your Oracle Integration 3 instance. If you don't configure a secondary identity domain, the IDCS application is created in the primary identity domain—the one you're signed into.

    After the Oracle Integration 3 instance has been created in the secondary identity domain, you need to assign administrators the ServiceAdministrator role in the IDCS application that was created. See Assign Oracle Integration Roles to Groups in an Identity Domain.

    Network access: Configure an allowlist for your instance.
    Custom Endpoint: (Available only if you are provisioning an Oracle Integration Generation 2 instance) Configure this tab to use a custom endpoint URL for the instance. The custom hostname you want to map to the instance must already be registered on a DNS provider and its SSL certificate stored as a secret in an OCI Vault. See Configure a Custom Endpoint for an Instance in Provisioning and Administering Oracle Integration Generation 2.
    • Hostname: Enter the custom hostname chosen for the instance.
    • Certificate: Provide the location of the hostname's certificate in your OCI tenancy.
      • Compartment: Select the OCI compartment that contains your certificate vault.
      • Vault: Select the vault that contains the hostname’s certificate.
      • Secret: Select the secret corresponding to the hostname’s certificate.

    Tags: Enter a key and optional value. Tags enable you to track resources within your tenancy. See Resource Tags.

    Typically, the selected model is displayed after Consumption Model. If multiple consumption models are listed, choose the model you'd like used for this instance.

    Instance creation typically takes just a few minutes. If you attempt to click the instance name and receive a 401: Authorization failed or a 404: Not Found error, but followed all the correct steps, instance creation has not completed. Wait a minute and try again.

  6. When instance creation completes successfully, the instance shows as Active in the State column.
    Once created, an instance is visible only in the region in which it was created.

Choose a License Type

Select a license type for your Oracle Integration instance.

Note

Choosing a license type applies when provisioning Oracle Integration only. It doesn't apply to Oracle Integration for SaaS.
  • Select to create a new Oracle Integration license in the cloud. This provides you with packages of 5K messages per hour.
  • Select to bring an existing Oracle Fusion Middleware license to the cloud for use with Oracle Integration. This provides you with packages of 20K messages per hour. This option is also known as bring your own license (BYOL).

Choose a Message Pack Number

When creating or editing an instance, specify the number of messages to use.

The message pack options available for selection are based on the version of Oracle Integration instance you are creating or editing. You are responsible for billing based on the message packs value you select.
  • For Oracle Integration: Select the number of message packs. The total number of messages available per pack is based on the License Type option you selected. You can select up to 3 message packs if you bring an existing Oracle Fusion Middleware license (BYOL) to the cloud. You can select up to 12 message packs if you create a new Oracle Integration license in the cloud.
  • For Oracle Integration for SaaS: Select the number of message packs to use per month. Each message pack consists of one million messages. You can select up to 43 message packs.
Note

  • Message pack updates can fail when maintenance and security patching are in progress.
  • You can also specify the number of message packs using the command line option. This enables you to specify larger values than permitted by the user interface. See Override the Message Pack Limit Using the Command Line.