Managing Policies
This topic describes how to create, edit, and delete policies.
Required IAM Policy
If you're in the Administrators group, then you have the required access for managing policies.
If you're new to policies, see Getting Started with Policies and Common Policies. If you want to dig deeper into writing policies to control who else can write policies or manage other IAM components, see Let a compartment admin manage the compartment, and also Details for IAM without Identity Domains.
Tagging Resources
Apply tags to resources to help organize them according to your business needs. You can apply tags when you create a resource, and you can update a resource later to add, revise, or remove tags. For general information about applying tags, see Resource Tags.
Working with Policies
If you haven't already, make sure to read How Policies Work to understand the basics of how policies work.
When creating a policy, you must specify the compartment where it should be attached, which is either the tenancy (the root compartment) or another compartment. Where it's attached governs who can later modify or delete it. For more information, see Policy Attachment. When creating the policy in the Console, you attach the policy to a compartment by creating the policy in that compartment. If you're using the API, you specify the identifier of the compartment in the CreatePolicy request.
When creating a policy, you must also provide a non-changeable name for it. The name must be unique across all policies in the compartment where you create it. You must also provide a description, which is a non-unique, changeable description for the policy. Oracle will also assign the policy a unique ID called an Oracle Cloud ID. For more information, see Resource Identifiers.
If you delete a policy and then create a new policy with the same name, they'll be considered different policies because they'll have different OCIDs.
For information about how to write a policy, see How Policies Work and Policy Syntax. When using the Console to write policies, you can use the policy builder to help you construct the syntax of the policies you want to add.
When you create a policy, make changes to an existing policy, or delete a policy, your changes go into effect typically within 10 seconds.
You can view a list of your policies in the Console or with the API. In the Console, the list is automatically filtered to show only the policies attached to the compartment you're viewing. To determine which policies apply to a particular group, you must view the individual statements inside all your policies. There isn't a way to automatically obtain that information in the Console or API.
For information about the number of policies you can have, see Limits by Service.
Writing Policy Statements with the Policy Builder
The policy builder in the Console helps you quickly create common policies without the need to manually type the policy statements. The policy builder automatically suggests the permissions that an administrator can grant to groups of users or resources in their tenancy, as well as target resources like instances, networks, and buckets. Most of the policies suggested in the policy builder can also be found in Common Policies, where you can learn more details about the access provided by each policy and the use cases for each. Users who don't need the suggestions offered by the policy builder or who have more complex policy requirements can bypass the builder's basic option and go straight to the advanced editor, where you can directly enter the policy statements in a free-form text box.
Features of the Policy Builder
The policy builder provides policy templates that you can complete to create policies for your tenancy. A policy template includes all the statements needed to provide the permissions to perform a task or set of related tasks in a service in OCI. To complete the template, select the group from a menu of existing groups and select the location from the list of compartments in your tenancy.
The policy templates in the policy builder are grouped by use case, such as network management, storage management, and account management, to make them easy to browse and find the permission set you need.
For example, assume you are setting up the network administrators for your tenancy. You need to grant a group of users the permissions required to work with all the resources in the Networking service. To create this policy in the policy builder:
- First, find the policy you want: From the Policy Use Cases menu, select Network Management. If you are not sure which use case a policy belongs to, you can leave this option set to All to browse all the templates.
- From the Common Policy Templates menu, select Let network admins manage a
cloud network.
The policy builder displays the policy statements that will be created. In this case, there is only one statement:
Allow {group name} to manage virtual-network-family in {location} - Now, all you need to do is select the group and location for the policy: When you select a group, the {group name} in the displayed policy statement also updates with your selection.
- Finally, select the location. You can traverse the compartment hierarchy to find and
select the appropriate compartment. To create the policy in the tenancy, choose the
root compartment.

Customizing Policies
If you find that a template doesn't fit your needs exactly, then you can customize the policies provided by adding statements, removing statements, adding conditions, or other changes to create the policy you need. Select Customize (Advanced) to edit the statements in a free-form text box. When entering statements directly in the text box, ensure that you follow the Policy Syntax rules.
Examples of customizing the Network Admins policy:
- You need to include another group, GroupB to this policy. To add a
group:
Select Customize (Advanced). In the text box, type the changes to the policy (following the required syntax).
Allow group GroupA, GroupB to manage virtual-network-family in compartment CompartmentA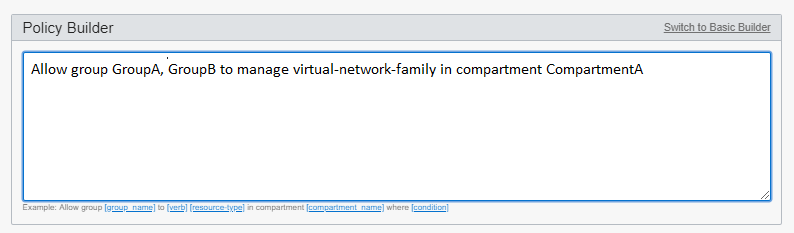
- You need to add a condition to the statement. For example, you want to ensure
that only users who have been verified by MFA can manage your networks. You can
add that condition to the statement as
follows:
Allow group GroupA to manage virtual-network-family in compartment CompartmentA where request.user.mfaTotpVerified='true'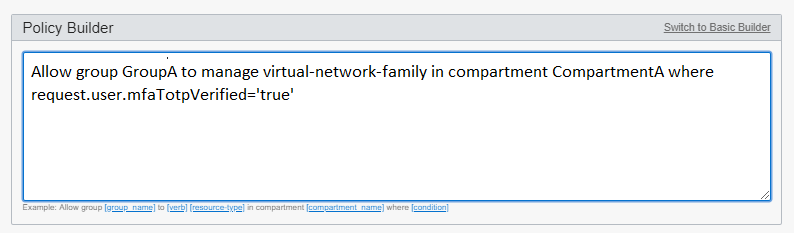
- You want to add another statement to the policy. For example, you want GroupA to
be allowed to use instances. To add another statement, enter it on the next
line:
Allow group GroupA to manage virtual-network-family in compartment CompartmentA Allow group GroupA to use instance-family in compartment CompartmentA 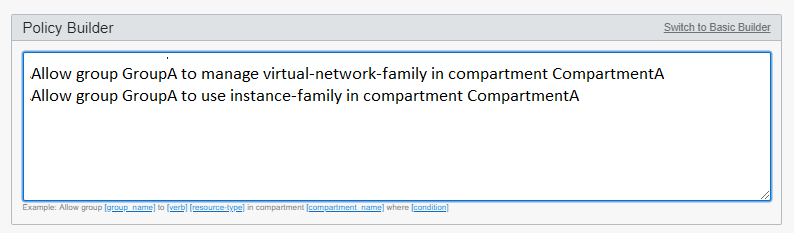
Editing Policies with the Policy Builder
After you have created the policy, you can enter any statement changes you need to make directly in the policy text. The template selector is only available when creating a new policy. The editor lets you delete, add, edit, or change the statement order.
Using the Console
Prerequisite: The group and compartment that you're writing the policy for must already exist.
- Open the navigation menu and select Identity & Security. Under Identity, select Policies. A list of the policies in the compartment you're viewing is displayed.
- Select Create Policy.
- Enter the following:
- Name: A unique name for the policy. The name must be unique across all policies in your tenancy. You cannot change this later. Avoid entering confidential information.
- Description: A friendly description. You can change this later if you want to.
- Compartment: If you want to attach the policy to a compartment other than the one you're viewing, select it from list. Where the policy is attached controls who can later modify or delete it (see Policy Attachment).
- Enter the policy statements using the policy
builder. Use the Basic option if you want to choose from common
policy templates, which you can also customize. Use the Customize (Advanced)
option if you already know how to write the statements you need and you want to
simply type them in a text box.To use the policy builder Basic option:
- Select from the Policy Use Cases menu to filter the list of policy templates. If you're not sure which use case to choose, you can browse all the templates in the Common Policies Templates list.
- Select the template that best matches your requirements from the
Common Policies Templates list.
The policy builder displays the description of the chosen policy and lists the policy statements that it includes.
- Select the Group that this policy applies to.
- Select a Location. The location is the compartment that this policy grants access to. The compartment you choose here must be either the compartment you chose to attach the policy to in Step 3, or a compartment within the hierarchy of that compartment.
- If you need to modify the policy statements, select Customize (Advanced).
To use the Customize (Advanced) option:- Select Customize (Advanced) .
- Enter or edit policy statements following the format described in Policy Syntax, entering one statement per line.
- To add tags to this policy, select Show Advanced Options. If you have permissions to create a resource, then you also have permissions to apply free-form tags to that resource. To apply a defined tag, you must have permissions to use the tag namespace. For more information about tagging, see Resource Tags. If you're not sure whether to apply tags, skip this option or ask an administrator. You can apply tags later.
- If you want to create another policy, select Create Another Policy.
- Select Create.
The new policy will go into effect typically within 10 seconds.
Open the navigation menu and select Identity & Security. Under Identity, select Policies. A list of the policies in the compartment you're currently viewing is displayed. If you want to view policies attached to a different compartment, select that compartment from the list on the left. You can't get a single list of all policies; they're always displayed by compartment.
To determine which policies apply to a particular group, you must view the individual statements inside all your policies. There isn't a way to automatically obtain that information in the Console.
This is available only through the API. A workaround is to create a new policy with the new description and delete the old policy.
- Open the navigation menu and select Identity & Security. Under Identity, select Policies. A list of the policies in the compartment you're viewing is displayed. If you don't see the policy you're looking for, verify that you're viewing the correct compartment. To view policies attached to a different compartment, under List scope, select that compartment from the list.
- Select the policy you want to update. The policy's details and statements are displayed.
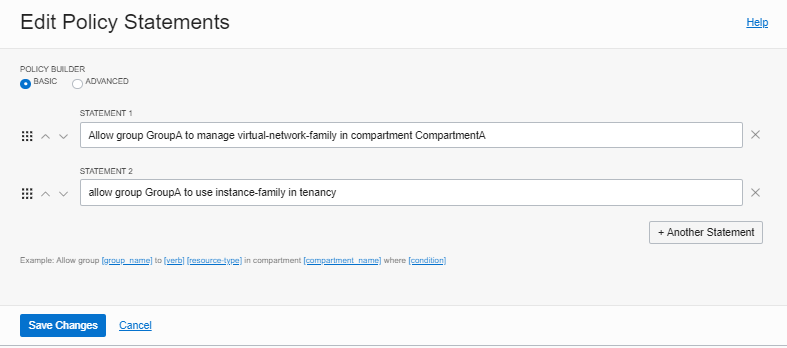
- Select Edit Policy Statements. Use the Basic policy builder option if
you want to interact with the statements using graphical controls. Use the
Advanced policy builder option to edit the statements in a simple text
box.
To use the Basic option:
- To revise a statement, enter the changes following the format in Policy Basics and Policy Syntax.
- To add a statement, select +Another Statement and enter the statement following the required format.
- To delete a statement, select the X next to the statement.
- To rearrange the order of the statements, use the up and down arrows to move statements to the correct order, or grab the handle to drag and drop statements to the preferred position.
- Select Advanced.
- Revise the policy statements in the text box following the format in Policy Basics and Policy Syntax.
- Select Save Changes when you are finished editing.
Your changes will go into effect typically within 10 seconds.
- Open the navigation menu and select Identity & Security. Under Identity, select Policies. A list of the policies in the compartment you're viewing is displayed. If you don't see the policy you're looking for, verify that you're viewing the correct compartment. To view policies attached to a different compartment, under List scope, select that compartment from the list.
- For the policy you want to delete, select Delete.
- Confirm when prompted.
Your changes will go into effect typically within 10 seconds.
Using the API
For information about using the API and signing requests, see REST API documentation and Security Credentials. For information about SDKs, see SDKs and the CLI.
Updates Are Not Immediate Across All Regions
Your IAM resources reside in your home region. To enforce policy across all regions, the IAM service replicates your resources in each region. Whenever you create or change a policy, user, or group, the changes take effect first in the home region, and then are propagated out to your other regions. It can take several minutes for changes to take effect in all regions. For example, assume you have a group with permissions to launch instances in the tenancy. If you add UserA to this group, UserA will be able to launch instances in your home region within a minute. However, UserA will not be able to launch instances in other regions until the replication process is complete. This process can take up to several minutes. If UserA tries to launch an instance before replication is complete, they will get a not authorized error.
Use these API operations to manage policies: