Ingest and Transform Data Using a Data Flow
A data flow is a logical diagram representing the flow of data from source data assets, such as a database or flat file, to target data assets, such as a data lake or data warehouse.
The flow of data from source to target can undergo a series of transformations to aggregate, cleanse, and shape the data. Data engineers and ETL developers can then analyze or gather insights and use that data to make impactful business decisions.
In this tutorial, you:
- Create a project where you can save the data flow.
- Add source operators and select the data entities to use in the data flow.
- Use shaping operators and apply transformations.
- Identify the target data asset for loading the data.
Before You Begin
To ingest and transform data using a data flow, you must have the following:
- Access to a Data Integration workspace. See Connect to Data Integration.
- Source and target data assets created.
-
The
PAR_MANAGEpermission enabled on the staging bucket.allow any-user to manage buckets in compartment <compartment-name> where ALL {request.principal.type = 'disworkspace', request.principal.id = '<workspace-ocid>', request.permission = 'PAR_MANAGE'}Autonomous databases use Object Storage for staging data and need pre-authenticated requests.
1. Creating a Project and a Data Flow
In Oracle Cloud Infrastructure Data Integration, data flows and tasks can only be created in a project or folder.
To create a project and a data flow:
2. Adding Source Operators
You add source operators to identify the data entities to use for the data flow. A data entity represents a database table in this tutorial.
Learn more about operators.
-
(Optional) In the Attributes tab, you can view the data entity's attributes and apply exclude or rename rules to the attributes from their respective Actions menu (
 ).
You can also use the filter icon on the Name or Type column to apply one or more filters on the attributes to be excluded.
).
You can also use the filter icon on the Name or Type column to apply one or more filters on the attributes to be excluded.
3. Filtering and Transforming Data
The Filter operator produces a subset of data from an upstream operator based on a condition.
- Connect REVENUE to FILTER_1:
- Place the cursor on REVENUE.
- Drag the connector circle at the side of REVENUE.
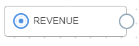
- Drop the connector circle on FILTER_1.

Using Data Xplorer, you can explore a data sample, review profiling metadata, and apply transformations in the Data tab of the Properties panel. Expression operators are added to the canvas for each transformation applied.
-
Click the transformations menu () for
FILTER_2.CUSTOMERS_JSON.STATE_PROVINCE, and then select Change case.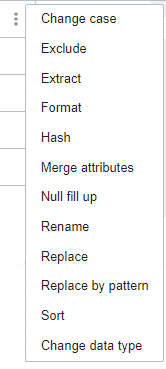
4. Joining Data
After you apply filters and transformations, you can join the source data entities using a unique customer identifier, and then load the data into a target data entity.
5. Adding a Target Operator
Additional Resources
To learn more, see:
What's Next
After you ingest and transform data using a data flow, you must Create an Integration Task to Configure and Run a Data Flow.