Flows
A flow is a piece of the skill dialog flow that defines the interaction with the user to complete a task or a part of a task that the user wants to perform.
Typical examples of flows include:
- Intent-driven flows, where each intent defined in the skill has an associated flow, for example 'Order Pizza', 'Send Money' or 'Create Expense'.
- Supporting or utility flows for tasks like user authorization, new user onboarding,
logging, or providing user assistance. Such flows can be invoked from multiple
flows.
For example, you could have a Create Account sub-flow that you invoke from flows like Order Pizza or Send Money.
Flow Types
Generally speaking, flows break down into the following types:
- Main Flow.
- Intent flows.
- Flows for built-in events and system transitions.
- Sub-flows that can be used by top-level flows.
Main Flow
With dialog flows created in the Visual Flow Designer, each dialog flow has a single main flow that is used to configure:
- The mappings between events and flows.
- Global context variables that can be used in all of the skill's flows.
When accessing such a variable with a Freemarker expression, you prefix the variable name with
skill.in the expression.These skill-level variables are cleared after the user session expires. Session expiry is configured at the channel level and is typically 24 hours by default.
The main flow isn't really a flow as such. Rather, it is the control center for the
skill, from where users are directed to specialized flows that are mapped to the
resolved intents. The main flow configuration includes the pre-defined
skill.system.nlpresult variable that is populated with intent and
entity matching results whenever an intent is resolved, which enables control to be
passed to individual flows.
Intent Flows
When you design dialog flows with the Visual Flow Designer, you create flows that you then map to your intents. All regular intents (meaning intents that are not answer intents) must be linked to a flow.
For answer intents, you can use either (or a combination) of the following approaches:
- Create a single flow and map it to the Answer Intent built-in event.
- Create individual flows for specific answer intents.
This approach enables you to have specific prompts or questions to precede and/or follow each answer.
You also have the option to not provide any flow at all for answer intents, in which case the answer is given to the user without the dialog flow being directly involved.
Utility Flows for Built-In Events and System Transitions
You can create flows that are triggered by the skill's built-in events (such as Answer Intent and Dialog Error), custom events, and system transitions (such as Authorize User and Dialog Error).
Custom Sub-Flows
You can also create flows that are not mapped to a specific intent or based on built-in events (or system transitions) but which can invoked by other flows.
For example, in a skill for a restaurant, you may want to have a Show Menu flow that can be called in the middle of an order flow if a user so requests.
Variables and Scope
In the Visual Flow Designer, variables for can be defined at two levels:
- In an individual flow. Variables defined at this level can only
be accessed from inside the flow where they are defined.
A flow-scope variable can't be directly accessed outside of the flow where it is defined, even from sub-flows or calling flows. However, you can define input and output parameters for a flow to pass values to and from variables defined in the flow.
When the flow ends, the variable values are reset.
Most of your variables should be defined at this level. By making regular use of flow variables, you make your flows more self-contained, which makes them easier to reuse, easier to test in isolation, and less likely to be adversely affected by bugs in other flows.
- In the Main Flow. Variables defined here have a skill-wide
(global) scope, meaning that they can be accessed by all flows in the skill.
Values for these global variables persist througout the user's session with the skill. The variables are cleared when the user session with the skill ends, which happens when one of the following things occurs:
- The user closes the chat window.
- The session times out after a period of inactivity (the value of which is defined at the channel level and which is typically 24 hours).
- In the context of a digital assistant, the user exits the skill
or reaches a state that directly invokes another skill.
Note
When the user interrupts a conversation with a non sequitur input and is temporarily routed to a different skill, the digital assistanta remains in the context of the original skill and its variables are not automatically cleared. In this case, if the user returns to the original skill after the interruption, the variables hold their values. If the user selects not to return to the original skill, the original skill is exited and the variables are cleared.
You should limit your use of these skill-scope variables to variables that require a shared context. For example, in a food delivery skill, you might need a skill-level variable for the list of all orders that a user has made in a session.
In Common Response and Set Variable components, you can also create variables of user or profile scope. In such cases, you create the variables using the drop-down directly in the component's Variable property (not the Create button next to the property). See Other Variables Types.
Variable values must match the type that was declared for the variable. If a variable is assigned a value that doesn't match its declared type, a runtime error occurs.
In the Visual Flow Designer, variables can be assigned an initial value when they are declared. (This is different in YAML-based dialog flows, where you need to use a
System.SetVariable component to set the initial value.)
Notes for Developers Used to YAML-Based Dialog Flows
If you are used to designing dialog flows using the OBotML code editor, you need to know the following about flows that you create with the Visual Flow Designer:
- There is no
returntransition available in the Visual Flow Designer.When the last state of a flow is reached the flow's variables are cleared automatically (though any skill-level variables remain active until the end of the session).
- State transitions can only be defined through the
nexttransition or transition actions.When you use the designer to insert a state into a flow, the appropriate
nexttransitions are inserted into that state and the preceding state.Implicit transitions based on the sequence of the states are not allowed. If no matching transition can be found, a runtime error will be thrown.
- It is not possible to directly use FreeMarker expressions to conditionally define the target states for transitions in a component. To conditionally specify the target state, insert a Switch component into the flow to hold the expression and define the action transitions based on the result of the expression.
Designing Flows
Create a Flow
Before you can map any type of event, whether it's an intent event for a transactional flow, or a built-in event for a utility flow, you need to first create the flow itself. The mapping that you eventually assign to a flow determines whether its scope extends to the entire skill, or only to a flow.
To create a flow, click + Add Flow.
The editor is populated with a Flow start node ![]() . You build out the flow from here. The editor also includes Events node where
you define the subflows for the system transition events that handle dialog errors,
out-of-order user messages, unexpected user input, and authentication.
. You build out the flow from here. The editor also includes Events node where
you define the subflows for the system transition events that handle dialog errors,
out-of-order user messages, unexpected user input, and authentication. 
Description of the illustration df-2-0-initial-flow.png
Your flow can end without an actual end flow state (implicitly), but if
you've defined output parameters that pass required values to another flow, then you
need to add an end flow state ![]() , one that specifies these output parameters.
, one that specifies these output parameters.
Tip:
Click Validate and then review the findings as you create a flow..
Create the Skill-Level Variables
- Select Main Flow > Skill Variable.
- Click + Add Variable and then complete the dialog.
- Select the variable type as an entity, a primitive type, or as a
list (JSON array) or map (JSON object). If the variable references an entity
(custom or built-in), complete the dialog by naming the variable for the
selected entity.
Note
You need to create variables for any variables that are set or created in entity event handlers or custom components. - If needed, enter an initial (default) value. This can be a single
value (e.g.,
false, for a boolean or4for an integer), an expression (e.g.,list.ManageAccounts.addAccountfor a string ) or a JSON object, one that encloses the keys and values in double quotes (") as illustrated by the following list object:
This snippet illustrates the default value for a list type variable in an array.[ { "pizzaType":"Veggie", "price":"10 USD" } ]Tip:
If you set an initial value for a variable, you won't need to add a Set Variable state in the flow to give it an initial value.
Designate a Start State
The start state is the first state to execute within a flow. If any other states precede the start state, the flow will skip those states, leaving them unexecuted.
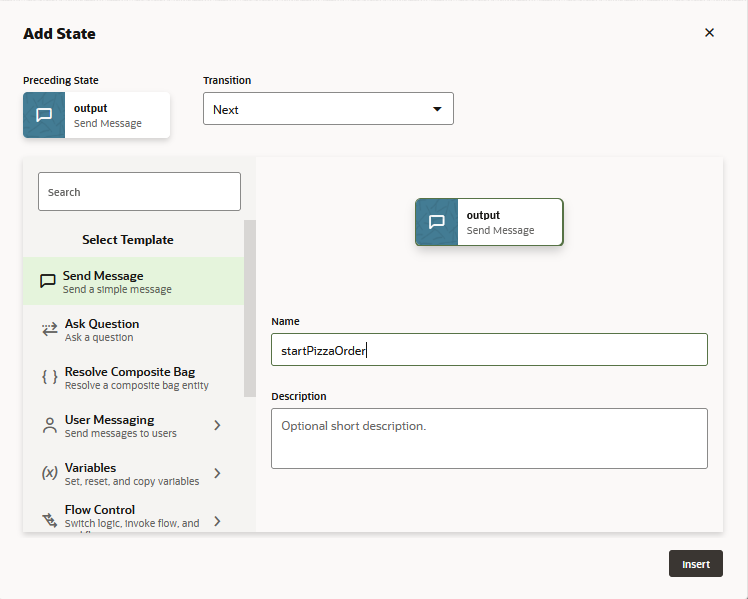
Add a State

Description of the illustration df-2-0-initial-flow.png
From the Flow start node, you can build out your state by first clicking the
menu ![]() and then by inserting a state selected from the Add State dialog, opened by
clicking Add start state.
and then by inserting a state selected from the Add State dialog, opened by
clicking Add start state.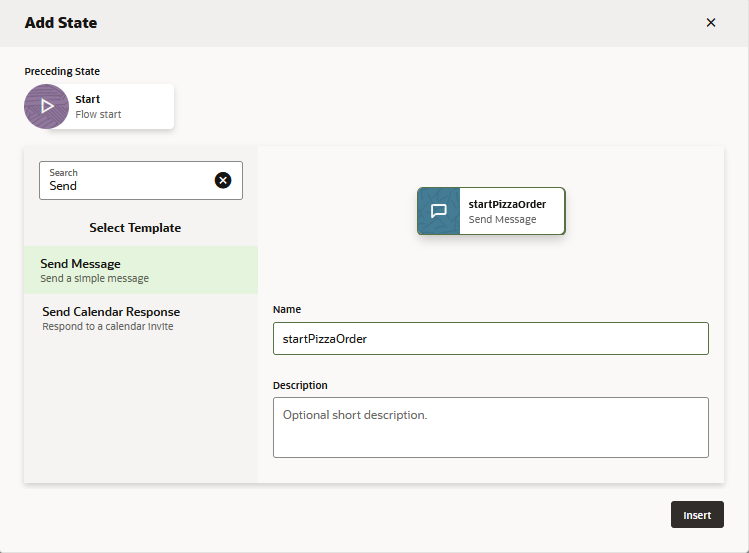
Description of the illustration df-2-0-add-state-dialog.png
Insert a State Between States
- Click the transition line that connects the two states and then open the Add
State menu by clicking
 . Note that the transition line notes the type of transition between
the states (
. Note that the transition line notes the type of transition between
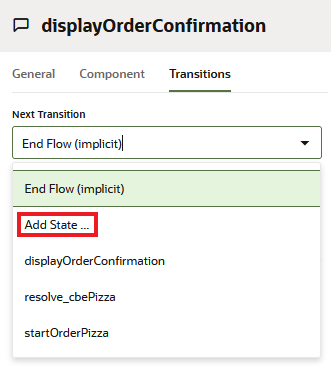
the states (next, for example). - Create a state on the fly by choosing Add State from the Next
Transition menu or Transition to menu for
actions.
Edit a State's Properties
Clicking a state opens its property editor, where you set the component configuration and
transitions. 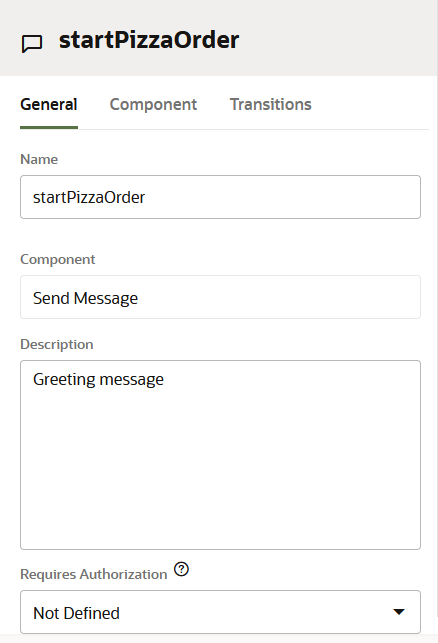
Description of the illustration df-2-0-start-state-properties.png
The property editor for the output state, for example, is a send message
component for outputting a string.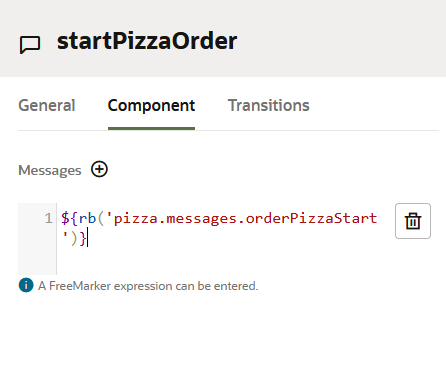
Description of the illustration df-2-0-start-state-component-page.png
Deleting States
You can delete a state by hovering its tile, clicking ![]() and then selecting Delete.
and then selecting Delete.
WARNING:
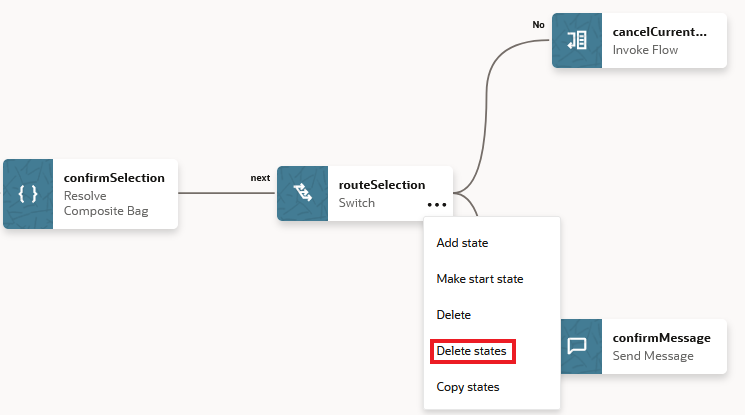
Deleting a state can have unintended consequences. If you delete a state, the state is removed entirely from every place that it appears in the flow. If you delete the wrong state, you can restore it.- Choose Delete states from the menu.
- Click Delete in the confirmation dialog.
If you've deleted the states in error, click Undo.
Tip:
If you want to just remove one occurrence of a state in a flow, you can disconnect it from that part of the flow by changing the value of the transition to it from the preceding state.Restore a Deleted State
If you accidentally delete a state and then realize that you want it back, you can restore it as long as you remain in the Visual Flow Designer and you haven't made any other changes. To do so:
- Locate the dialog confirming that the state was deleted. This should appear in the
lower left of your screen and look something like the following screenshot:
- Click Undo.
Reconnect a Disconnected State
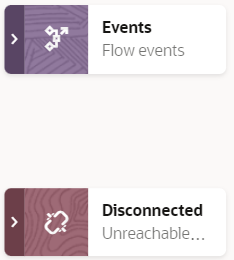
In the course of development, you might cause a break between states by changing a transition. At this point, the part of the flow that is broken off from the flow is parked within a tile named Disconnected, which appears below the Events tile.
You can reconnect a part of a disconnected flow to a working flow by specifying the name of a disconnected state as a transition in the working flow. To do so:
- If you are unsure of which states have been disconnected, double-click the Disconnected tile to display the states that have been disconnected from the flow.
- Select the tile of the state from which you want to transition to the currently disconnected state to open its property inspector.
- In the property inspector, select the Transitions tab.
- If you are using the Next transition, select the disconnected state from the Next Transition dropdown.
- If you are using an action transition, click Edit (
 ) for the transition that you want to use for the state and change the
Transition to value to the state that you want to connect
to.
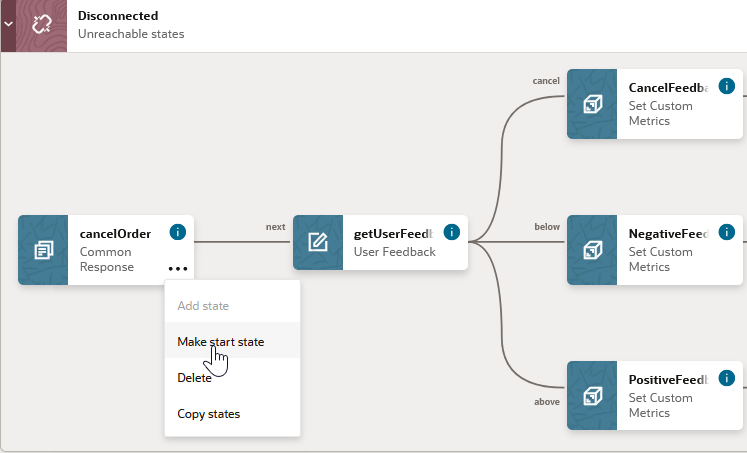
Insert a New First State
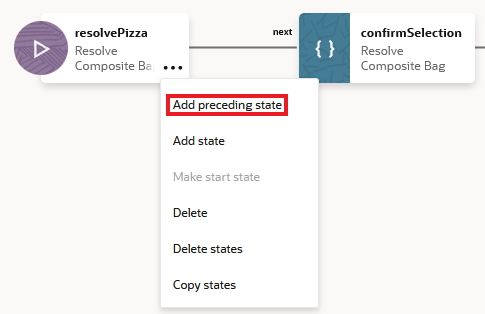
- Hover over the start node state to invoke the menu
 .
.
- Choose Add preceding state.
- Select a template from the Add State dialog. You can choose the
default
Nexttransition, or create a transition action, which you can later configure in the property editor. - After you've inserted the preceding state, you can assign it as the start node by choosing Make start
state from the menu.
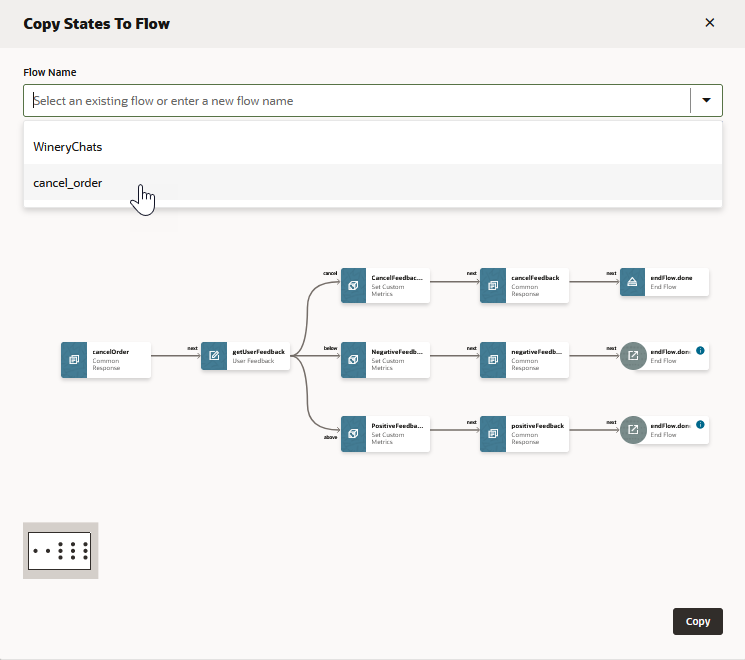
Copy States
- Click the menu
 on the state that you want to copy, then choose Copy
states. Your selection might include a single state, or an
entire branch, depending on the state's position and relation to other
states.
- Select the target flow (either the current flow or another flow within the
skill). Then click Copy. If you're selecting a separate
flow, then any variables associated with the selection will be copied to that
flow.
- Open the Disconnected node, then set a transition that connects the state or
states to the flow. If you're creating an new flow based on the copied states,
choose Make start state for the selected state.Note
States copied to the current flow are differentiated from the originals with a 1. For example, the copy ofcancelOrderiscancelOrder1.


