About Managing Data Connections

You can connect to a variety of data sources and remote applications to provide the background information for reports. You can blend the additional data from the various data sources with the ready-to-use datasets to enhance business analysis.

Oracle Fusion Analytics Warehouse can connect to other pre-validated data sources such as Oracle Object Storage, cloud applications such as Google Analytics, and on-premises applications such as Oracle E-Business Suite.

You can view the usage of capacity for custom data that is loaded into Oracle Fusion Analytics Warehouse through the connectors in the Custom Data Usage dashboard available in the Common folder. The dashboard shows data loaded daily and monthly from each of the activated external data sources.
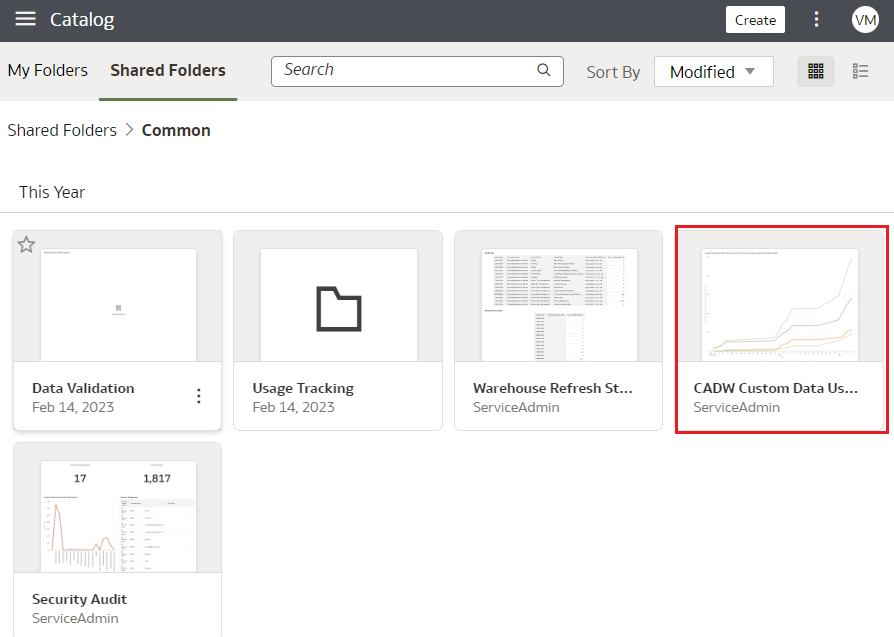
Custom Data Usage dashboard in the Common folder

Create a Data Connection Type

Connection Type specifies the source to which you are connecting. A connection type can have multiple connections.

You can create a custom data source type for any remote data connection.
  1. Sign in to your service.
  2. In Oracle Fusion Analytics Warehouse Console, click Data Configuration under Application Administration.
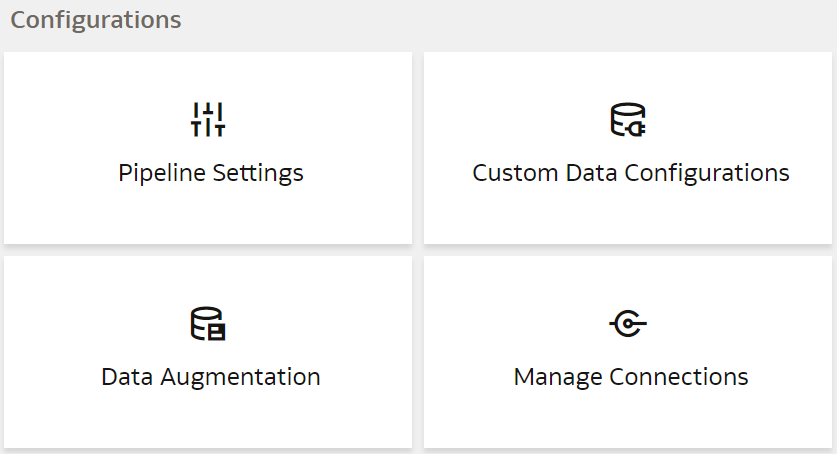
  3. On the Data Configuration page, click Manage Connections under Configurations.

    Description of fawag_manage_connections.png follows

  4. On the Manage Connections page, click Create and then click Connection Type.

    Description of fawag_manage_connections_create.png follows

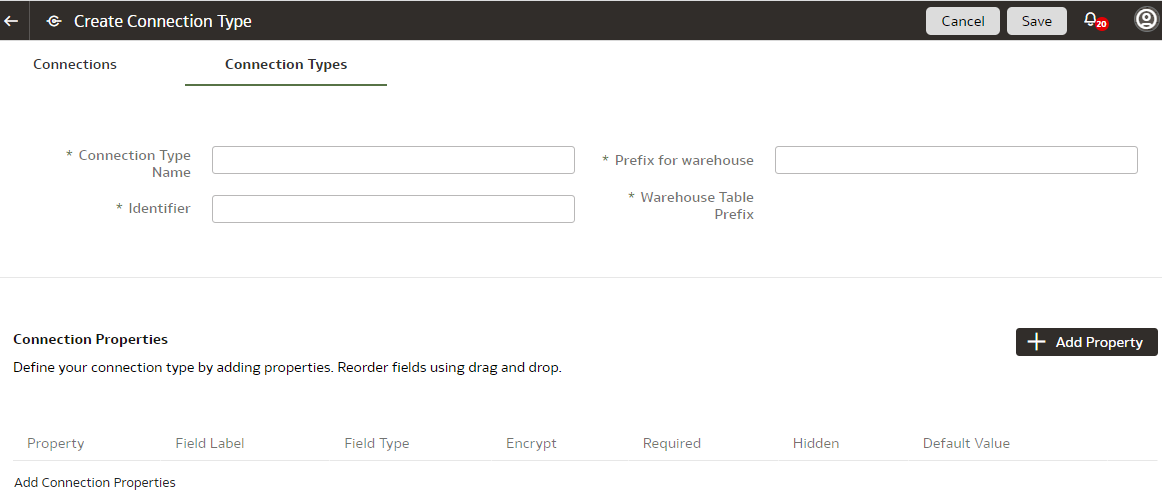
  5. In the Create Connection Type dialog, enter the Name, Identifier, and Prefix for warehouse for the connection type.

    Description of fawag_create_connection_type.png follows

  6. Click Add Property and enter the parameters for each property that defines the connection.
  7. When you've finished adding the connection properties, you can reorder them as needed.
  8. Click Save the Connection Type.
The new connection is available on the Connections page.

Edit a Data Connection Type

If the properties or parameters for a data connection type change, you can edit them.

  1. Sign in to your service.
  2. In Oracle Fusion Analytics Warehouse Console, click Data Configuration under Application Administration.
  3. On the Data Configuration page, click Manage Connections under Configurations.
  4. On the Manage Connections page, click Connection Types and then click or search for the connection type you want to edit.
    You can't edit or delete Oracle-managed connections.
  5. Click the Action button next to the connection type you want to change.
  6. In the dialog box for the connection type, edit the details for your connection type, and then click Save.

Delete a Data Connection Type

You can delete a data connection type if you don't need it anymore.

Note

After you delete a connection type, you can't create new data connections to it.
  1. Sign in to your service.
  2. In Oracle Fusion Analytics Warehouse Console, click Data Configuration under Application Administration.
  3. On the Data Configuration page, click Manage Connections under Configurations.
  4. On the Manage Connections page, click Connections and then select or search for the connection you want to test.
  5. Click the Action menu for the connection and select Delete.
  6. In the Delete Connection dialog box, click Delete.

Create a Data Connection

You create a data connection to a data source to load data from that source into Oracle Fusion Analytics Warehouse. You can create a connection for any available connection type.

  1. Sign in to your service.
  2. In Oracle Fusion Analytics Warehouse Console, click Data Configuration under Application Administration.
  3. On the Data Configuration page, click Manage Connections under Configurations.
  4. On the Manage Connections page, click Create and then click Connection.
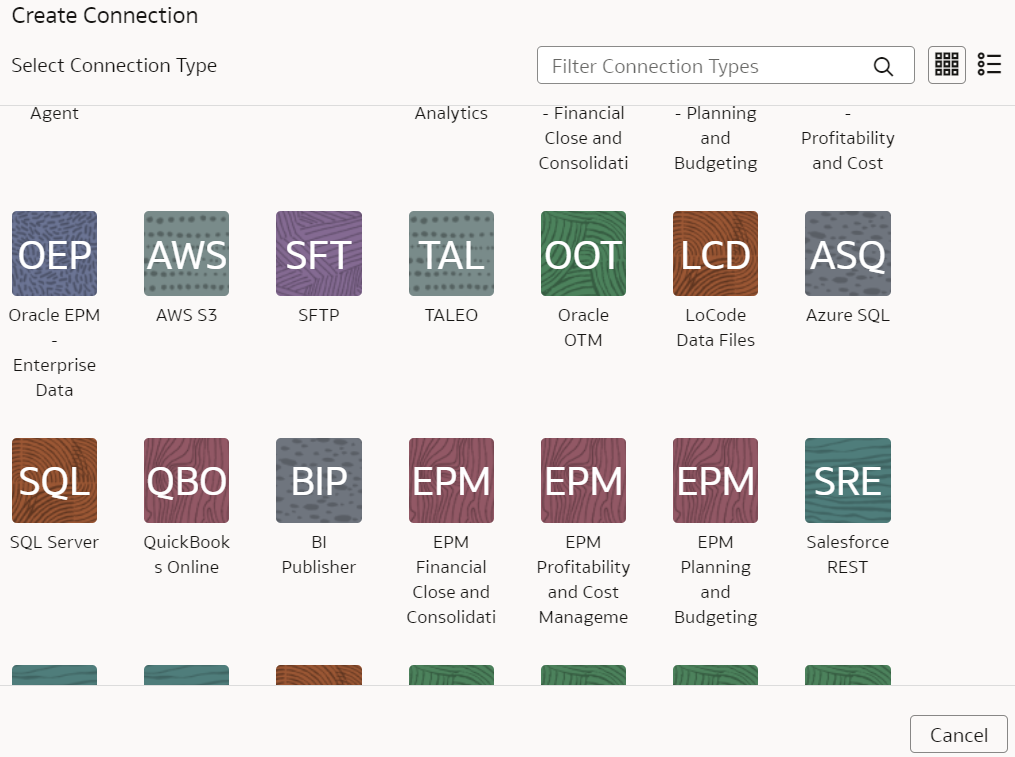
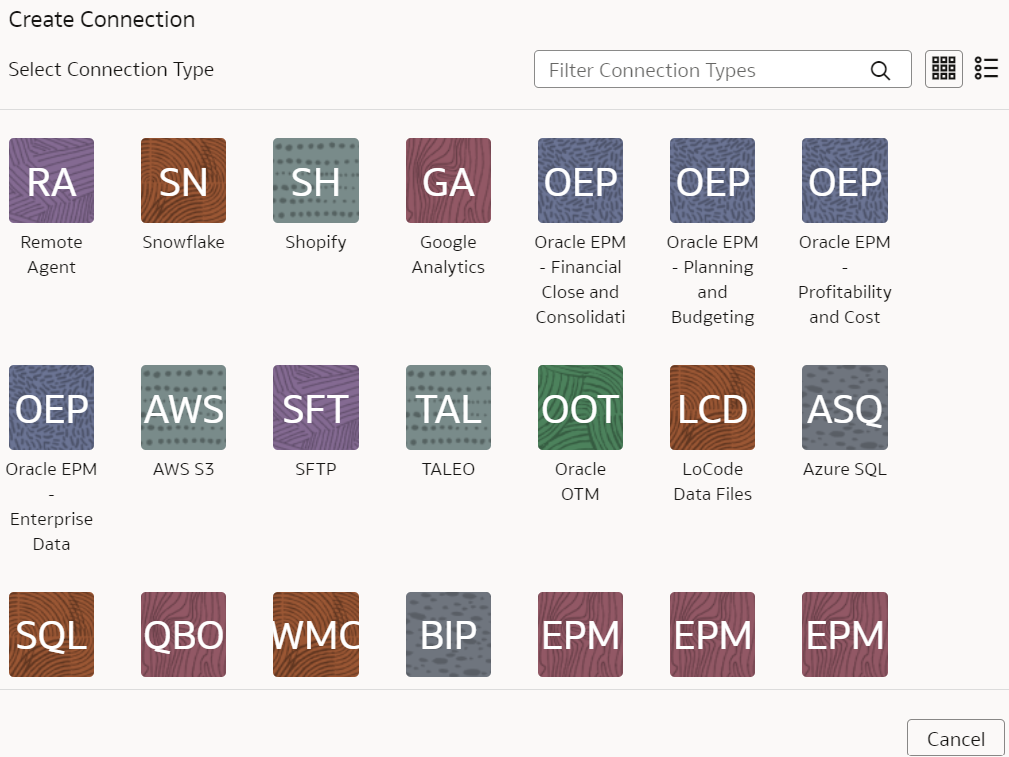
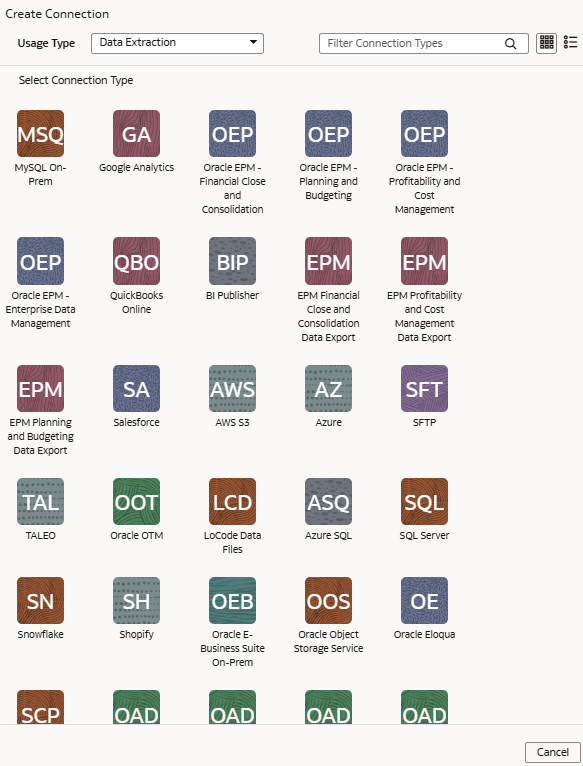
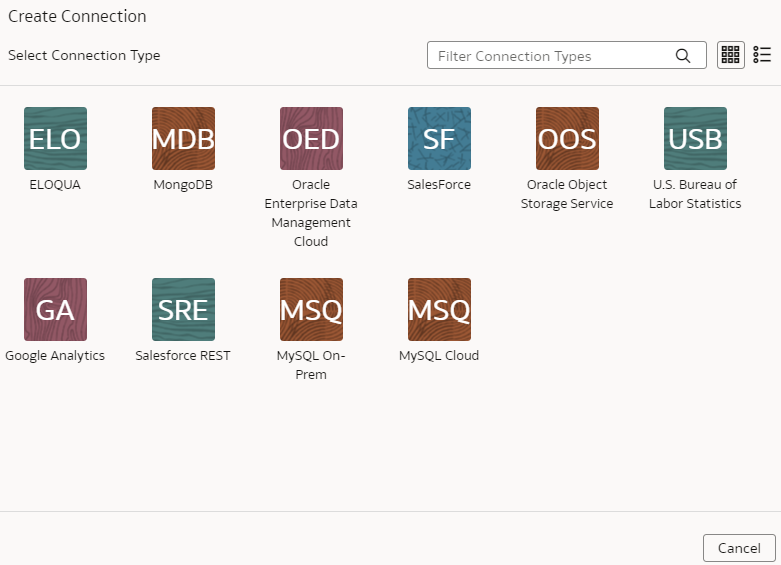
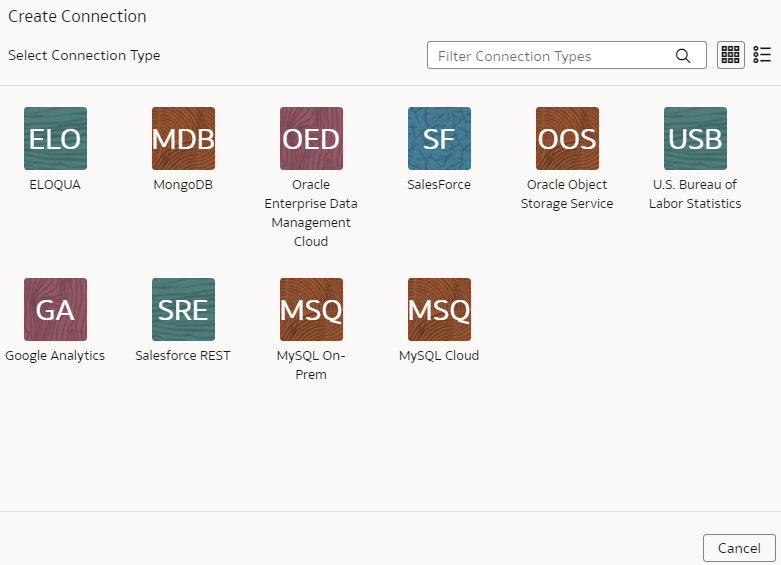
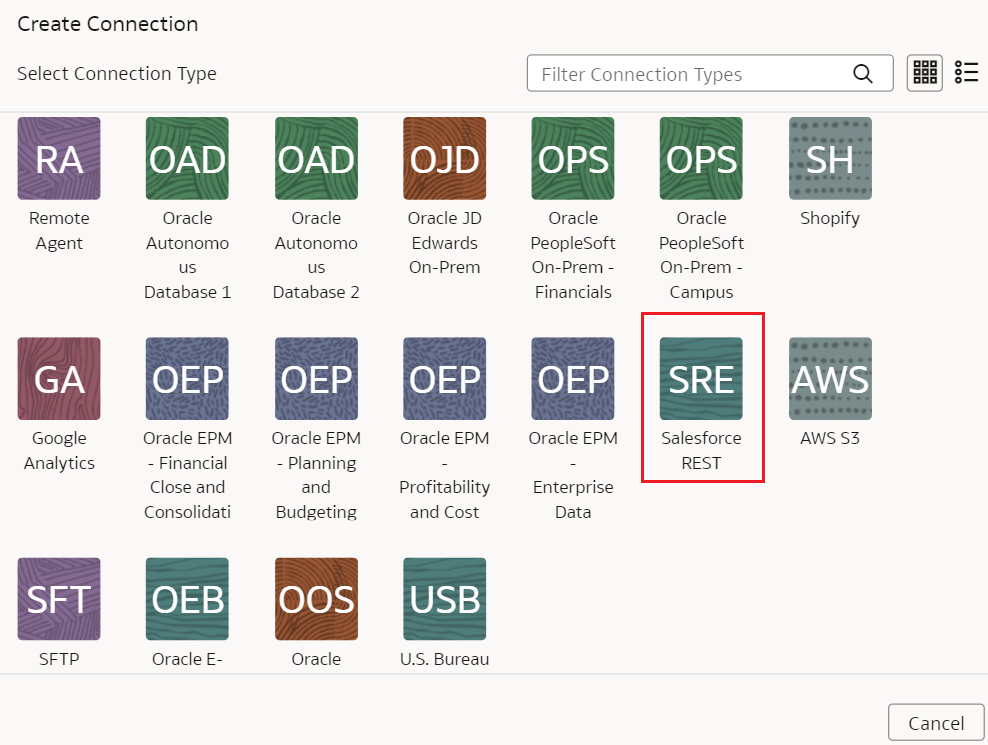
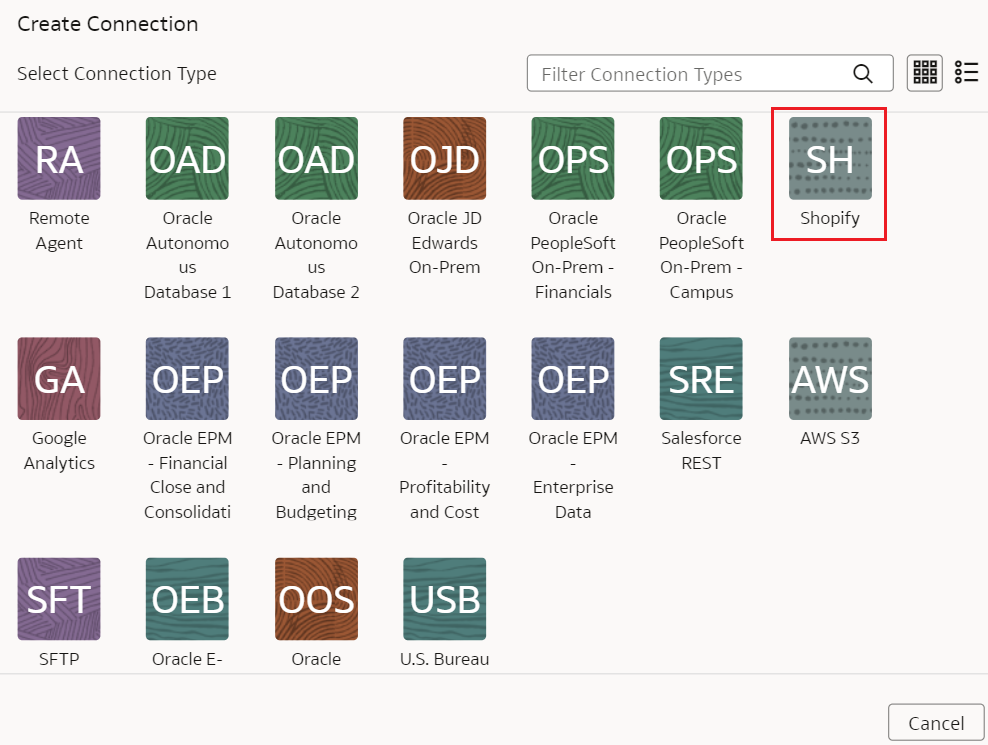
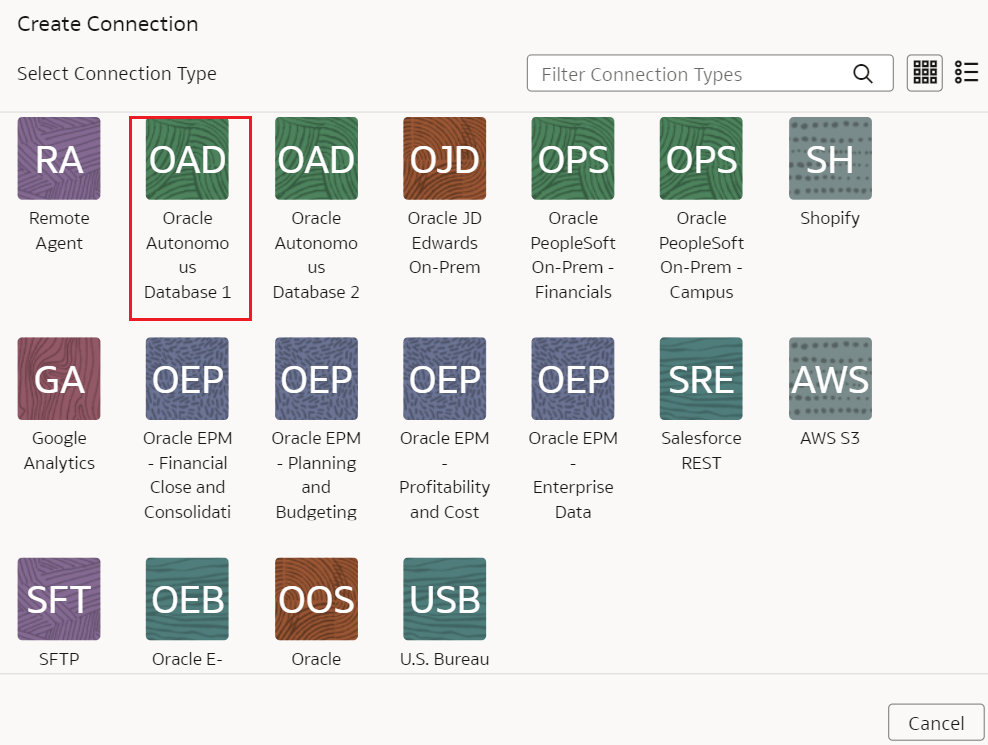
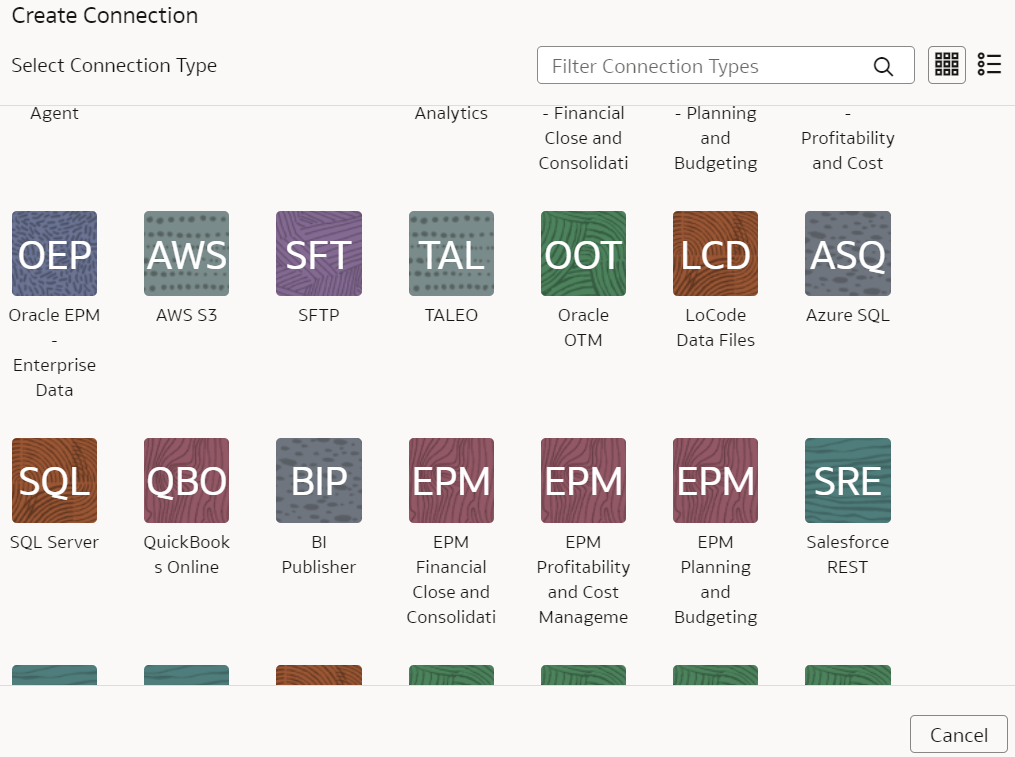
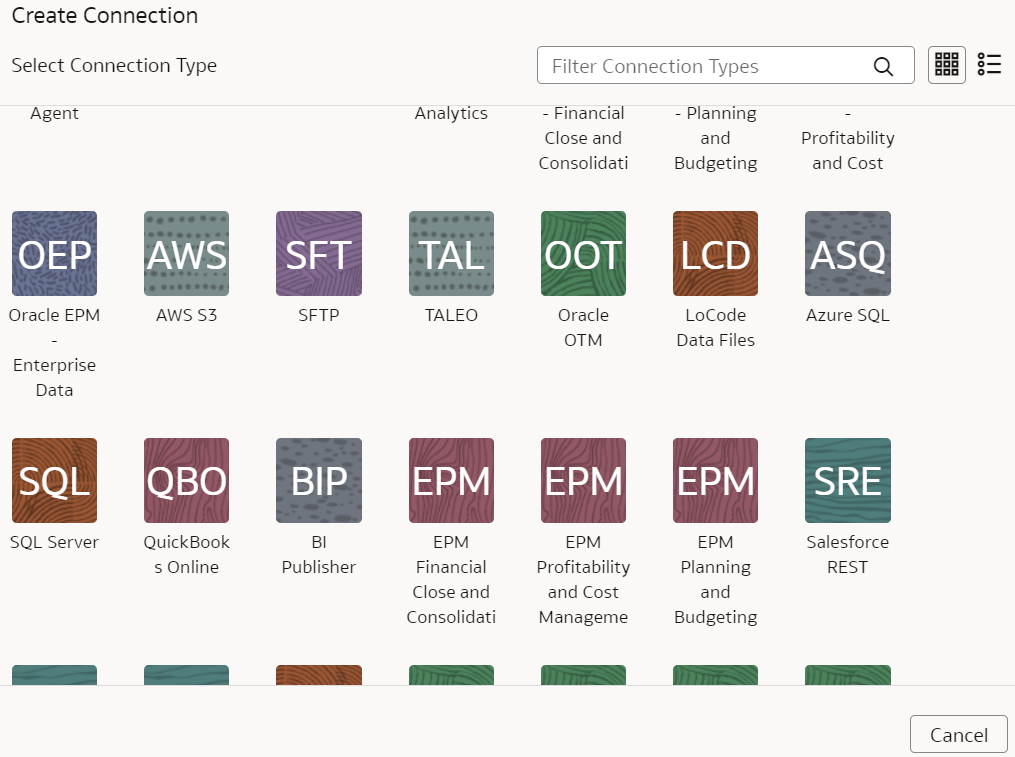
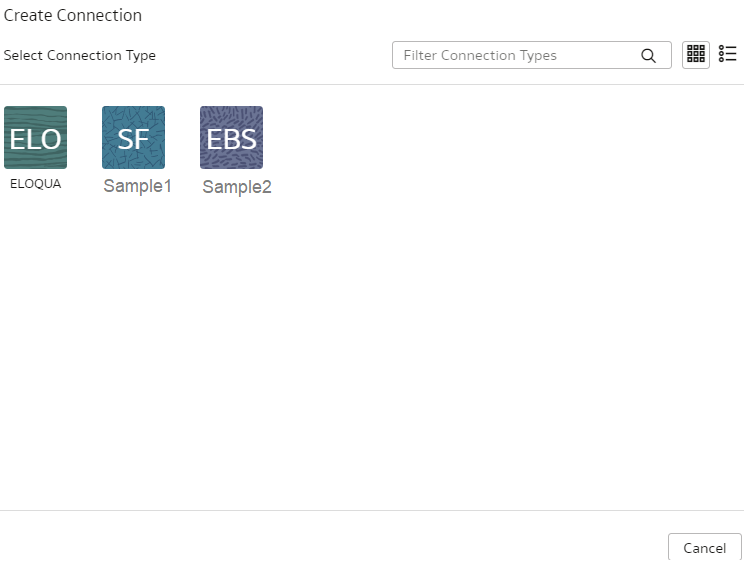
  5. In the Create Connection dialog, click or search for the connection type you want to create.

    Description of fawag_create_connection.png follows

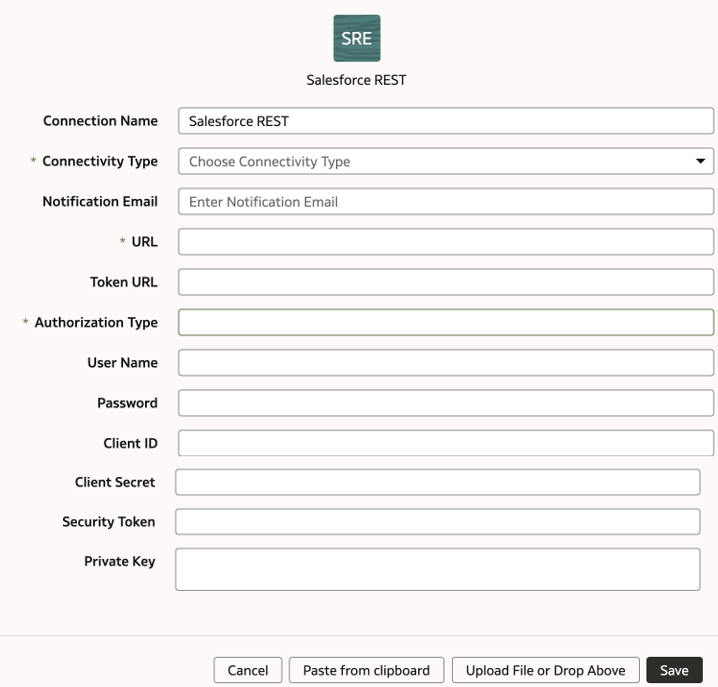
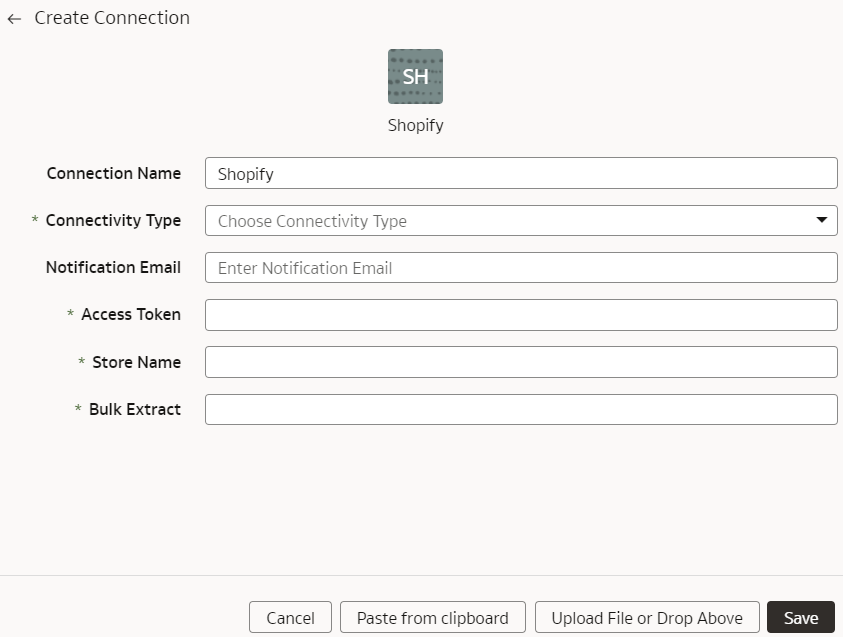
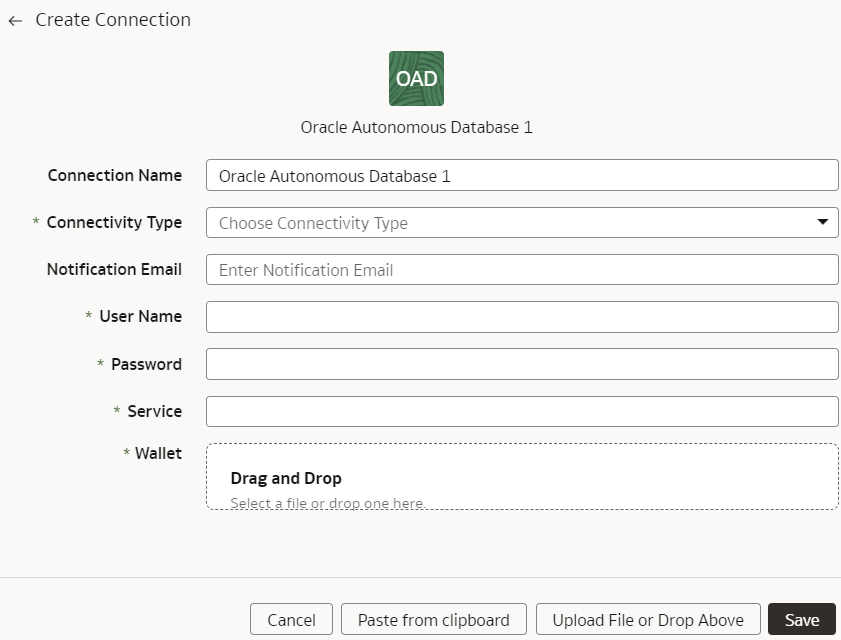
  6. In the dialog box for the connection, enter the details for your connection in the fields.
  7. Click Save.
The new connection is available on the Connections page.

Test a Data Connection

After you create a data connection, you should test it to ensure it works properly.

  1. Sign in to your service.
  2. In Oracle Fusion Analytics Warehouse Console, click Data Configuration under Application Administration.
  3. On the Data Configuration page, click Manage Connections under Configurations.
  4. On the Manage Connections page, click Connections, then select or search for the connection you want to test.
  5. Click the Action menu for the connection and select Test Connection.
  6. On the Request History page, check the status of the request to test the connection.

Update a Data Connection

When you first make a data connection, or when you make changes, you need to initialize and refresh it.

  1. Sign in to the Oracle Cloud Infrastructure Console.
  2. In Oracle Cloud Infrastructure Console, click the Navigation menu icon in the top left corner.
  3. Click Analytics & AI. Under Analytics, click Fusion Analytics Warehouse.
  4. Navigate to your service instances page.
  5. On the Instances page, click the instance for which you want to update the service.
  6. Click Connections, then select or search for the connection you want to test.
  7. Click the Action menu for the connection and select Initialize/Refresh Connection.

Delete a Data Connection

You can delete a custom data connection if you don't need it anymore.

Ensure that you delete the functional areas, data augmentations, and custom data configurations related to the data connection before deleting it. You can't update or load data from deleted data connections to the warehouse.

Note

  1. Sign in to your service.
  2. In Oracle Fusion Analytics Warehouse Console, click Data Configuration under Application Administration.
  3. On the Data Configuration page, click Manage Connections under Configurations.
  4. On the Manage Connections page, click Connections, then select or search for the connection you want to test.
  5. Click the Action menu for the connection and select Delete.
  6. In the Delete Connection dialog box, click Delete.

Connect With On-premises Sources

Connect with your on-premises applications to provide the background information for reports.

You can blend the additional data from these data sources with the ready-to-use datasets to enhance business analysis.

Set up the Remote Agent to Load Data into Fusion Analytics Warehouse (Preview)

As a service administrator, you can use an extract service remote agent to connect to your on-premises systems such as E-Business Suite, Peoplesoft, and JD Edwards, load data from these on-premises systems into Oracle Fusion Analytics Warehouse, and then use the on-premises data to create data augmentations.

After connecting to your on-premises system, the remote agent extracts the data and loads it into the autonomous data warehouse associated with your Oracle Fusion Analytics Warehouse instance. The remote agent pulls the metadata through the public extract service REST API and pushes data into object storage using the object storage REST API. You can extract and load the on-premises data into Oracle Fusion Analytics Warehouse only once in 24 hours.
Note

After configuring the remote agent on the Data Configuration page, wait for few minutes, refresh the remote agent page, and when you see the Agent Initialised message, you can proceed with other operations such as testing the connection to the remote agent, testng the connection to the remote source like EBusiness Suite, and refreshing the metadata. This enables you to run these jobs without timeout failures because data pipeline has a default timeout of 15 minutes.

Ensure that Remote Agent is enabled on the Enable Features page prior to creating this connection. See Make Preview Features Available.

  1. Download the remote agent Docker image from here.
  2. Identify a host to deploy the remote agent.
    The host that you identify must meet these minimum system requirements for the basic configuration of a single source agent:
    • CPU: 4 (CORE/CPU)
    • Memory: 8 GB
    • Storage: 8 GB
    Note

    The host must be able to make a JDBC connection to the applicable database.
  3. Copy the Docker image to the host and load it using this script:
    docker load -i <docker image zip>
    //List the images docker images
  4. Create and run the Docker container using this script:
    docker run -d -p 9091:9091 --name remoteagent -v /faw/software/remoteagent/config/:/faw/software/remoteagent/config/ -v /faw/logs/RemoteAgent/:/faw/logs/RemoteAgent <docker image Id>

    If the remote agent user interface isn't accessible, then run this script:

    sudo docker run -d -p 9091:9091 --name remoteagent --network host -v /faw/software/remoteagent/config/:/faw/software/remoteagent/config/ -v /faw/logs/RemoteAgent/:/faw/logs/RemoteAgent <docker image Id>
    Note

    Ensure that the logs directory in /faw/logs/RemoteAgent/ has write permissions and the config folder in /faw/software/remoteagent/config/ is present in case you need to add custom properties.
  5. If you've a firewall that prevents you from accessing the remote agent, then ensure that you complete these steps before starting the Docker container for the first time:
    1. Disable the firewall in the Linux host where Docker is deployed.
    2. Start the Docker container.
    3. Check the logs to see if the container is started.
    4. Enable the firewall.
    5. Open the port using this script:
      
      sudo firewall-cmd --zone=public --add-port=9091/tcp --permanent
      sudo firewall-cmd --reload
      sudo iptables-save | grep 9091
  6. Verify that the container has started successfully using this script:
    run '$ docker ps'
  7. Configure the extract service URL to connect using this information:
    1. Sign in to the remote agent user interface using http://<host>:9091/extractservice-remoteagent/index.html.
    2. Configure the extract service URL that the remote agent connects to and configure any outgoing proxies if required using the applicable extract service end points. You can form the extract service url based on your Oracle Fusion Analytics Warehouse URL by replacing ui/oax/ with the extract service context path. For example, if your product URL is https://myinstance.example.com/ui/oax/ then the extract service URL would be https://myinstance.example.com/extractservice.
  8. In the remote agent user interface, click Configure to configure the agent.
  9. Copy the configuration details from the text box or download the configuration details.
    You use it to set up the connection on the Data Configuration page in Oracle Fusion Analytics Warehouse.
  10. Optional: If you need to upgrade the remote agent, then use the following script:
    
    Stop Remoteagent docker
    sudo docker stop remoteagent
    
    Remove Remoteagent docker
    sudo docker rm remoteagent
    
    load the image from tar ball
    docker load -i <docker image zip>   
     
    Get Image ID from below 
    sudo docker images
    
    Run the image:       
    sudo docker run -d -p 9091:9091 --name remoteagent -v /faw/software/remoteagent/config/:/faw/software/remoteagent/config/:Z -v /faw/logs/RemoteAgent/:/faw/logs/RemoteAgent:Z <imageid>
  11. Configure the remote agent on the Data Configuration page in Oracle Fusion Analytics Warehouse using these instructions:
    1. On the Console, click Data Configuration under Application Administration.
    2. On the Data Configuration page, click Manage Connections.
    3. On the Manage Connections page, click Create and then click Connection.
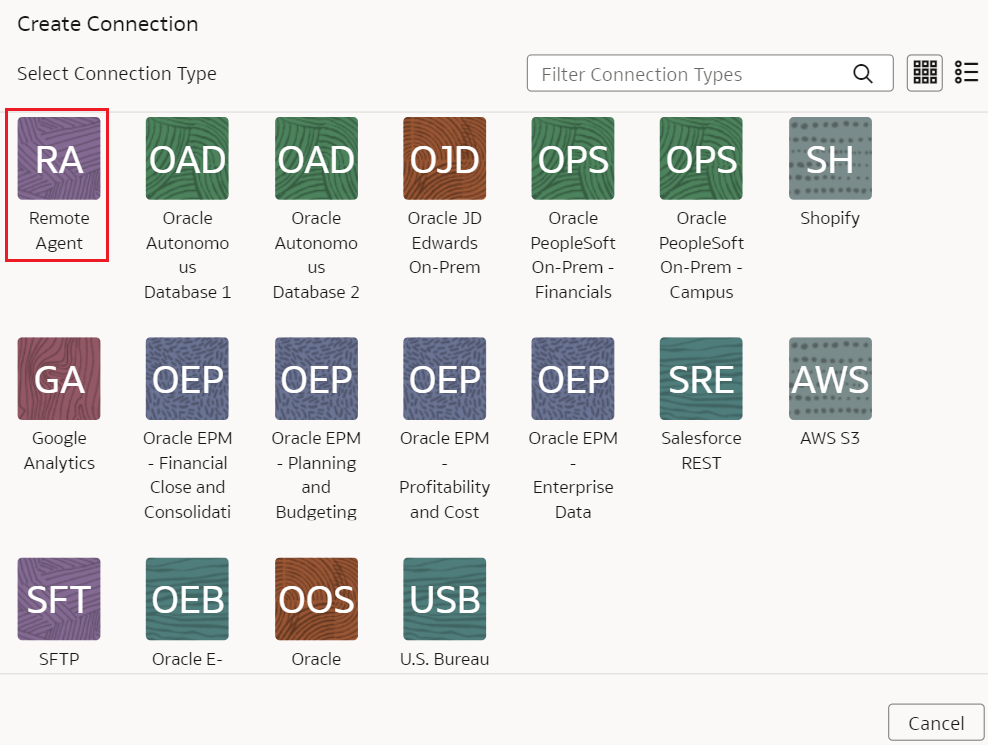
    4. In Create Connection, select Remote Agent as the connection type.
      Remote Agent connection option

    5. In the Create Connection Remote Agent dialog, in Connection Name, you can modify the default name and verify that Remote is displayed in Connectivity Type.
      Create Connection Remote Agent dialog

    6. Enter an email address to receive notifications in Notification Email, provide the Identifier and Host, in Public Key, click Upload File or Drop Above to fill in the details of the remote agent, and then click Save. You can add the configuration details file that you had downloaded or use the configuration details that you had copied after configuring the remote agent.

Load Data from On-premises E-Business Suite into Fusion Analytics Warehouse (Preview)

As a service administrator, you can use an extract service remote agent to connect to your on-premises Oracle E-Business Suite system.

After connecting to your on-premises system, the remote agent extracts the data and loads it into the autonomous data warehouse associated with your Oracle Fusion Analytics Warehouse instance. The remote agent pulls the metadata through the public extract service REST API and pushes data into object storage using the object storage REST API. You can extract and load the on-premises data into Oracle Fusion Analytics Warehouse only once a day.

Ensure that Oracle E-Business Suite On-Prem is enabled on the Enable Features page prior to creating this connection. See Make Preview Features Available.

  1. Set up the remote agent to load data from your on-premises Oracle E-Business Suite system into Oracle Fusion Analytics Warehouse.
  2. Configure the remote agent and E-Business Suite data source on the Data Configuration page in Oracle Fusion Analytics Warehouse using these instructions:
    1. On the Console, click Data Configuration under Application Administration.
    2. On the Data Configuration page, click Manage Connections.
    3. On the Manage Connections page, click Create and then click Connection.
    4. In Create Connection, select Remote as the remote agent connection type.
      Note

      The "Remote" and "EBS" connection types are ready-to-use.
    5. Click Add File or drop down to fill in the details of the remote agent. You can add the configuration details file that you had downloaded or use the configuration details that you had copied after configuring the remote agent. See Create a Data Connection.
    6. In Create Connection, select Oracle E-Business Suite as the connection type.
      E-Business Suite connection option

    7. In Create Connection for Oracle E-Business Suite On-Prem, select Remote as connectivity type.
      Create Connection for Oracle E-Business Suite On-Prem dialog

    8. In the Remote Agent field, select the remote agent connection that you created, for example, EBS-Remote Agent. Enter an email address to receive notifications in Notification Email, provide the credentials in User Name and Password, the E-Business Suite connection using the JDBC format such as jdbc:oracle:thin:@<HOST>:<PORT>/<DB_NAME/SID_NAME> in URL, and select the E-Business Suite offerings that you want to load data from in Offerings.
    9. Confirm that you see the Remote Agent and E-Business Suite connections on the Manage Connections page.
    10. On the Manage Connections page, select Actions (Actions menu ellipsis icon) for the E-Business Suite connection and then select Refresh Metadata.
      Note

      You can’t create augmentations for E-Business Suite unless you perform a metadata extract.
    11. Test both the connections by selecting the Test Connection option in Actions. You can check the statuses of all these requests on the Data Configuration Request History page.
  3. After the connections are successfully established, navigate to the Data Augmentation tile on the Data Configuration page and create a data augmentation using the E-Business Suite data. Ensure that you select Regular as the source dataset type and EBS as the pillar. Select the applicable E-Business Suite source tables. See Augment Your Data.

Load Data from On-premises MySQL Database into Fusion Analytics Warehouse (Preview)

As a service administrator, you can use an extract service remote agent to connect to your on-premises MySQL database.

After connecting to your on-premises system, the remote agent extracts the data and loads it into the autonomous data warehouse associated with your Oracle Fusion Analytics Warehouse instance. The remote agent pulls the metadata through the public extract service REST API and pushes data into object storage using the object storage REST API. You can extract and load the on-premises data into Oracle Fusion Analytics Warehouse only once a day.

Ensure that MySQL On-Prem is enabled on the Enable Features page prior to creating this connection. See Make Preview Features Available.

  1. Set up the remote agent to load data from your on-premises MySQL database into Oracle Fusion Analytics Warehouse.
  2. Check the port number for your on-premises MySQL database and create a service request with server host and port details to enable network connectivity to the on-premises MySQL server.
  3. Configure the remote agent and on-premises MySQL database on the Data Configuration page in Oracle Fusion Analytics Warehouse by following these steps:
    1. On the Console, click Data Configuration under Application Administration.
    2. On the Data Configuration page, click Manage Connections.
    3. On the Manage Connections page, click Create and then click Connection.
    4. In Create Connection, select MySQL On-Prem as the connection type.
      MySQL On-Prem connection option

    5. In Connectivity Type, select Remote.
    6. In the Remote Agent field, select the remote agent connection that you created, for example, MySQL-Remote Agent. Enter an email address to receive notifications in Notification Email, and provide these details:
      • Host Name: Enter the host name of MySQL server such as 100.111.252.64
      • Port Number: Enter the port number where the server is listening such as 3306
      • Database: Enter the database name you need to connect to such as airportdb
      • Credentials to access the database in User Name and Password
      • Last Update Date Column Pattern: Enter "%r%a%o%%"
        Note

        If column name matches with pattern provided, then Fusion Analytics Warehouse marks the column name with isLastUpdateDate = true and uses it for the incremental extract. For example, if pattern provided is “%mo%fie%te%“, then the column name modifiedDate is marked as isLastUpdateDate = true.
      • Initial Extract Date Column Pattern: Enter "%e%art%new"
        Note

        If column name matches with pattern provided, then Fusion Analytics Warehouse marks the column name with isCreationDate = true and uses it for the initial extract date extraction. For example, if pattern provided is: “%cr%ted%te%“, then the column name createdDate is marked as isCreationDate = true.

      Create Connection for MySQL On-Prem dialog

    7. Confirm that you see the Remote Agent and on-premises MySQL database connections on the Manage Connections page.
    8. On the Manage Connections page, select Actions (Actions menu ellipsis icon) for the on-premises MySQL database connection and then select Refresh Metadata.
      Note

      You can’t create augmentations for on-premises MySQL database unless you perform a metadata extract.
    9. Test both the connections by selecting the Test Connection option in Actions. You can check the statuses of all these requests on the Data Configuration Request History page.
  4. After the connections are successfully established, navigate to the Data Augmentation tile on the Data Configuration page and create a data augmentation using the on-premises MySQL database data. Ensure that you select Regular as the source dataset type and EBS as the pillar. Select the applicable on-premises MySQL database source tables. See Augment Your Data.

Load Data from On-premises PeopleSoft into Fusion Analytics Warehouse (Preview)

As a service administrator, you can use an extract service remote agent to connect to your on-premises Oracle PeopleSoft system.

After connecting to your on-premises system, the remote agent extracts the data and loads it into the autonomous data warehouse associated with your Oracle Fusion Analytics Warehouse instance. The remote agent pulls the metadata through the public extract service REST API and pushes data into object storage using the object storage REST API. You can extract and load the on-premises data into Oracle Fusion Analytics Warehouse only once in 24 hours.
Ensure that Remote Agent and depending on the functional module you want to connect to, the applicable feature is enabled on the Enable Features page prior to creating this connection:
  • Oracle PeopleSoft On-Prem - Campus Solutions
  • Oracle PeopleSoft On-Prem - Financials
  • Oracle PeopleSoft On-Prem - Human Resources
  • Oracle PeopleSoft On-Prem - Learning Management
See Make Preview Features Available.
  1. Set up the remote agent to load data from your on-premises Oracle E-Business Suite system into Oracle Fusion Analytics Warehouse.
  2. Configure the remote agent and PeopleSoft data source on the Data Configuration page in Oracle Fusion Analytics Warehouse using these instructions:
    1. On the Console, click Data Configuration under Application Administration.
    2. On the Data Configuration page, click Manage Connections.
    3. On the Manage Connections page, click Create and then click Connection.
    4. In Create Connection, select Remote Agent as the connection type.
    5. In the Create Connection Remote Agent dialog, in Connection Name, you can modify the default name and verify that Remote is displayed in Connectivity Type.
    6. Enter an email address to receive notifications in Notification Email, provide the Identifier and Host, in Public Key, click Upload File or Drop Above to fill in the details of the remote agent, and then click Save. You can add the configuration details file that you had downloaded or use the configuration details that you had copied after configuring the remote agent.
    7. Navigate to the Manage Connections page, click Create and then click Connection.
    8. In Create Connection, select the connection type based on the functional module that you want to connect to. For example, to connect to the "Financials" module, select Oracle PeopleSoft On-Prem - Financials as the connection type.
      Oracle PeopleSoft On-Prem - Financials connection option

    9. In Create Connection for Oracle PeopleSoft On-Prem - Financials dialog, in Connectivity Type, verify that Remote is selected automatically.
      Create Connection for Oracle PeopleSoft On-Prem - Financials dialog

    10. In Remote Agent, select the remote agent connection that you created earlier, for example, Remote Agent.
    11. Enter an email address to receive notifications in Notification Email, provide credentials for your PeopleSoft source in User Name and Password, and the URL of your PeopleSoft source in URL.
    12. Confirm that you see the Remote Agent and PeopleSoft connections on the Manage Connections page.
    13. On the Manage Connections page, select Actions (Actions menu ellipsis icon) for the PeopleSoft connection and then select Refresh Metadata.
      Note

      You can’t create augmentations for PeopleSoft unless you perform a metadata extract.
    14. Test both the connections by selecting the Test Connection option in Actions. You can check the statuses of all these requests on the Data Configuration Request History page.
  3. After the connections are successfully established, navigate to the Data Augmentation tile on the Data Configuration page and create a data augmentation using the PeopleSoft data. Ensure that you select Regular as the source dataset type and PSFT as the pillar. Select the applicable PeopleSoft source tables. See Augment Your Data.

Load Data from On-premises JD Edwards into Fusion Analytics Warehouse (Preview)

As a service administrator, you can use an extract service remote agent to connect to your on-premises JD Edwards system and use the JD Edwards data to create data augmentations.

After connecting to your on-premises system, the remote agent extracts the data and loads it into the autonomous data warehouse associated with your Oracle Fusion Analytics Warehouse instance. The remote agent pulls the metadata through the public extract service REST API and pushes data into object storage using the object storage REST API. You can extract and load the on-premises data into Oracle Fusion Analytics Warehouse only once in 24 hours.

Ensure that Remote Agent and Oracle JD Edwards On-Prem are enabled on the Enable Features page prior to creating this connection. See Make Preview Features Available.

  1. Set up the remote agent to load data from your on-premises Oracle E-Business Suite system into Oracle Fusion Analytics Warehouse.
  2. Configure the remote agent and JD Edwards data source on the Data Configuration page in Oracle Fusion Analytics Warehouse using these instructions:
    1. On the Console, click Data Configuration under Application Administration.
    2. On the Data Configuration page, click Manage Connections.
    3. On the Manage Connections page, click Create and then click Connection.
    4. In Create Connection, select Remote Agent as the connection type.
    5. In the Create Connection Remote Agent dialog, in Connection Name, you can modify the default name and verify that Remote is displayed in Connectivity Type.
    6. Enter an email address to receive notifications in Notification Email, provide the Identifier and Host, in Public Key, click Upload File or Drop Above to fill in the details of the remote agent, and then click Save. You can add the configuration details file that you had downloaded or use the configuration details that you had copied after configuring the remote agent.
    7. Navigate to the Manage Connections page, click Create and then click Connection.
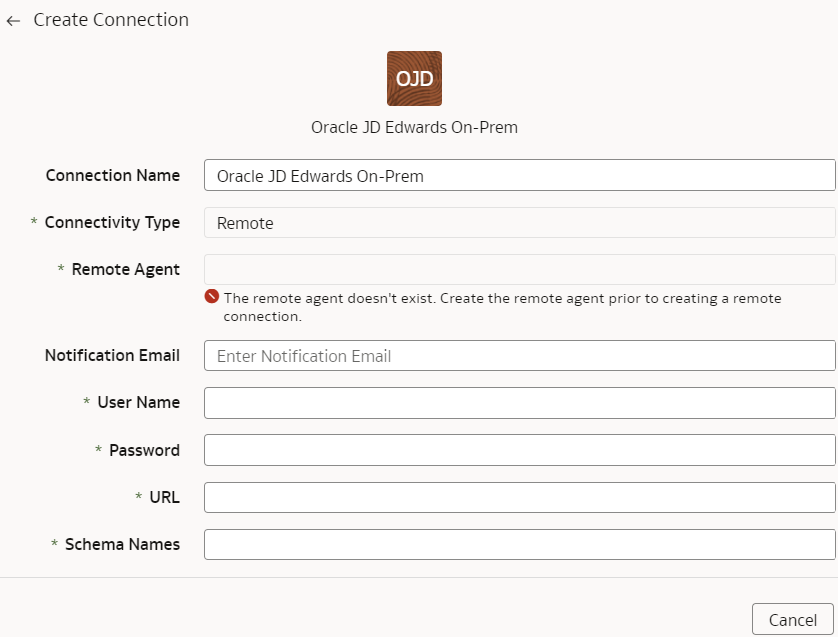
    8. In Create Connection, select Oracle JD Edwards On-Prem as the connection type.
      Oracle JD Edwards On-Prem connection option

    9. In Create Connection for Oracle JD Edwards On-Prem, in Connectivity Type, verify that Remote is selected automatically.
      Create Connection for Oracle JD Edwards On-Prem

    10. In Remote Agent, select the remote agent connection that you created earlier, for example, Remote Agent.
    11. Enter an email address to receive notifications in Notification Email, provide credentials for your JD Edwards source in User Name and Password, and the URL of your JD Edwards source in URL.
    12. Confirm that you see the Remote Agent and JD Edwards connections on the Manage Connections page.
    13. On the Manage Connections page, select Actions (Actions menu ellipsis icon) for the JD Edwards connection and then select Refresh Metadata.
      Note

      You can’t create augmentations for JD Edwards unless you perform a metadata extract.
    14. Test both the connections by selecting the Test Connection option in Actions. You can check the statuses of all these requests on the Data Configuration Request History page.
  3. After the connections are successfully established, navigate to the Data Augmentation tile on the Data Configuration page and create a data augmentation using the JD Edwards data. Ensure that you select Regular as the source dataset type and JD Edwards as the pillar. Select the applicable JD Edwards source tables. See Augment Your Data.

Load Data from SQL Server into Oracle Fusion Analytics Warehouse (Preview)

As a service administrator, you can use the Oracle Fusion Analytics Warehouse extract service to acquire data from SQL Server and use it to create data augmentations.

Ensure that SQL Server is enabled on the Enable Features page prior to creating this connection. See Make Preview Features Available.

  1. Set up the remote agent to load data from your SQL Server into Oracle Fusion Analytics Warehouse.
  2. In Oracle Fusion Analytics Warehouse, create the SQL Server data connection using these instructions:
    1. In Oracle Fusion Analytics Warehouse Console, click Data Configuration under Application Administration.
    2. On the Data Configuration page, click Manage Connections.
    3. On the Manage Connections page, click Create and then click Connection.
    4. In Create Connection, select SQL Server as the connection type.

      SQL Server connection option

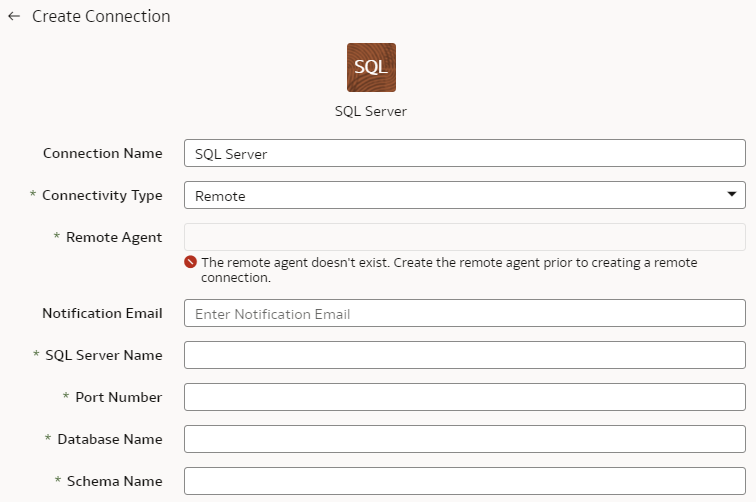
    5. In the dialog for the SQL Server connection, enter these details and click Save:
      • Connectivity Type: Select Remote.
      • Remote Agent: Select the remote agent that you had set up to load data from your SQL Server.
      • Notification Email: Enter an email address to receive notifications.
      • SQL Server Name: Enter the SQL server name.
      • Port Number: Enter the port number on which your SQL server is available.
      • Database Name: Enter the database name in your SQLServer instance.
      • Schema Name: Enter the name of the schema for the dataset you want to load to run analytics on.
      • User Name and Password: Enter the credentials for your SQL Server instance.
      • Initial Extract Date Column Pattern: MM/dd/yyyy is the date format in your initial extract column; sample date is 1/23/1998.
      • Last Update Date Column Pattern: Last update date shows when the last update was done in your SQL Server database.

      Create Connection for SQL Server dialog

    6. Click Save.
  3. On the Manage Connections page, select Actions (Actions menu ellipsis icon) for the SQL Server connection and then select Test Connection.
  4. On the Manage Connections page, select Actions for the SQL Server connection and then select Refresh Metadata.
    Note

    You can’t create augmentations for SQL Server unless you perform a metadata extract.
  5. After the connections are successfully established, navigate to the Data Augmentation tile on the Data Configuration page and create a data augmentation using the SQL Server data. Ensure that you select Regular as the source dataset type and SQL Server as the pillar. Select the applicable SQL Server source tables. See Augment Your Data.

Connect with Cloud File Storage Sources

Connect with your file storage-based cloud sources to provide the background information for reports.

You can blend the additional data from these data sources with the ready-to-use datasets to enhance business analysis.

About OpenCSV Standards

The CSV parser in the extract service for file extractors uses Opencsv. The csv files that are processed by extractservice must be compliant with the Opencsv standards.

See Opencsv File Standards. In addition to the CSV parser, the extract service supports files that are compliant with RFC4180 specification. The RFC 4180 CSV parser enables you to ingest single-line and multi-line data within your .csv files. The RFC 4180 parser supports ingesting data records with up to 99 line breaks. For more information on the RFC 4180 specification, see Common Format and MIME Type for Comma-Separated Values (CSV) Files.

Keep in mind the following:
  • While using special characters:
    • For strings without special characters, quotes are optional.
    • For strings with special characters, quotes are mandatory. For example, if a string has a comma, then you must use quotes for the string such as "Abc, 123".
    • Escapes (backslash character) are optional.
    • Backslash characters must always be escaped. For example, if there is a backslash in your data, use the following format: "Double backslash ( \\ ) abc".
    • To manage quotes inside a quoted string, use a backslash inside the quotes: "Asd \" asd".
  • The Opencsv parser allows you to select one of these available characters as a delimiter:
  • Comma (,)
  • Semi-colon ( ; )
  • Pipe (|)
  • Tab ( )

About Date and Timestamp Formatting for CSV File-based Extractors

Extractors such as Secure FTP (SFTP), Amazon Simple Storage Service (AWS S3), and Oracle Object Storage Service use CSV data files that have date and timestamp fields.

For the CSV file-based extractors, use the format examples to provide the values in the CSV Date Format, and CSV Timestamp Format fields while entering the source connection details.
Note

Ensure that the date and timestamp formats for the data files match the date and timestamp formats in your source; for example, if you've used MM/dd/yyyy and MM/dd/yyyy hh:mm:ss in your source, then you must specify the same formats while creating the applicable data connections.
Examples
Example Pattern
1/23/1998 MM/dd/yyyy
1/23/1998 12:00:20 MM/dd/yyyy hh:mm:ss
12:08 PM h:mm a
01-Jan-1998 dd-MMM-yyyy
2001-07-04T12:08:56.235-0700 yyyy-MM-dd'T'HH:mm:ss.SSSZ
The guidelines to define the format are:
Letter Meaning
M Month
d Day
y Year
h Hour (0-12)
H Hour (0-23)
m Minute
s Second
S Milli Second
a AM/PM
Z Timezone

Load Data from Amazon Simple Storage Service into Oracle Fusion Analytics Warehouse (Preview)

As a service administrator, you can use the Oracle Fusion Analytics Warehouse extract service to acquire data from Amazon Simple Storage Service (AWS S3) and use it to create data augmentations.

Ensure that AWS S3 is enabled on the Enable Features page prior to creating this connection. See Make Preview Features Available.

  1. In Oracle Fusion Analytics Warehouse, create the AWS S3 data connection using these instructions:
    1. In Oracle Fusion Analytics Warehouse Console, click Data Configuration under Application Administration.
    2. On the Data Configuration page, click Manage Connections.
    3. On the Manage Connections page, click Create and then click Connection.
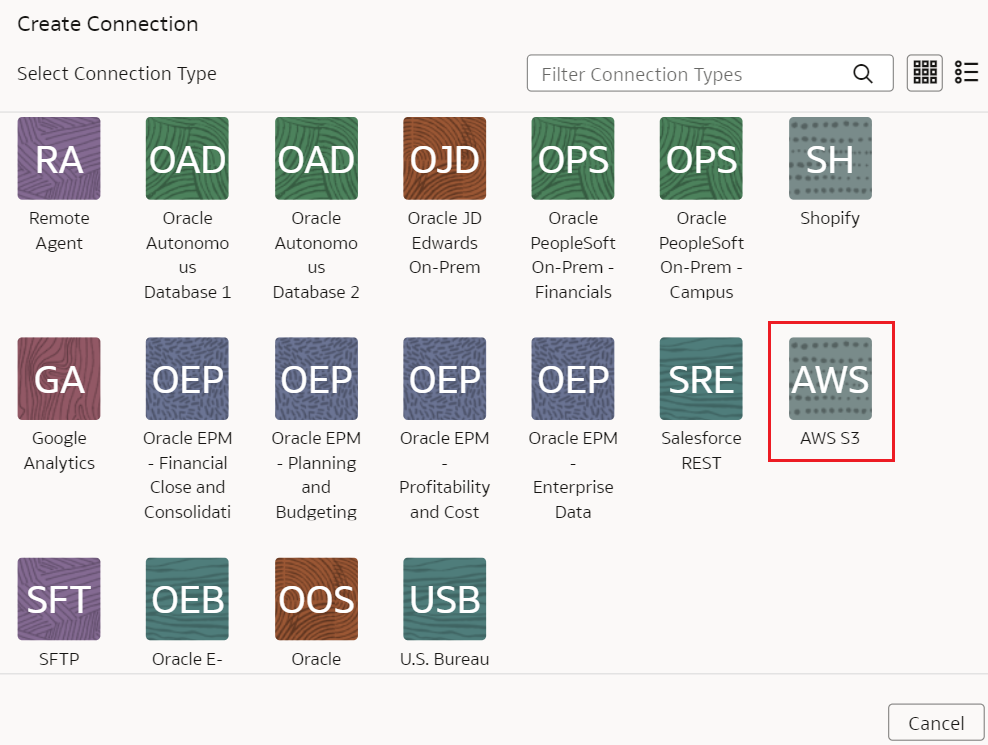
    4. In Create Connection, select AWS S3 as the connection type.

      AWS S3 connection option

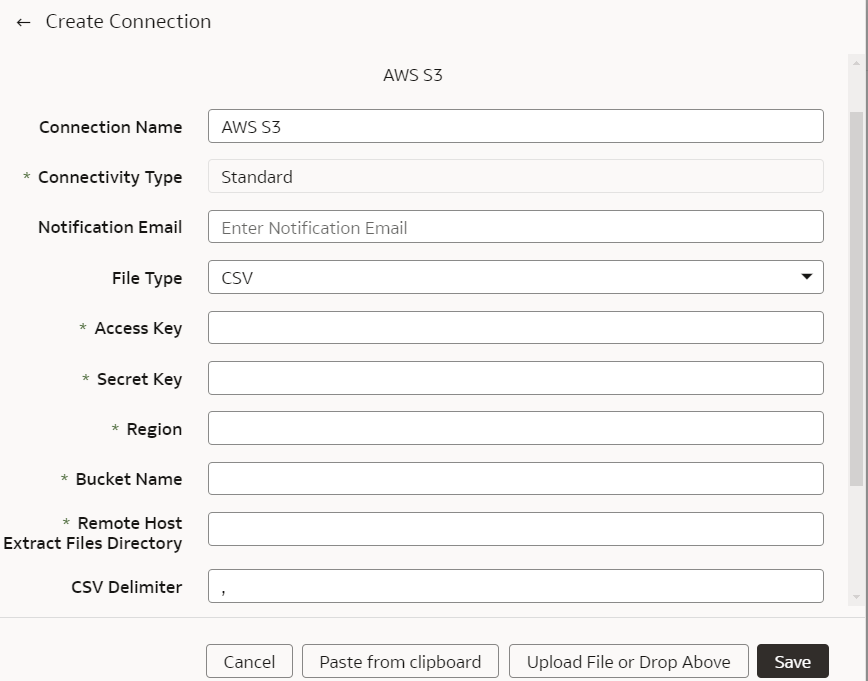
    5. In the dialog for the AWS S3 connection, select Standard in Connectivity Type, enter an email address to receive notifications in Notification Email, and provide applicable details of your AWS S3.

      Create Connection for AWS S3 dialog

    6. Click Save.
  2. On the Manage Connections page, select Actions (Actions menu ellipsis icon) for the AWS S3 connection and then select Test Connection.
  3. On the Manage Connections page, select Actions for the AWS S3 connection and then select Refresh Metadata.
    Note

    You can’t create augmentations for AWS S3 unless you perform a metadata extract.
  4. After the connections are successfully established, navigate to the Data Augmentation tile on the Data Configuration page and create a data augmentation using the AWS S3 data. Ensure that you select Regular as the source dataset type and AWS S3 as the pillar. Select the applicable AWS S3 source tables. See Augment Your Data.

Load Data from Oracle Object Storage into Fusion Analytics Warehouse

As a service administrator, you can use the Fusion Analytics Warehouse extract service to acquire data from Oracle Object Storage Service and use it to create data augmentations.

The recommended approach is to create one augmentation from one source table after acquiring data from Oracle Object Storage Service. After completion of augmentation, Fusion Analytics Warehouse renames the source table in this case and if you create more than one augmentation from the same source, all other augmentations may fail with a message that the source file wasn't found.

  1. Store the following details in a text file to use while creating the connection to Oracle Object Storage Service in Fusion Analytics Warehouse:
    1. In Oracle Object Storage Service, create the Remote Host Extract Files directory as the base folder in which you must place all your data files. Note down the name of this directory. See the "To create a folder or subfolder" section in Using the Console.
    2. Obtain the URL of the Oracle Object Storage Service by signing into the Oracle Cloud Infrastructure Console and navigating to the bucket to get the details of the region, namespace, and bucket name. For example, the URL must be in the https://objectstorage.<region>.oraclecloud.com/n/<namespace>/b/<name of the bucket> format. See the "To view bucket details" section in Using the Console.
    3. Obtain a user’s OCID by navigating in the Oracle Cloud Infrastructure Console to Identity & Security, and then Users. On the Users page, search for a user who has access to the bucket used in the connector and copy the OCID. Obtain the tenancy ID by clicking your profile icon and then Tenancy in the Oracle Cloud Infrastructure Console. Under Tenancy information, copy the OCID. See Where to Get the Tenancy's OCID and User's OCID.
    4. Obtain the fingerprint for a user from the Oracle Cloud Infrastructure Console. Navigate to API Keys under Resources on the user page, and then click Add API Keys. In the Add API Keys dialog, ensure that Generate API Key Pair is selected. Download the private and public keys using the Download Private Key and Download Public Key options. You must copy the entire text of the private key along with the comments before and after the actual key. These comments could be as simple as: “---------------Begin RSA Private Key --------” and “-----------End of RSA Private Key----------“. Don’t copy only the alphanumeric key without the header and footer comments. In the Add API Keys dialog, select Choose Public Key File to upload your file, or Paste Public Key, if you prefer to paste it into a text box and then click Add. Copy the fingerprint that you see after you upload the public key in the Console. It looks something like this:12:34:56:78:90:ab:cd:ef:12:34:56:78:90:ab:cd:ef.
  2. In Fusion Analytics Warehouse, create the Oracle Object Storage connection using these instructions:
    1. In Fusion Analytics Warehouse Console, click Data Configuration under Application Administration.
    2. On the Data Configuration page, click Manage Connections.
    3. On the Manage Connections page, click Create and then click Connection.
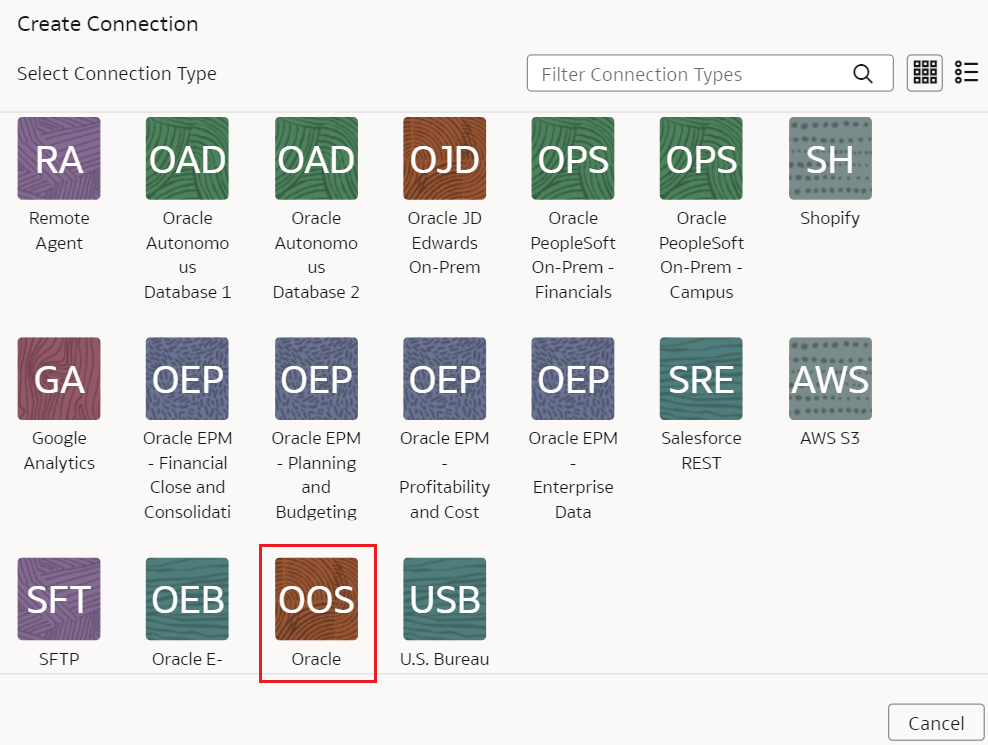
    4. In Create Connection, select Oracle Object Storage Service as the connection type.
      Oracle Object Storage Service connection option
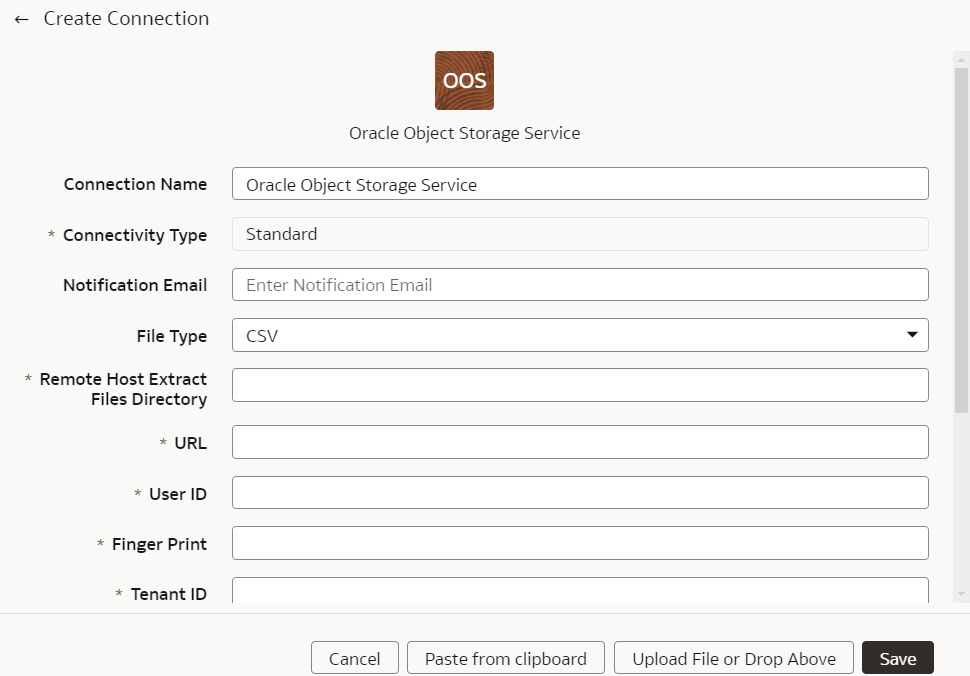
    5. In the dialog for the Oracle Object Storage Service connection, select Standard in Connectivity Type and enter these details:
      • Connection Name: Object Storage
      • Connection Type: Standard
      • Notification Email: An email address to receive notifications
      • Remote Host Extract Files Directory: Name of the base folder in which you must place all your data files in Oracle Object Storage Service
      • URL: URL of the Oracle Object Storage Service that you noted down in a text file
      • User ID: OCID of a user that has access to the applicable bucket in Oracle Object Storage Service
      • Finger Print: The fingerprint that you saw and copied after you uploaded the public key in the Console. It looks something like this: 12:34:56:78:90:ab:cd:ef:12:34:56:78:90:ab:cd:ef
      • Tenant ID: Tenancy in the Oracle Infrastructure Cloud Console that you noted down in the text file
      • Private Key: Paste the private key contents that you previously downloaded
      • File Type: csv
      • CSV Delimiter: Delimiter for the data files
      • Date format for the data files must match the date format in your Oracle Object Storage Service source; for example, if you've used MM/dd/yyyy (01/23/1998) in your source, then you must specify the same format in CSV Date Format. See About Date and Timestamp Formatting for CSV File-based Extractors.
      • Timestamp format for the data files must match the timestamp format in your Oracle Object Storage Service source; for example, if you've used MM/dd/yyyy hh:mm:ss (01/23/1998 12:00:20) in your source, then you must specify the same format in CSV Timestamp Format
      Create Connection for Oracle Object Storage Service dialog
    6. Click Save.
  3. In Oracle Object Storage Service:
    1. Create the folder structure in the Bucket using these guidelines:
      Base folder
      • The base folder in the bucket must match with the details provided in the connection.
      • Inside the base folder, ensure to place each file in its own folder.
      • Ensure that the Prefix of Data_Store_Name (same as Folder name) and Files in the target folder match exactly.

      See the "To create a folder or subfolder" section in Using the Console.

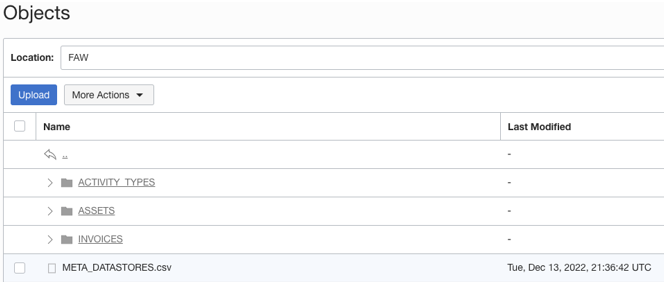
    2. Inside the base folder, create the metadata file for the Data Store List. This file lists the supported data stores. Each data store is a folder that has the actual file used in data augmentation, for example, ASSETS. Ensure that the file name and folder name match and there aren’t any special characters (including space) in the datastore, folder or file names.
      Base folder structure
    3. Create the metadata file for each data file under the data store folder using these guidelines:

      The META_DATASTORES.csv must have these columns:

      • DATA_STORE_NAME - A mandatory column to identify the data store name.
      • DATA_STORE_LABEL - A non-mandatory column that identifies the description of the data store.

      Each folder must have:

      • A data file that has the actual data that gets loaded into Fusion Analytics Warehouse. This file must have a prefix with the DATA STORE NAME.
      • A metadata file for the list of columns contains all the column information on the data. This file must have a Prefix with META_DATASTORES_<DATA_STORE_NAME>_COL.
        • For the columns in this metadata, ensure the following:
        • If column name is ABC, then metadata can be ABC or “ABC” - the double quotes are ignored.
        • If column name is “ABC”, then metadata must be “”ABC”” – the first double quotes are ignored.

      Example

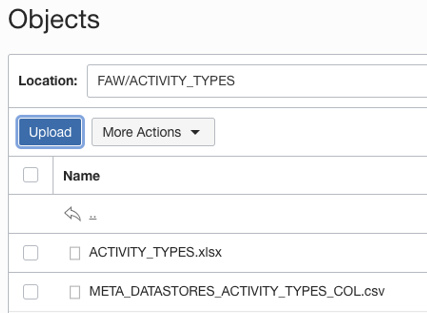
      In the image, the folder name is ACTIVITY_TYPES. Hence, the data store name is ACTIVITY_TYPES. You can confirm this from the META_DATASTORES.csv file. In this example, the file is named ACTIVITY_TYPES.xlsx or ACTIVITY_TYPES.csv. The metadata file must be META_DATASTORES_ACTIVITY_TYPES_COL.csv.Sample folder and metadata file

      The META_DATASTORES_ACTIVITY_TYPES_COL.csv has these columns:
      • DATA_STORE_NAME - This is a mandatory column.
      • COLUMN_NAME - This is a mandatory column.
      • COLUMN_LABEL - This is a non-mandatory column.
      • DATA_TYPE – This is a mandatory column.
      • WIDTH – This column identifies the string length.
      • PRECISION - This column value must be Numeric data type.
      • SCALE - This column value must be Numeric data type.
      • KEY_SEQUENCE - This is a mandatory column that identifies the Primary Key definition. If you’re using the composite primary key, then use column order numbers as values.
  4. In Fusion Analytics Warehouse, on the Manage Connections page, select Actions (Actions menu ellipsis icon) for the Oracle Object Storage Service connection and then select Test Connection.
  5. On the Manage Connections page, select Actions for the Oracle Object Storage Service connection and then select Refresh Metadata.
    Note

    You can’t create augmentations for the Oracle Object Storage Service unless you perform a metadata extract.
  6. After the connections are successfully established, navigate to the Data Augmentation tile on the Data Configuration page and create a data augmentation using the data from the Oracle Object Storage Service. Ensure that you select Regular as the source dataset type and Oracle Object Storage Service as the pillar. Select the applicable source tables from the Oracle Object Storage Service data. See Augment Your Data.

Load Data from a Secure FTP Source into Fusion Analytics Warehouse (Preview)

As a service administrator, you can use the Fusion Analytics Warehouse extract service to acquire data from a secure FTP source (SFTP) and use it to create data augmentations.

Ensure that SFTP is enabled on the Enable Features page prior to creating this connection. See Make Preview Features Available.

  1. Check the port number for your secure FTP database and create a service request to get the port opened.
    Note

    You must provide the IP address of the SFTP server, which should be a public IP and can’t be hostname and a fully qualified domain name (FQDN) or a class A private IP.
  2. In Fusion Analytics Warehouse, create the SFTP data connection using these instructions:
    1. In Fusion Analytics Warehouse Console, click Data Configuration under Application Administration.
    2. On the Data Configuration page, click Manage Connections.
    3. On the Manage Connections page, click Create and then click Connection.
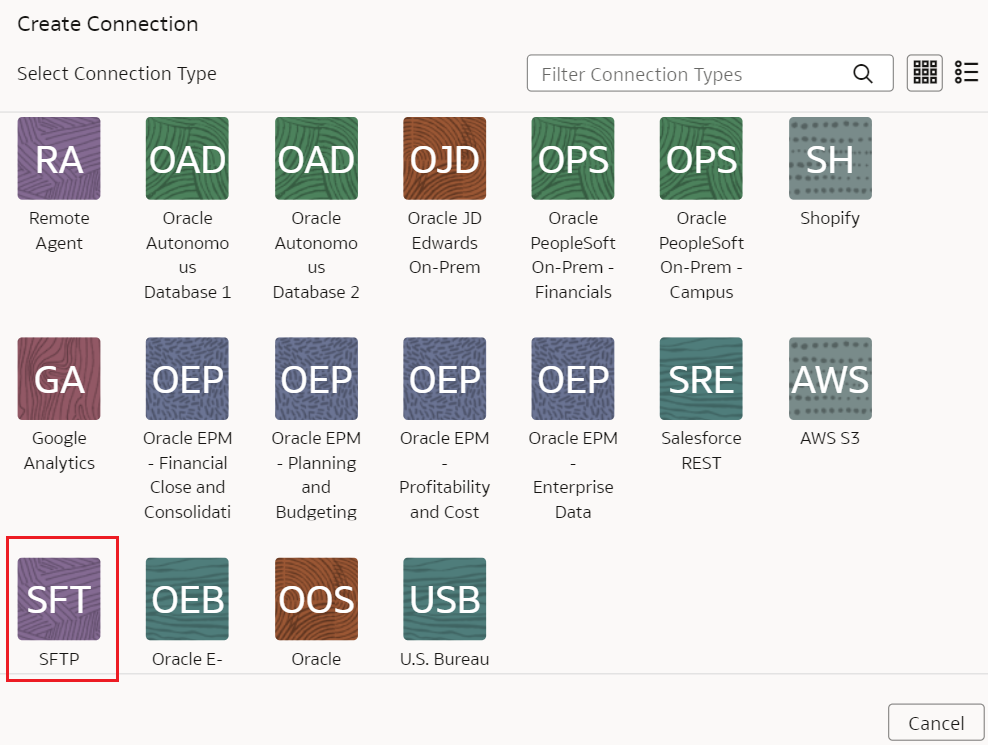
    4. In Create Connection, select SFTP as the connection type.

      SFTP connection option

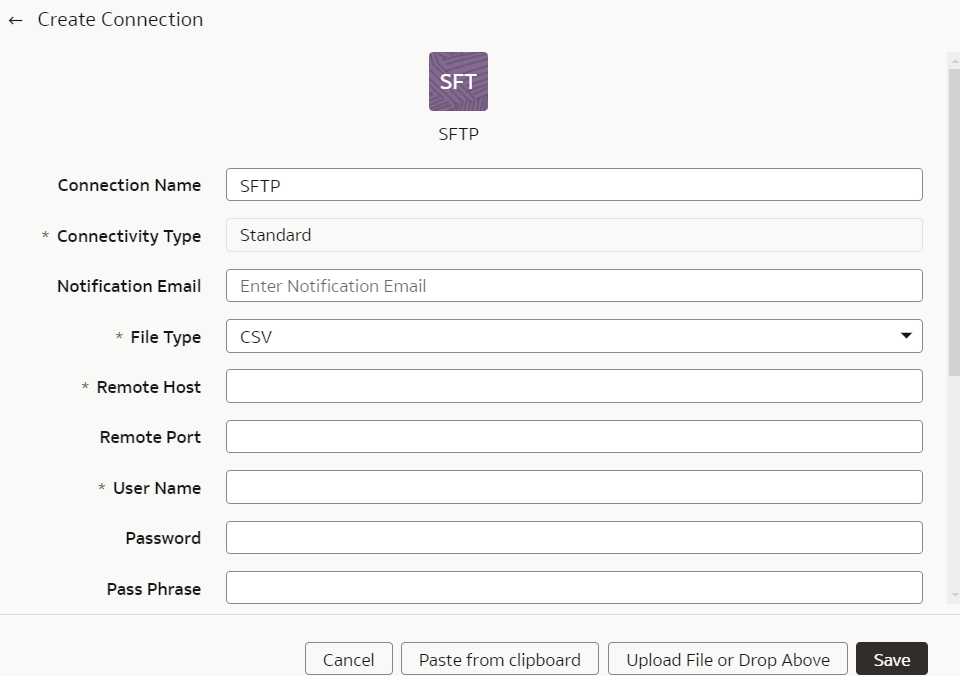
    5. In the dialog for the SFTP connection, select Standard in Connectivity Type, enter an email address to receive notifications in Notification Email, and provide applicable values in Remote Host, User Name, Private Key, Remote Host Extract Files Directory, File Type, CSV Delimiter, CSV Date Format, and CSV Timestamp Format. In Lock Metadata, specify whether you want to turn off the metadata extracts after first refresh if metadata isn't going to change. This option is useful if the flag to derive metadata from data files using the metadata utility is turned on in your source.
      Ensure the following:
      • The table name and file name in your SFTP source needs to be the same.
      • The private key you provide is in the valid OpenSSH format.
      • Date format for the data files must match the date format in your SFTP source; for example, if you've used MM/dd/yyyy (01/23/1998) in your source, then you must specify the same format in CSV Date Format. See About Date and Timestamp Formatting for CSV File-based Extractors.
      • Timestamp format for the data files must match the timestamp format in your SFTP source; for example, if you've used MM/dd/yyyy hh:mm:ss (01/23/1998 12:00:20) in your source, then you must specify the same format in CSV Timestamp Format.

      Create Connection for SFTP dialog

    6. Click Save.
  3. In your SFTP source:
    1. Create the folder structure in the Bucket using these guidelines:
      Base folder
      • The base folder in the bucket must match with the details provided in the connection.
      • Inside the base folder, ensure to place each file in its own folder.
      • Ensure that the Prefix of Data_Store_Name (same as Folder name) and Files in the target folder match exactly.

      See the "To create a folder or subfolder" section in Using the Console.

    2. Inside the base folder, create the metadata file for the Data Store List. This file lists the supported data stores. Each data store is a folder that has the actual file used in data augmentation, for example, ASSETS. Ensure that the file name and folder name match and there aren’t any special characters (including space) in the datastore, folder or file names.
      Base folder structure
    3. Create the metadata file for each data file under the data store folder using these guidelines:

      The META_DATASTORES.csv must have these columns:

      • DATA_STORE_NAME - A mandatory column to identify the data store name.
      • DATA_STORE_LABEL - A non-mandatory column that identifies the description of the data store.

      Each folder must have:

      • A data file that has the actual data that gets loaded into Fusion Analytics Warehouse. This file must have a prefix with the DATA STORE NAME.
      • A metadata file for the list of columns contains all the column information on the data. This file must have a Prefix with META_DATASTORES_<DATA_STORE_NAME>_COL.
        • For the columns in this metadata, ensure the following:
        • If column name is ABC, then metadata can be ABC or “ABC” - the double quotes are ignored.
        • If column name is “ABC”, then metadata must be “”ABC”” – the first double quotes are ignored.

      Example

      In the image, the folder name is ACTIVITY_TYPES. Hence, the data store name is ACTIVITY_TYPES. You can confirm this from the META_DATASTORES.csv file. In this example, the file is named ACTIVITY_TYPES.xlsx or ACTIVITY_TYPES.csv. The metadata file must be META_DATASTORES_ACTIVITY_TYPES_COL.csv.Sample folder and metadata file

      The META_DATASTORES_ACTIVITY_TYPES_COL.csv has these columns:
      • DATA_STORE_NAME - This is a mandatory column.
      • COLUMN_NAME - This is a mandatory column.
      • COLUMN_LABEL - This is a non-mandatory column.
      • DATA_TYPE – This is a mandatory column.
      • WIDTH – This column identifies the string length.
      • PRECISION - This column value must be Numeric data type.
      • SCALE - This column value must be Numeric data type.
      • KEY_SEQUENCE - This is a mandatory column that identifies the Primary Key definition. If you’re using the composite primary key, then use column order numbers as values.
  4. On the Manage Connections page, select Actions (Actions menu ellipsis icon) for the SFTP connection and then select Test Connection.
  5. On the Manage Connections page, select Actions for the SFTP connection and then select Refresh Metadata.
    Note

    You can’t create augmentations for SFTP unless you perform a metadata extract.
  6. After the connections are successfully established, navigate to the Data Augmentation tile on the Data Configuration page and create a data augmentation using the SFTP data. Ensure that you select Regular as the source dataset type and the secure FTP source as the pillar. Select the applicable secure FTP source tables. See Augment Your Data.

Connect With Cloud Sources

Connect with your cloud applications to provide the background information for reports.

You can blend the additional data from these data sources with the ready-to-use datasets to enhance business analysis. To know about the date and timestamp formatting for the CSV file-based extractors, see About Date and Timestamp Formatting for CSV File-based Extractors.

Load Data from Azure SQL into Oracle Fusion Analytics Warehouse (Preview)

As a service administrator, you can use the Oracle Fusion Analytics Warehouse extract service to acquire data from Azure SQL and use it to create data augmentations.

Ensure that Azure SQL is enabled on the Enable Features page prior to creating this connection. See Make Preview Features Available.

  1. In Oracle Fusion Analytics Warehouse, create the Azure SQL data connection using these instructions:
    1. In Oracle Fusion Analytics Warehouse Console, click Data Configuration under Application Administration.
    2. On the Data Configuration page, click Manage Connections.
    3. On the Manage Connections page, click Create and then click Connection.
    4. In Create Connection, select Azure SQL as the connection type.

      Azure SQL connection option

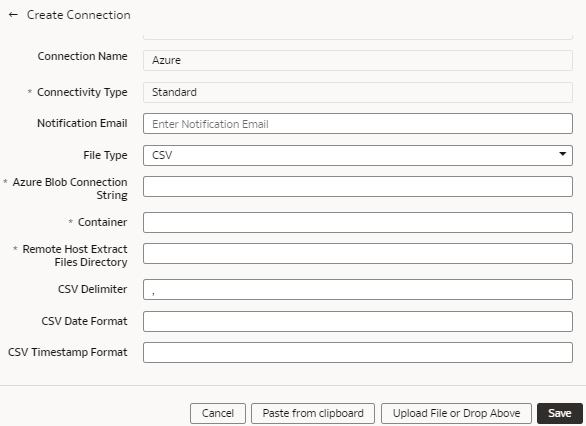
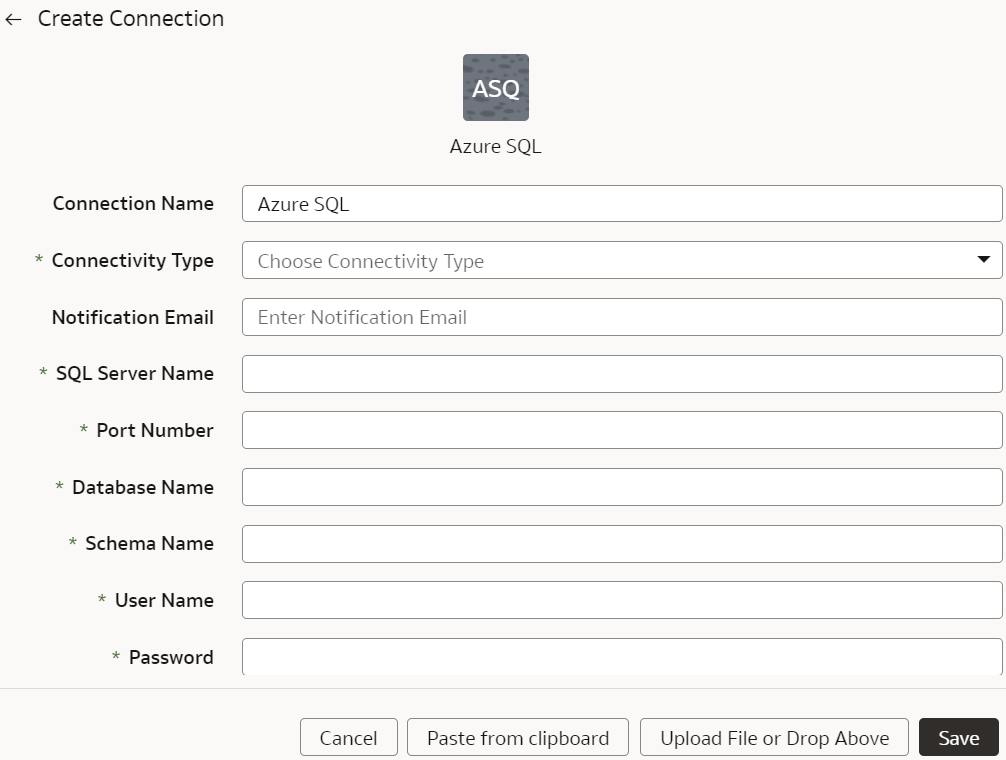
    5. In the dialog for the Azure SQL connection, select Standard in Connectivity Type, enter an email address to receive notifications in Notification Email, enter your Azure SQL instance details, and click Save.

      Create Connection for Azure SQL dialog

    6. Click Save.
  2. On the Manage Connections page, select Actions (Actions menu ellipsis icon) for the Azure SQL connection and then select Test Connection.
  3. On the Manage Connections page, select Actions for the Azure SQL connection and then select Refresh Metadata.
    Note

    You can’t create augmentations for Azure SQL unless you perform a metadata extract.
  4. After the connections are successfully established, navigate to the Data Augmentation tile on the Data Configuration page and create a data augmentation using the Azure SQL data. Ensure that you select Regular as the source dataset type and Azure SQL as the pillar. Select the applicable Azure SQL source tables. See Augment Your Data.

Connect with Your Oracle Eloqua Data Source

If you’ve subscribed for Oracle Fusion CX Analytics and want to load data from your Oracle Eloqua source into Fusion Analytics Warehouse, then create a connection using the Eloqua connection type.

The Oracle Eloqua data that you load into Fusion Analytics Warehouse enables you to augment the data in your warehouse and create varied customer experience-related analytics. Ensure that Oracle Eloqua is enabled on the Enable Features page prior to creating this connection. See Make Preview Features Available.

  1. In Oracle Fusion Analytics Warehouse Console, click Data Configuration under Application Administration.
  2. On the Data Configuration page, click Manage Connections under Global Configurations.
  3. On the Manage Connections page, click Create and then click Connection.
  4. In Create Connection, select Eloqua as the connection type.
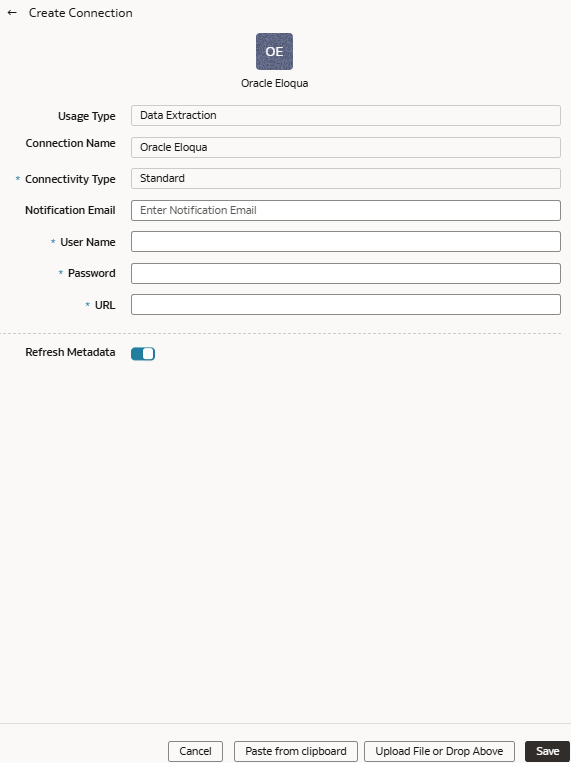
  5. In the dialog for the Eloqua connection, select Standard in Connectivity Type, enter an email address to receive notifications in Notification Email, and the credentials to connect with the Eloqua source in User Name and Password.
  6. In URL, enter the URL for your Eloqua server in this sample format: https://<your eloqua server>/api/odata/1.0.Description of fawag_eloqua_create_connection.gif follows
  7. Click Save.
Load Data from Your Oracle Eloqua Data Source

Create a data pipeline for the Marketing Campaign Analytics functional area to load data from your Oracle Eloqua source into Oracle Fusion Analytics Warehouse.

  1. Sign in to your service.
  2. In Oracle Fusion Analytics Warehouse, open the Navigator menu, click Console, and then click Data Configuration under Application Administration.
  3. On the Data Configuration page, click your service. For example, under Applications, click Customer Experience.
  4. On the Customer Experience page, click Create.
  5. In the wizard, select Customer Experience Marketing Analytics in Offering and Marketing Campaign Analytics in Functional Area to transfer the data to the warehouse, and then click Next.

    Description of fawag_load_eloqua_data.png follows

  6. Review the parameters and click one of the options:
    • Cancel: To cancel the data pipeline for the functional area.
    • Save: To save the data pipeline for the functional area but not activate it.
    • Activate: To schedule when to run the data pipeline for the functional area. See Activate a Data Pipeline for a Functional Area.

Load Data from Enterprise Data Management Cloud into Fusion Analytics Warehouse (Preview)

As a service administrator, you can use the Fusion Analytics Warehouse extract service to acquire data from the Enterprise Data Management Cloud instance and use it to create data augmentations.

The extracts created in the Enterprise Data Management Cloud service need to be public, hence you must promote your private extracts to the public. Review the documentation and error messages for the metadata refresh failures for the private extract.

Ensure that Oracle Enterprise Data Management Cloud is enabled on the Enable Features page prior to creating this connection. See Make Preview Features Available.

  1. In Fusion Analytics Warehouse, create the Enterprise Data Management Cloud data connection using these instructions:
    1. In Fusion Analytics Warehouse Console, click Data Configuration under Application Administration.
    2. On the Data Configuration page, click Manage Connections.
    3. On the Manage Connections page, click Create and then click Connection.
    4. In Create Connection, select Oracle Enterprise Data Management Cloud as the connection type.

      Oracle Enterprise Data Management Cloud connection option

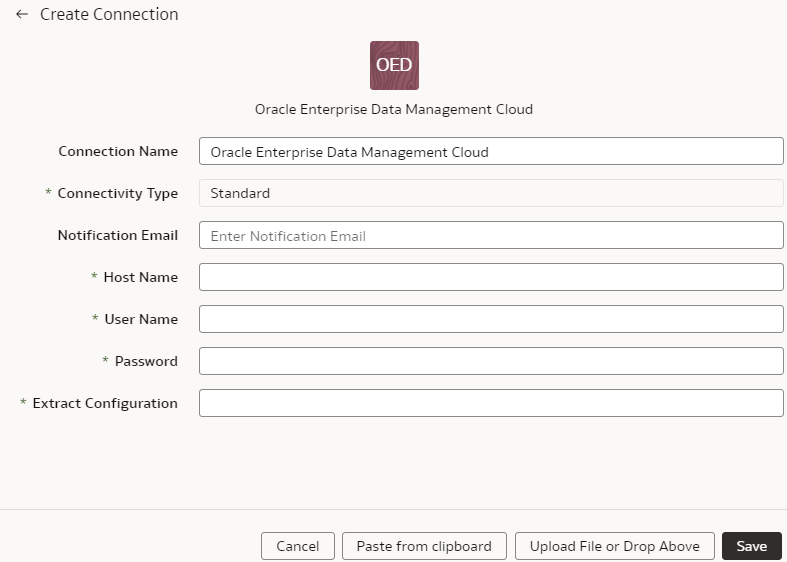
    5. In the dialog for the Enterprise Data Management Cloud connection, select Standard in Connectivity Type, enter an email address to receive notifications in Notification Email, host name of the Oracle Enterprise Data Management server in Host Name, credentials to access the Enterprise Data Management Cloud instance in User Name and Password. In Extract Configuration, enter the list of extracts using only “comma” as the delimiter. The configuration extract must be a single line JSON without formatting for the quotation marks (" instead of \"), for example:
      [{"applicationName": "Account Reconciliation", "dimensionName": "Profiles","extractName": "Profiles"}]

      Create Connection for Oracle Enterprise Data Management Cloud dialog

    6. Click Save.
  2. On the Manage Connections page, select Actions (Actions menu ellipsis icon) for the Enterprise Data Management Cloud connection and then select Test Connection.
  3. On the Manage Connections page, select Actions for the Enterprise Data Management Cloud connection and then select Refresh Metadata.
    Note

    You can’t create augmentations for Enterprise Data Management Cloud unless you perform a metadata extract.
  4. After the connections are successfully established, navigate to the Data Augmentation tile on the Data Configuration page and create a data augmentation using the Enterprise Data Management Cloud data. Ensure that you select Regular as the source dataset type and Enterprise Data Management Cloud as the pillar. Select the applicable Enterprise Data Management Cloud source tables. See Augment Your Data.
Load Data from Enterprise Performance Management into Fusion Analytics Warehouse (Preview)

As a service administrator, you can use the Fusion Analytics Warehouse extract service to acquire data from the Enterprise Performance Management (EPM) SaaS instance and use it to create data augmentations for various Enterprise Resource Planning and Supply Chain Management use cases.

You can connect to these functional modules of EPM:
  • Financial Close and Consolidation (FCCS)
  • Planning and Budgeting (PBCS)
  • Profitability and Cost Management (PCMCS)
If you've pivot table in your source, then the metadata extract supports pivot table metadata extraction for the EPM connectors. You can only manually extract the incremental data because, for incremental extraction, you must update the results file in EPM before starting the next extraction for the updated data. Update the results file by running the integration using Data Exchange and then access the new results file from the EPM connector in Fusion Analytics Warehouse. Ensure that you enter all the fields in accordance with your EPM nomenclature and specifics. For example, if you have defined Period in your EPM job as {June-23}, then include exactly the same in the Create Connection for the EPM source dialog.
Note

The EPM connectors display the default datatype and size; you must edit these values as applicable while creating data augmentations.
Depending on the functional module you want to connect to, ensure that the applicable feature is enabled on the Enable Features page prior to creating this connection:
  • Oracle EPM - Financial Close and Consolidation
  • Oracle EPM - Planning and Budgeting
  • Oracle EPM - Profitability and Cost Management
See Make Preview Features Available.
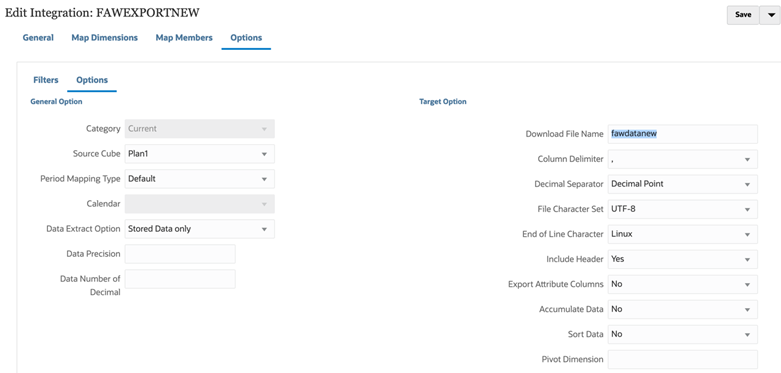
  1. In EPM, create an integration, write out the results into a file whose name you provide in Download File Name, and then specify that same file name in List of Data Files while creating the connection to EPM in Fusion Analytics Warehouse to extract the data.
    Create an integration in EPM
  2. In EPM, when exporting data, use one of the following modes:
    • Standard mode: This built-in workflow process helps manage the data flow process in and out of EPM. For Standard mode, you specify the period when you run the integration.
    • Quick mode: This process by-passes most of the steps in the workflow and provides a significant improvement in the extract process. When using quick mode, you specify the period in the integration definition filter, and this may include a substitution variable.When using the API, the same rules apply, except that when you need to specify a period, you can’t use a substitution variable to pull from EssBase, but will need to include the period or year on extract.

    See Exporting Data.

  3. In Fusion Analytics Warehouse, create the EPM data connection using these instructions:
    1. In Fusion Analytics Warehouse Console, click Data Configuration under Application Administration.
    2. On the Data Configuration page, click Manage Connections.
    3. On the Manage Connections page, click Create and then click Connection.
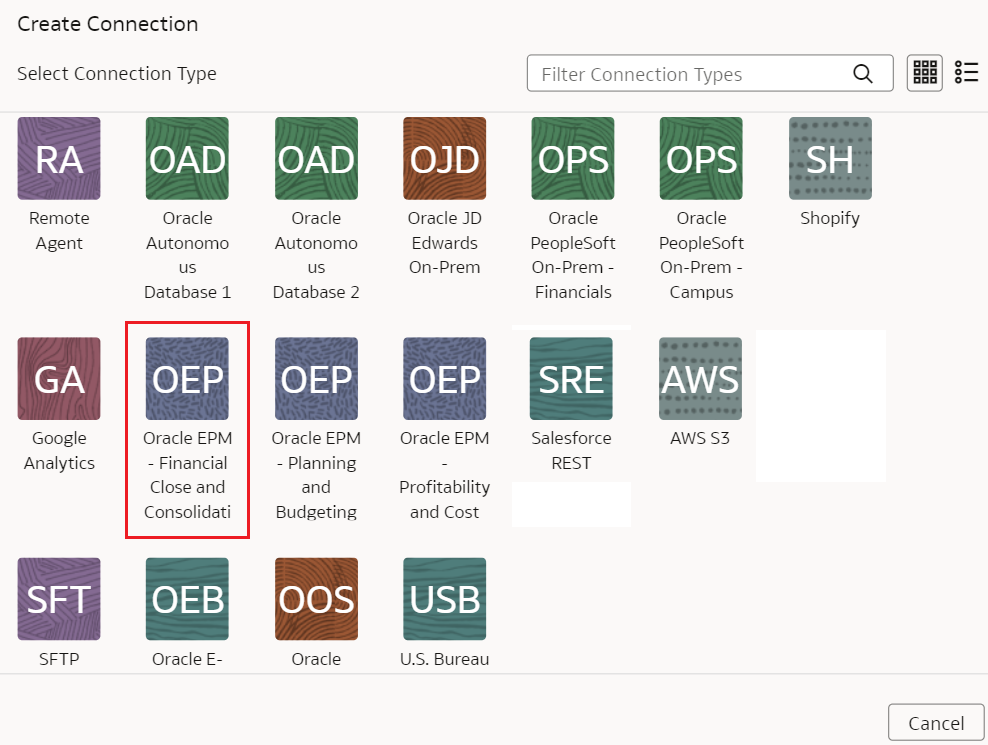
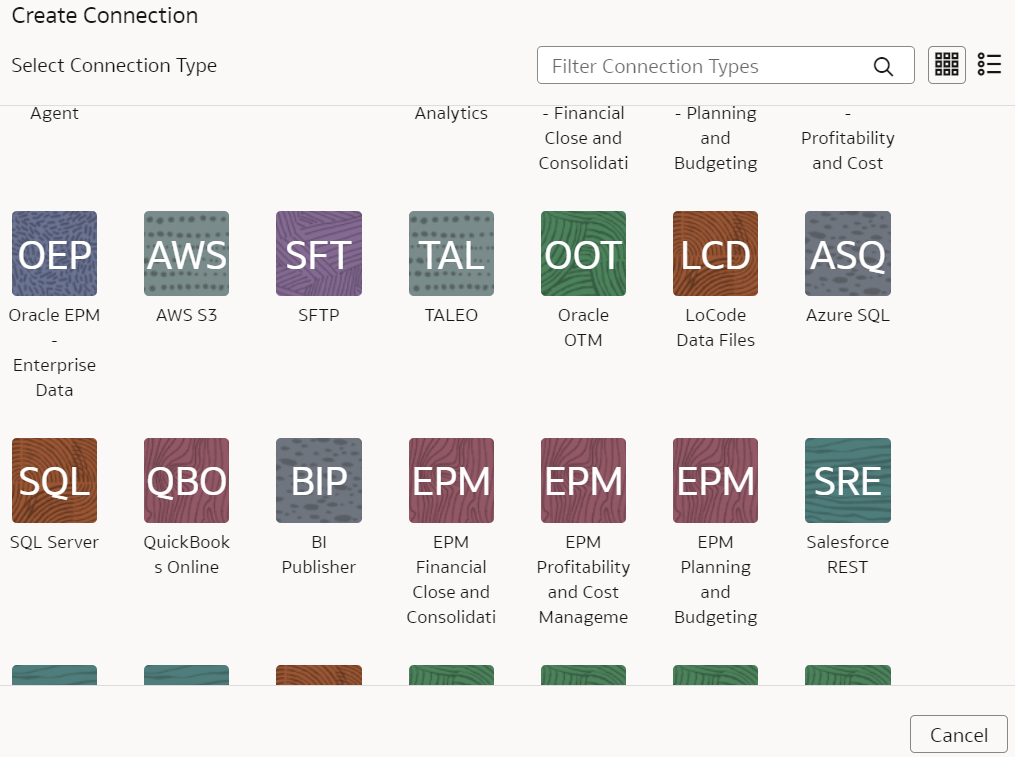
    4. In Create Connection, select the connection type based on the functional module that you want to connect to. For example, to connect to the "Financial Close and Consolidation (FCCS)" module, select Oracle EPM - Financial Close and Consolidation as the connection type.

      Oracle EPM - Financial Close and Consolidation connection option

    5. In Create Connection for the EPM source, enter these details and click Save:
      • Connectivity Type: Select Standard.
      • Notification Email: Enter an email address to receive notifications.
      • User Name and Password: Enter the credentials for your EPM source. Prefix the user name with the domain of your EPM source, such as domain.username.
      • URL: Enter the specific URL of your EPM source. For example, https://epm7-test-a123456.epm.us6.oraclecloud.com.
      • List of Data Files: Specify the file name that you had entered in Download File Name while creating an integration in EPM.
      • List of Job Names: Provide the EPM integration job names. If you’ve multiple job names, then ensure that they are comma separated. For example, FAWEPMTestingV2, FAWEXPORT,FAW Job Testing.
      • List of Period Names: Provide the period names for the corresponding job names. Ensure that multiple period names are comma separated. You may leave this blank, in which case the connector uses the global point of view. For example, “{Jan-22}-{Oct-22}”.

      Create EPM Connection

  4. On the Manage Connections page, select Actions (Actions menu ellipsis icon) for the EPM connection and then select Refresh Metadata.
    Note

    You can’t create augmentations for EPM unless you perform a metadata extract.
  5. On the Manage Connections page, select Actions for the EPM connection and then select Test Connection.
  6. After the connections are successfully established, navigate to the Data Augmentation tile on the Data Configuration page and create a data augmentation using the EPM data. Ensure that you select Regular as the source dataset type and EPM as the pillar. Select the applicable EPM source tables. See Augment Your Data.

Load Data from EPM Export Data Instance into Fusion Analytics Warehouse (Preview)

As a service administrator, you can use the Fusion Analytics Warehouse extract service to acquire data from EPM Export Data instance and use it to create data augmentations.

You can connect to these functional modules of EPM:
  • Financial Close and Consolidation (FCCS)
  • Planning and Budgeting (PBCS)
  • Profitability and Cost Management (PCMCS)
If you've pivot table in your source, then the metadata extract supports pivot table metadata extraction for the EPM connectors. You can only manually extract the incremental data because, for incremental extraction, you must update the results file in EPM before starting the next extraction for the updated data. Update the results file by running the integration using Data Exchange and then access the new results file from the EPM connector in Fusion Analytics Warehouse. Ensure that you enter all the fields in accordance with your EPM nomenclature and specifics. For example, if you have defined Period in your EPM job as {June-23}, then include exactly the same in the Create Connection for the EPM source dialog.
Note

The EPM connectors display the default datatype and size; you must edit these values as applicable while creating data augmentations.
Depending on the functional module you want to connect to, ensure that the applicable feature is enabled on the Enable Features page prior to creating this connection:
  • EPM Financial Close and Consolidation Data Export
  • EPM Planning and Budgeting Data Export
  • EPM Profitability and Cost Management Data Export
See Make Preview Features Available.
  1. In EPM, create a data exchange job, write out the results into a file whose name you provide in Download File Name, and then specify that same file name in List of Data Files while creating the connection to EPM in Fusion Analytics Warehouse to extract the data.
  2. In EPM, when exporting data, use one of the following modes:
    • Standard mode: This built-in workflow process helps manage the data flow process in and out of EPM. For Standard mode, you specify the period when you run the integration.
    • Quick mode: This process by-passes most of the steps in the workflow and provides a significant improvement in the extract process. When using quick mode, you specify the period in the integration definition filter, and this may include a substitution variable.When using the API, the same rules apply, except that when you need to specify a period, you can’t use a substitution variable to pull from EssBase, but will need to include the period or year on extract.

    See Exporting Data.

  3. In Fusion Analytics Warehouse, create the data connection to the EPM Export Data instance using these instructions:
    1. In Fusion Analytics Warehouse Console, click Data Configuration under Application Administration.
    2. On the Data Configuration page, click Manage Connections.
    3. On the Manage Connections page, click Create and then click Connection.
    4. In Create Connection, select the connection type based on the functional module that you want to connect to. For example, to connect to the "Financial Close and Consolidation (FCCS)" module, select EPM Financial Close and Consolidation Data Export as the connection type.

      EPM Financial Close and Consolidation Data Export connection option

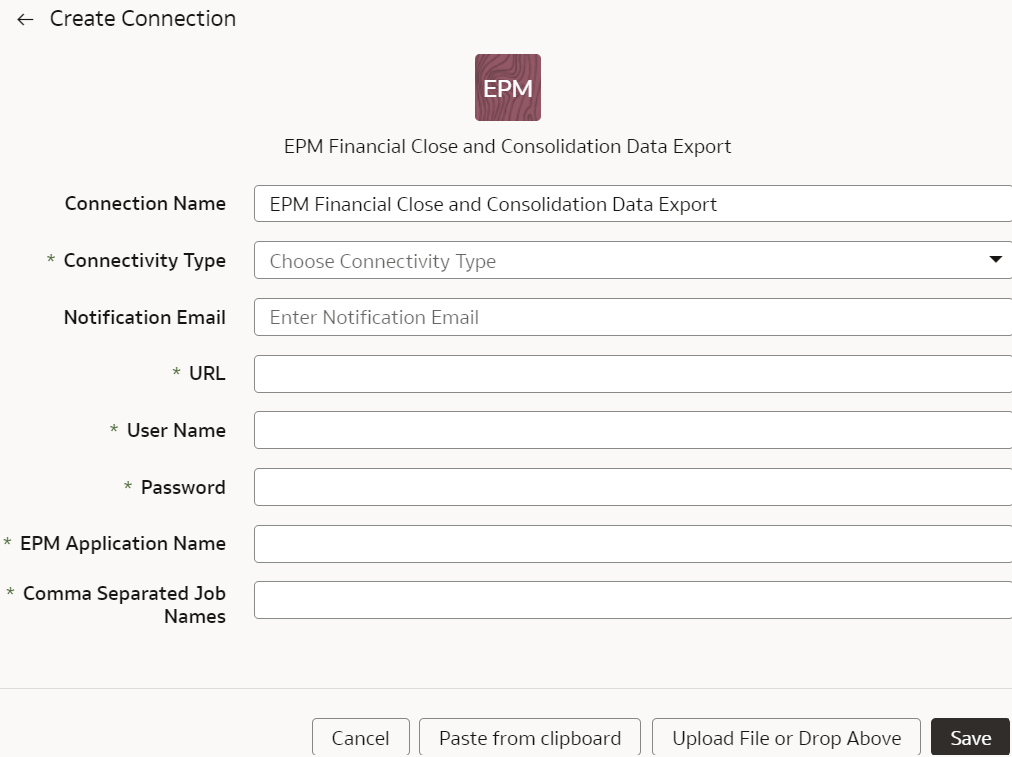
    5. In Create Connection for the EPM source, enter these details and click Save:
      • Connectivity Type: Select Standard.
      • Notification Email: Enter an email address to receive notifications.
      • URL: Enter the specific URL of your EPM source. For example, https://epm7-test-a123456.epm.us6.oraclecloud.com.
      • User Name and Password: Enter the credentials for your EPM source. Prefix the user name with the domain of your EPM source, such as domain.username.
      • EPM Application Name: Specify the file name that you had entered in Download File Name while creating the EPM data exchange job in EPM.
      • Comma Separated Job Names: Provide the EPM data exchange job names. If you’ve multiple job names, then ensure that they are comma separated. For example, FAWEPMTestingV2, FAWEXPORT,FAW Job Testing.

      EPM Financial Close and Consolidation Data Export Create Connection dialog

  4. On the Manage Connections page, select Actions (Actions menu ellipsis icon) for the EPM connection and then select Refresh Metadata.
    Note

    You can’t create augmentations for EPM unless you perform a metadata extract.
  5. On the Manage Connections page, select Actions for the EPM connection and then select Test Connection.
  6. After the connections are successfully established, navigate to the Data Augmentation tile on the Data Configuration page and create a data augmentation using the EPM data. Ensure that you select Regular as the source dataset type and EPM as the pillar. Select the applicable EPM source tables. See Augment Your Data.
Load Data from Google Analytics into Fusion Analytics Warehouse

As a service administrator, you can use the Fusion Analytics Warehouse extract service to acquire data from the Google Analytics SaaS instance and use it to create data augmentations for various Enterprise Resource Planning and Supply Chain Management use cases.

Before connecting with the Google Analytics source, note these:
  • Fusion Analytics Warehouse supports Google Analytics extractor for GA4 properties and doesn’t support the previous version – Google Universal Analytics (UA) properties.
  • DataStores are the list of GA4 properties.
  • DataStore columns are the list of Dimensions and Metrics for a GA4 property.
  • DataExtract runs the report based on user selection for a GA4 property as DataStore and Dimensions and Metrics as DataStore columns.
  • MetaExtract fetches metadata for all the available GA4 properties (DataStores) and its Dimensions and Metrics (DataStoreColumns).
  1. In Google Cloud (Analytics) Project, create a service account and download the credentials.json file.
  2. Add the service account to the Google Analytics 4 property.
  3. Enable Google Analytics APIs using these instructions:
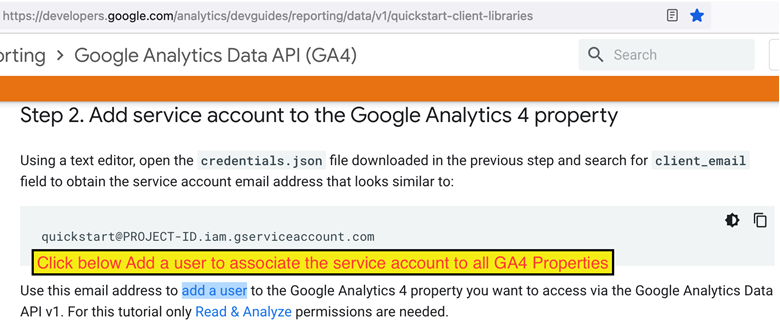
    1. Using a text editor, open the credentials.json file that you had downloaded and search for the client_email field to obtain the service account email address.
    2. Use this email address to add a user to the Google Analytics 4 property you want to access through the Google Analytics Data API v1.
    Enable Google Analytics APIs
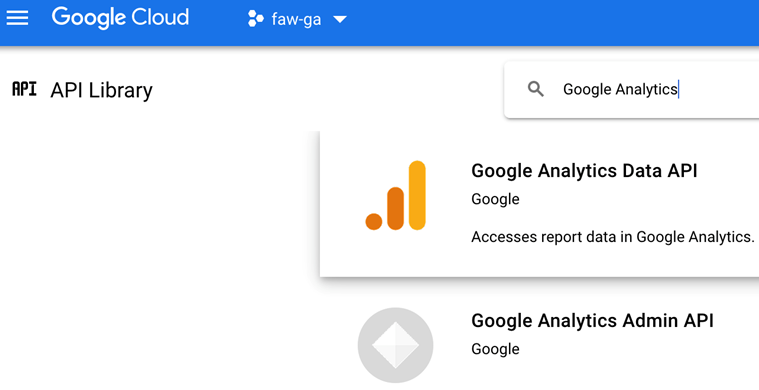
  4. Ensure that the Google Analytics Admin API, Google Analytics Data API are available for your Google Analytics instance.
    View Google Analytics APIs
  5. In Fusion Analytics Warehouse, create the Google Analytics data connection using these instructions:
    1. In Fusion Analytics Warehouse Console, click Data Configuration under Application Administration.
    2. On the Data Configuration page, click Manage Connections.
    3. On the Manage Connections page, click Create and then click Connection.
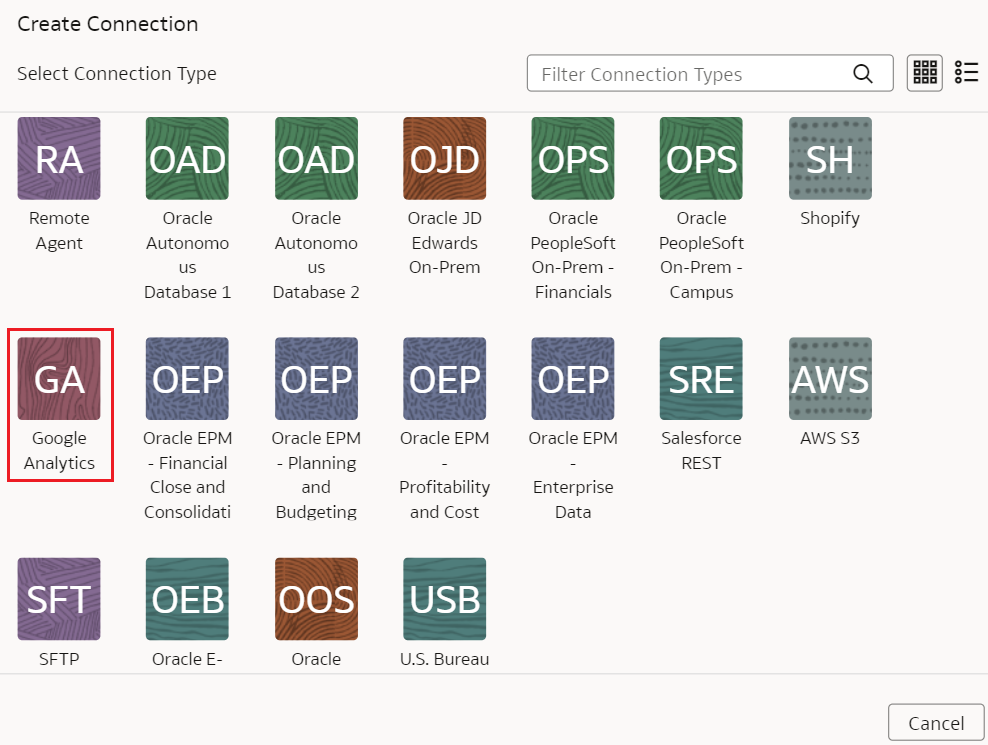
    4. In Create Connection, select Google Analytics as the connection type.

      Google Analytics connection option

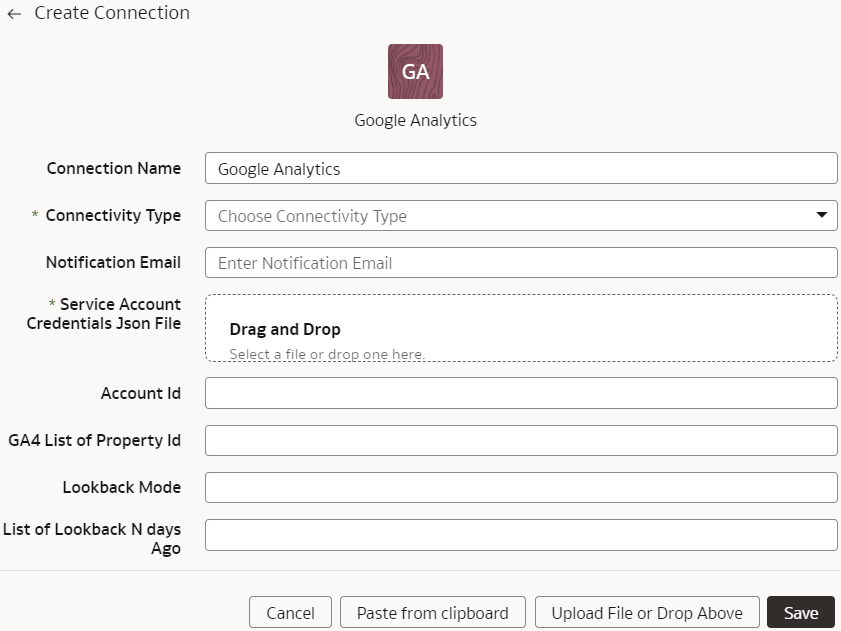
    5. In the dialog for the Google Analytics connection, select Standard as the connectivity type and enter these details:
      • Notification Email: An email address to receive notifications regarding this connection.
      • Service Account Credentials Json File: The Google Cloud Service Account credentials.json file that you had downloaded.
      • Account ID: Google Analytics account ID.
      • GA4 List of Property ID: The GA4 List of Property ID with commas to separate each ID.
      • Lookback Mode: Select either Full or Committed.
      • List of Lookback N days Ago: Comma separated list of days (integer) values such as 7,21.
      Create Connection dialog
      Note these:
      • For the Lookback mode, if you don't provide a value, then the Lookback mode isn't supported. The Full option requires one day value, if you provide multiple values, then the process uses the first value. You can provide multiple values for the Committed option.
      • For List Data Stores, the REST API returns a list of GA4 Property IDs either using the Account ID (if provided) or just the source configured or provided list of property.
      • For List columns, the REST API returns a list of column metadata for the given GA4 Property ID.
    6. Click Save.
  6. On the Manage Connections page, select Actions (Actions menu ellipsis icon) for the Google Analytics connection and then select Test Connection.
    Note

    REST API signature is same across sources. Test connection invokes GA Common Metadata API. This returns the default version values and no calls are made to the source.
  7. On the Manage Connections page, select Actions for the Google Analytics connection and then select Refresh Metadata.
    Note

    You can’t create augmentations for Google Analytics unless you perform a metadata extract.
    Metadata extract:
    • Retrieves metadata columns for each GA4 Property ID provided in the source configuration.
    • Prefixes the GA property columns with Dimension_ orMetric_ that Fusion Analytics Warehouse later uses while extracting data to differentiate Dimension and Metric column type.
    • Leaves the payload dataStores array empty.
  8. After the connections are successfully established, navigate to the Data Augmentation tile on the Data Configuration page and create a data augmentation using the Google Analytics data. Ensure that you select Regular as the source dataset type and Google Analytics as the pillar. Select the applicable Google Analytics source tables. See Augment Your Data.
    When you enable data extraction, you can schedule to run when you choose to do so. For data extraction, note these:
    1. Provide date ranges to run the report and fetch data.
    2. Regular data extract uses the initial or last ExtractDate as StartDate and job RunDate as EndDate.
    3. Lookback mode includes additional date ranges along with the regular extract date range which fetches additional data set but in a single runReport call.
      • The Full option has a single date range; StartDate=ExtractDate - NdaysAgo, EndDate=RunDate.
      • The Commited option can have multiple date ranges. For each configured GA_LIST_OF_N_DAYS_AGO, StartDate=ExtractDate - NdaysAgo, EndDate=RunDate - NdaysAgo.

Load Data from Mongo Database into Fusion Analytics Warehouse (Preview)

As a service administrator, you can use the Fusion Analytics Warehouse extract service to acquire data from the Mongo database and use it to create data augmentations.

Ensure that MongoDB is enabled on the Enable Features page prior to creating this connection. See Make Preview Features Available.

  1. Check the port number for your Mongo database and create a service request with server host and port details to enable network connectivity to the Mongo database server.
  2. In Fusion Analytics Warehouse, create the Mongo database connection using these instructions:
    1. In Fusion Analytics Warehouse Console, click Data Configuration under Application Administration.
    2. On the Data Configuration page, click Manage Connections.
    3. On the Manage Connections page, click Create and then click Connection.
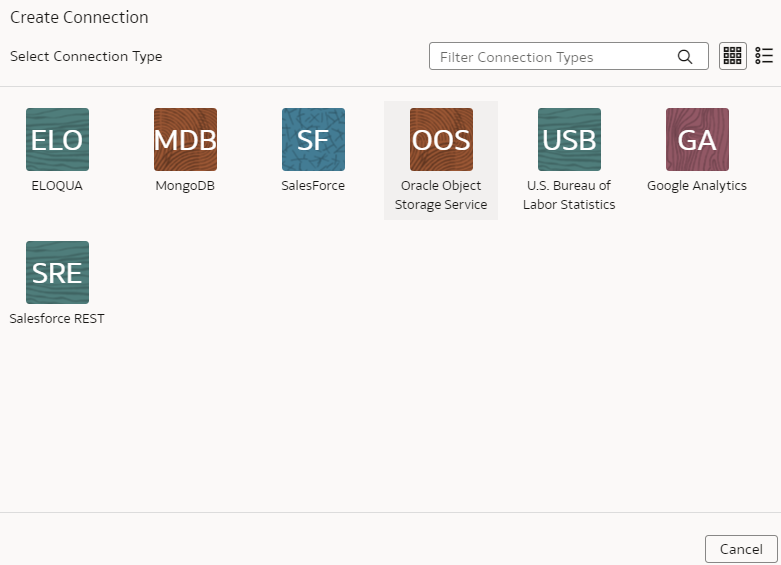
    4. In Create Connection, select MongoDB as the connection type.

      MongoDB connection option

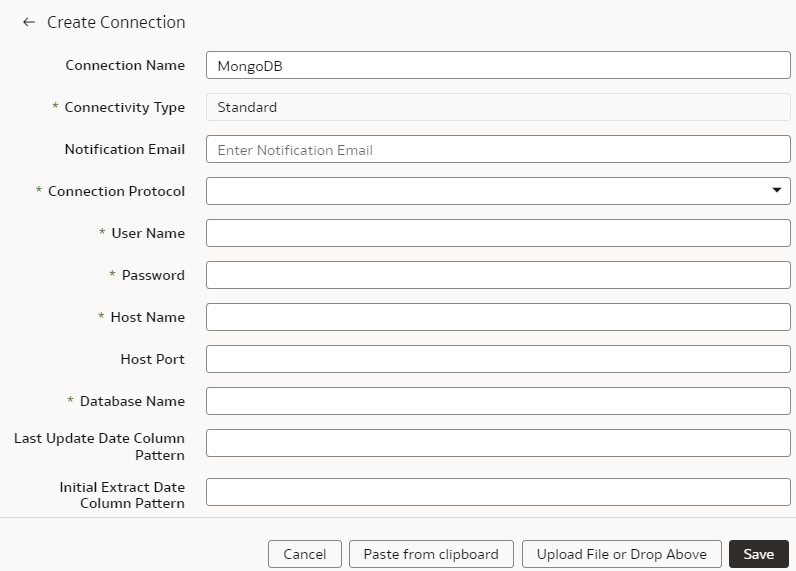
    5. In the dialog for the Mongo database connection, select Standard in Connectivity Type, enter an email address to receive notifications in Notification Email, and provide these details:
      • Connection Protocol: Enter the connection protocol such as mongodb+srv or mongodb
      • Credentials to access the database in User Name and Password
      • Host Name: Enter the host name of the Mongo database such as cluster0.example4.mongodb.net
      • Host Port: Enter the port number where Mobgo database is listening such as 27017
      • Database Name: Enter a name such as Analytics
      • Last Update Date Column Pattern: Enter pattern such as "%mo%fie%te%"
        Note

        If column name matches with pattern provided, then Fusion Analytics Warehouse marks the column name with isLastUpdateDate = true and uses it for the incremental extract. For example, if pattern provided is “%mo%fie%te%“, then the column name modifiedDate is marked as isLastUpdateDate = true.
      • Initial Extract Date Column Pattern: Enter pattern such as "%cr%ted%te%"
        Note

        If column name matches with pattern provided, then Fusion Analytics Warehouse marks the column name with isCreationDate = true and uses it for the initial extract date extraction. For example, if pattern provided is: “%cr%ted%te%“, then the column name createdDate is marked as isCreationDate = true.

      Create Connection for Mongo database dialog

    6. Click Save.
  3. On the Manage Connections page, select Actions (Actions menu ellipsis icon) for the Mongo database connection and then select Test Connection.
  4. On the Manage Connections page, select Actions for the Mongo database connection and then select Refresh Metadata.
    Note

    You can’t create augmentations for Mongo database unless you perform a metadata extract.
  5. After the connections are successfully established, navigate to the Data Augmentation tile on the Data Configuration page and create a data augmentation using the Mongo database data. Ensure that you select Regular as the source dataset type and Mongo database as the pillar. Select the applicable Mongo database source tables. See Augment Your Data.
Load Data from MySQL Cloud Database into Fusion Analytics Warehouse (Preview)

As a service administrator, you can use the Fusion Analytics Warehouse extract service to acquire data from the MySQL Cloud database and use it to create data augmentations.

Ensure that MySQL Cloud is enabled on the Enable Features page prior to creating this connection. See Make Preview Features Available.

  1. Check the port number for your MySQL Cloud database and create a service request with server host and port details to enable network connectivity to the MySQL server.
  2. In Fusion Analytics Warehouse, create the MySQL Cloud database connection using these instructions:
    1. In Fusion Analytics Warehouse Console, click Data Configuration under Application Administration.
    2. On the Data Configuration page, click Manage Connections.
    3. On the Manage Connections page, click Create and then click Connection.
    4. In Create Connection, select MySQL Cloud as the connection type.

      MySQL Cloud database connection option

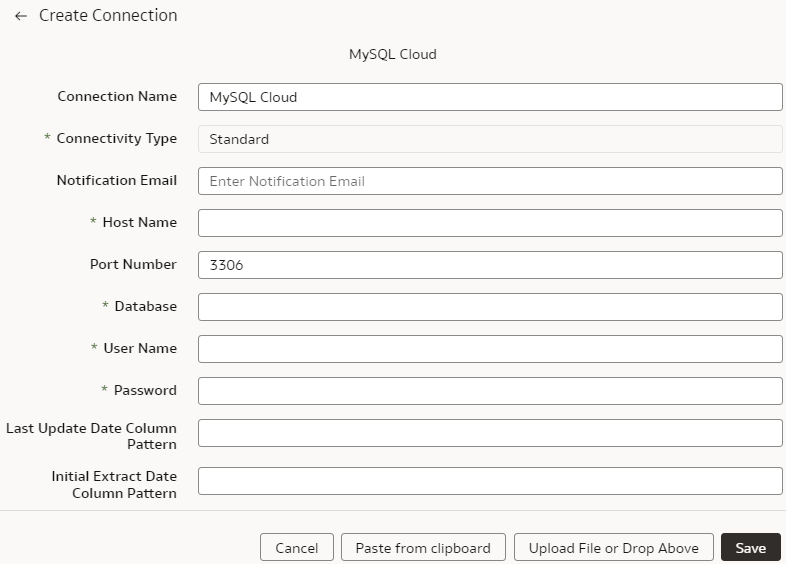
    5. In the dialog for the MySQL Cloud database connection, select Standard in Connectivity Type, enter an email address to receive notifications in Notification Email, and provide these details:
      • Host Name: Enter the host name of MySQL server such as 100.111.252.64
      • Port Number: Enter the port number where the server is listening such as 3306
      • Database: Enter the database name you need to connect to such as airportdb
      • Credentials to access the database in User Name and Password
      • Last Update Date Column Pattern: Enter format such as "%mo%fie%te%"
        Note

        If column name matches with pattern provided, then Fusion Analytics Warehouse marks the column name with isLastUpdateDate = true and uses it for the incremental extract. For example, if pattern provided is “%mo%fie%te%“, then the column name modifiedDate is marked as isLastUpdateDate = true.
      • Initial Extract Date Column Pattern: Enter format such as "%cr%ted%te%"
        Note

        If column name matches with pattern provided, then Fusion Analytics Warehouse marks the column name with isCreationDate = true and uses it for the initial extract date extraction. For example, if pattern provided is: “%cr%ted%te%“, then the column name createdDate is marked as isCreationDate = true.

      Create Connection for MySQL Cloud database dialog

    6. Click Save.
  3. On the Manage Connections page, select Actions (Actions menu ellipsis icon) for the MySQL Cloud database connection and then select Test Connection.
  4. On the Manage Connections page, select Actions for the MySQL Cloud database connection and then select Refresh Metadata.
    Note

    You can’t create augmentations for MySQL Cloud database unless you perform a metadata extract.
  5. After the connections are successfully established, navigate to the Data Augmentation tile on the Data Configuration page and create a data augmentation using the MySQL Cloud database data. Ensure that you select Regular as the source dataset type and MySQL Cloud database as the pillar. Select the applicable MySQL Cloud database source tables. See Augment Your Data.
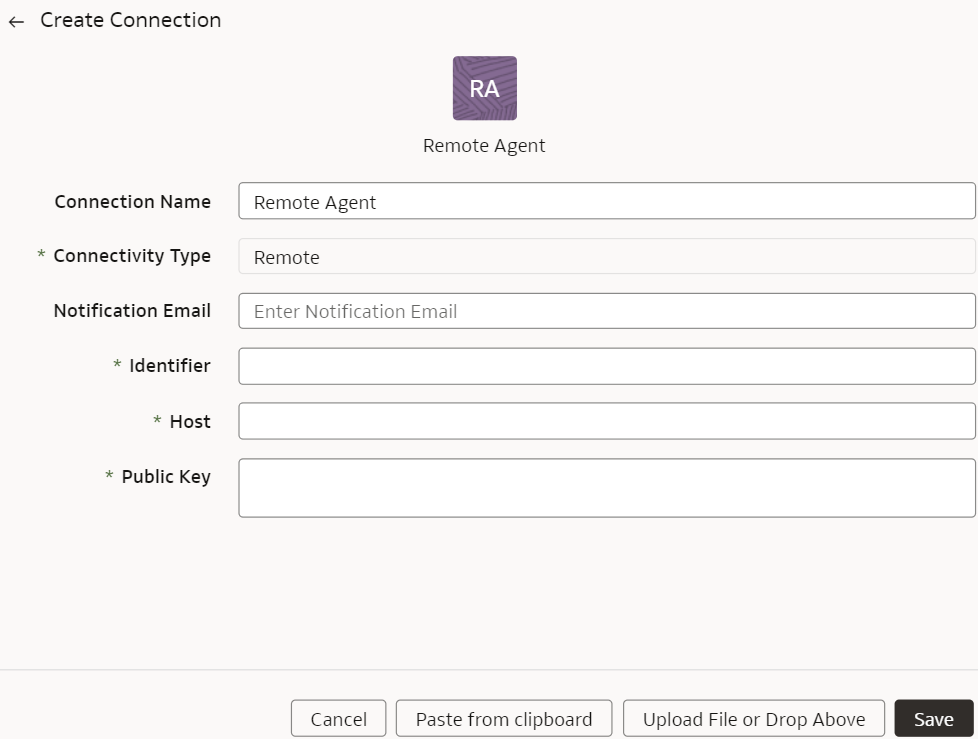
Load Data from Salesforce into Fusion Analytics Warehouse

As a service administrator, you can use the Fusion Analytics Warehouse extract service to acquire data from the Salesforce SaaS instance and use it to create data augmentations for various Enterprise Resource Planning and Supply Chain Management use cases.

This version of the Salesforce Connector supports version 57.0 of the API from Salesforce.

Note

This data augmentation connector is temporarily unavailable as of Platform 24.R1 (March, 2024) release. Further updates will be available after an Oracle internal review.
  1. In Fusion Analytics Warehouse, create the Salesforce data connection using these instructions:
    1. In Fusion Analytics Warehouse Console, click Data Configuration under Application Administration.
    2. On the Data Configuration page, click Manage Connections.
    3. On the Manage Connections page, click Create and then click Connection.
    4. In Create Connection, select Salesforce REST as the connection type.

      Salesforce REST connection option

    5. In the dialog box for the Salesforce connection, select Standard in Connectivity Type and enter an email address to receive notifications in Notification Email.

      Create Connection for Salesforce REST dialog

    6. Enter the URL of your Salesforce source such as <your Salesforce instance name>.my.salesforce.com in URL.
    7. Copy and paste the token url from your Salesforce instance in Token URL.
    8. Select the type of authorization in Authorization Type.
      Authorization Type can be one of the following: BASICAUTH or OAUTH. Ensure that you enter these authorization types in uppercase letters without any characters in them. You must provide the corresponding fields for those authorization types. For example, if you select BASICAUTH, then you must provide a valid username, password, security token, url, client ID, and client secret. If you select OAUTH, then you must provide a valid username, token url, client ID, and private key. Remember to update all the authorization fields, since Salesforce may reset or require you to reset them regularly.
    9. Enter the credentials for your Salesforce source in User Name and Password.
    10. Copy and paste the client ID that is usually a long alpha-numeric code from your Salesforce account in Client ID.
    11. Copy and paste the client secret from your Salesforce account in Client Secret.
      This is an alpha-numeric code and may contain special characters, however, it isn't visible. It is encrypted and shown as ….
    12. Copy and paste the security token from your Salesforce account in Security Token.
      This is an alpha-numeric code and may contain special characters, however, it isn't visible. It is encrypted and shown as ….
    13. Copy and paste the private key from your Salesforce account in Private Key.
    14. Click Save.
  2. On the Manage Connections page, select Actions (Actions menu ellipsis icon) for the EPM connection and then select Refresh Metadata.
    Note

    You can’t create augmentations for Salesforce unless you perform a metadata extract.
  3. On the Manage Connections page, select Actions for the EPM connection and then select Test Connection.
  4. After the connections are successfully established, navigate to the Data Augmentation tile on the Data Configuration page and create a data augmentation using the Salesforce data. Ensure that you select Regular as the source dataset type and Salesforce as the pillar. Select the applicable Salesforce source tables. See Augment Your Data.
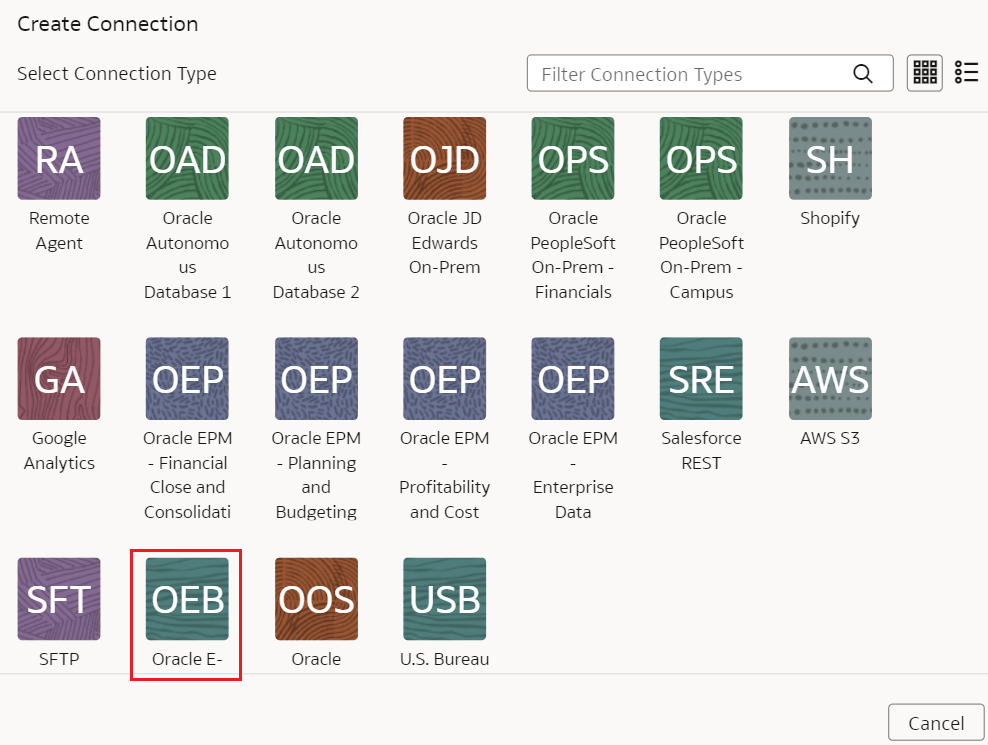
Load Data from Shopify into Fusion Analytics Warehouse (Preview)

As a service administrator, you can use the Fusion Analytics Warehouse extract service to acquire data from the Shopify SaaS instance and use it to create data augmentations for various Enterprise Resource Planning and Supply Chain Management use cases.

Ensure that Shopify is enabled on the Enable Features page prior to creating this connection. See Make Preview Features Available.

Note

This data augmentation connector is temporarily unavailable as of Platform 24.R1 (March, 2024) release. Further updates will be available after an Oracle internal review.
  1. In Fusion Analytics Warehouse, create the Shopify data connection using these instructions:
    1. In Fusion Analytics Warehouse Console, click Data Configuration under Application Administration.
    2. On the Data Configuration page, click Manage Connections.
    3. On the Manage Connections page, click Create and then click Connection.
    4. In Create Connection, select Shopify as the connection type.

      Shopify connection option

    5. In the dialog for the Shopify connection, select Standard in Connectivity Type, enter an email address to receive notifications in Notification Email, applicable token value in Access Token, Store Name such as myfawteststore.myshopify.com, and True in Bulk Extract.

      Create Connection for Shopify dialog

    6. Click Save.
  2. On the Manage Connections page, select Actions (Actions menu ellipsis icon) for the Shopify connection and then select Test Connection.
  3. On the Manage Connections page, select Actions for the Shopify connection and then select Refresh Metadata.
    Note

    You can’t create augmentations for Shopify unless you perform a metadata extract.
  4. After the connections are successfully established, navigate to the Data Augmentation tile on the Data Configuration page and create a data augmentation using the Shopify data. Ensure that you select Regular as the source dataset type and Shopify as the pillar. Select the applicable Shopify source tables. See Augment Your Data.
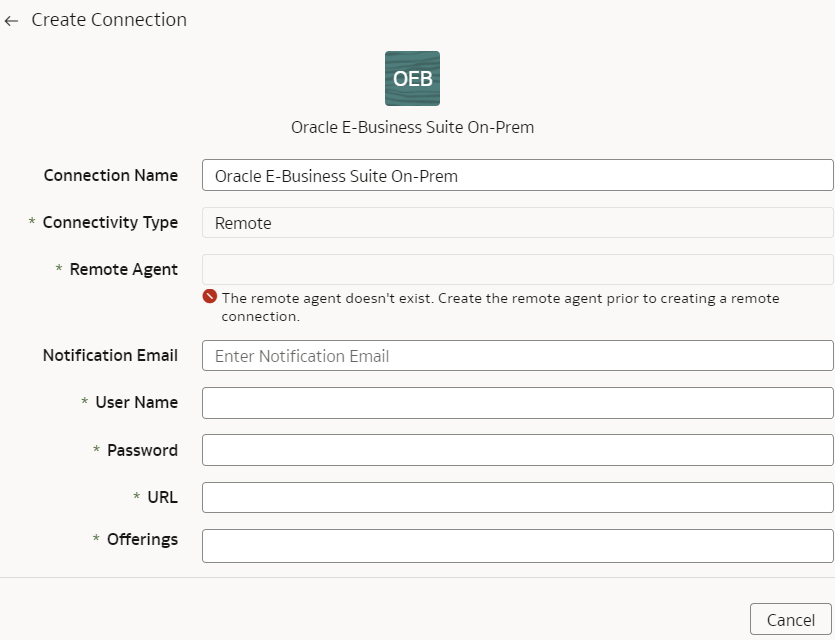
Load Data from Oracle Autonomous Database into Oracle Fusion Analytics Warehouse (Preview)

As a service administrator, you can use the Oracle Fusion Analytics Warehouse extract service to acquire data from Oracle Autonomous Database and use it to create data augmentations.

You can create connections to five autonomous databases. Depending on the number of connections, ensure that options such as Oracle Autonomous Database 1, Oracle Autonomous Database2 are enabled on the Enable Features page prior to creating this connection. See Make Preview Features Available.

  1. In Oracle Fusion Analytics Warehouse, create the autonomous database connection using these instructions:
    1. In Oracle Fusion Analytics Warehouse Console, click Data Configuration under Application Administration.
    2. On the Data Configuration page, click Manage Connections.
    3. On the Manage Connections page, click Create and then click Connection.
    4. In Create Connection, depending on the number of connections, select options such as Oracle Autonomous Database 1, or Oracle Autonomous Database2 as the connection type.

      Oracle Autonomous Database connection option

    5. In the dialog for the Oracle Autonomous Database connection, provide these details:
      • Select Standard in Connectivity Type.
      • Enter an email address to receive notifications in Notification Email.
      • Enter the credentials to access the database in User Name and Password.
      • Enter the database service details in Service.
      • In Wallet, drag and drop the database wallet details.
      • In Initial Extract Date Column Pattern, provide the initial extract date pattern that matches the pattern in your source.
      • In Last Update Date Column Pattern, provide the last update date pattern that matches the pattern in your source.
      • If your source has flashback support, then select Yes in Enable flashback incremental.
      • In List of Flashback Incremental Exempt datastores, provide a comma separated list of datastores that you want to exempt from the flashback incremental queries.
      • If your source has ROWSCN support, then select Yes in Enable ROWSCN incremental.
      • In List of ROWSCN Incremental Exempt datastores, specify a comma-separated list of datastores that you want to exclude from the automatic tracking of row changes based on system change numbers.

      Create Connection for Oracle Autonomous Database dialog

    6. Click Save.
  2. On the Manage Connections page, select Actions (Actions menu ellipsis icon) for the autonomous database connection and then select Test Connection.
  3. On the Manage Connections page, select Actions for the autonomous database connection and then select Refresh Metadata.
    Note

    You can’t create augmentations for autonomous database unless you perform a metadata extract.
  4. After the connections are successfully established, navigate to the Data Augmentation tile on the Data Configuration page and create a data augmentation using the autonomous database data. Ensure that you select Regular as the source dataset type and autonomous database as the pillar. Select the applicable autonomous database source tables. See Augment Your Data.
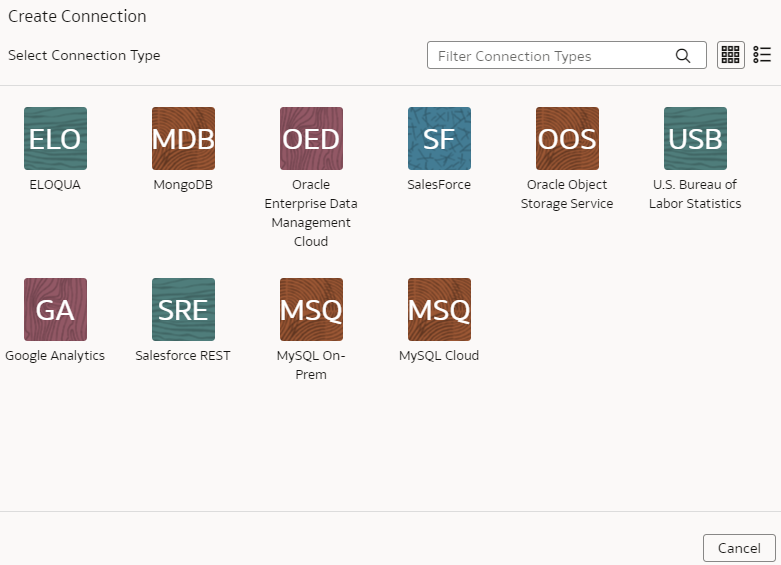
Load Data from Snowflake into Oracle Fusion Analytics Warehouse (Preview)

As a service administrator, you can use the Oracle Fusion Analytics Warehouse extract service to acquire data from a Snowflake instance.

You can later use this data to create data augmentations for various Enterprise Resource Planning and Supply Chain Management use cases. Establish the connection from Fusion Analytics Warehouse to your Snowflake instance to start data acquisition followed by augmentation.

Ensure that Snowflake is enabled on the Enable Features page prior to creating this connection. See Make Preview Features Available.

  1. In Fusion Analytics Warehouse, create the Snowflake data connection:
    1. In Fusion Analytics Warehouse Console, click Data Configuration under Application Administration.
    2. On the Data Configuration page, click Manage Connections.
    3. On the Manage Connections page, click Create and then click Connection.
    4. In Create Connection, select Snowflake as the connection type.
      Snowflake connection option
    5. In Create Connection, enter these details and then click Save:
      • Connectivity Type: Standard.
      • Notification Email: An email address to receive notifications.
      • Auth Schema: Enter “BASICAUTH” if you’re using username and password to establish the connection. Enter “PRIVATE_KEY” if you’re using token-based authentication.
      • User Name: Enter username only if you're using the basic authentication.
      • Password: Enter password for the username only if you're using the basic authentication.
      • Host Name: Complete host name of your Snowflake instance.
      • Table Schema: Your Snowflake table schema such as TPCH_SF1.
      • Database: Mentioned in your Snowflake account under Data.
      • Warehouse: The compute resources in your Snowflake instance that you can find by running SHOW WAREHOUSES [ LIKE '<pattern>' ]. See SHOW WAREHOUSES.
      • Private Key: Generate the Private Key in Snowflake, if you don’t have one already, and paste it here. See Generate the Private Key.

      Create Snowflake connection

  2. On the Manage Connections page, select Actions (Actions menu ellipsis icon) for the Snowflake connection, and then select Refresh Metadata.
    Note

    You can’t create augmentations for Snowflake unless you perform a metadata extract.
  3. On the Manage Connections page, select Actions for the Snowflake connection and then select Test Connection.
  4. After the connections are successfully established, navigate to the Data Augmentation tile on the Data Configuration page and create a data augmentation using the Snowflake data. Ensure that you select Regular as the source dataset type and Snowflake as the pillar. Select the applicable Snowflake source tables. See Augment Your Data.
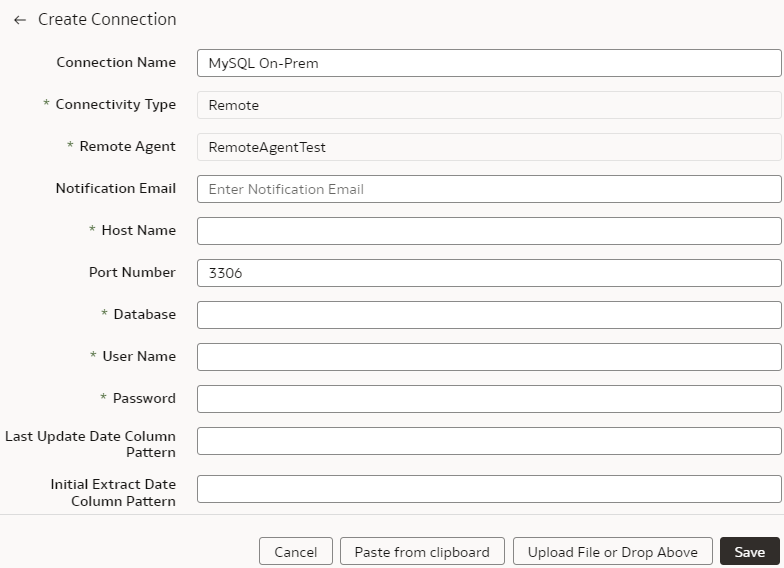
Load Data from Taleo into Fusion Analytics Warehouse (Preview)

As a service administrator, you can use the Fusion Analytics Warehouse extract service to acquire data from the Taleo instance and use it to create data augmentations for various Enterprise Resource Planning and Supply Chain Management use cases.

Ensure that Taleo is enabled on the Enable Features page prior to creating this connection. See Make Preview Features Available.

  1. In Fusion Analytics Warehouse, create the Taleo data connection using these instructions:
    1. In Fusion Analytics Warehouse Console, click Data Configuration under Application Administration.
    2. On the Data Configuration page, click Manage Connections.
    3. On the Manage Connections page, click Create and then click Connection.
    4. In Create Connection, select Taleo as the connection type.

      Taleo connection option

    5. In Connectivity Type, select Standard, enter an email address to receive notifications in Notification Email, host name of your Taleo instance in Host Name, and credentials for your Taleo source in User Name and Password.

      Create Taleo Connection dialog

    6. Click Save.
  2. On the Manage Connections page, select Actions (Actions menu ellipsis icon) for the Taleo connection and then select Refresh Metadata.
    Note

    You can’t create augmentations for Taleo unless you perform a metadata extract.
  3. On the Manage Connections page, select Actions for the Taleo connection and then select Test Connection.
  4. After the connections are successfully established, navigate to the Data Augmentation tile on the Data Configuration page and create a data augmentation using the Taleo data. Ensure that you select Regular as the source dataset type and Taleo as the pillar. Select the applicable Taleo source tables. See Augment Your Data.
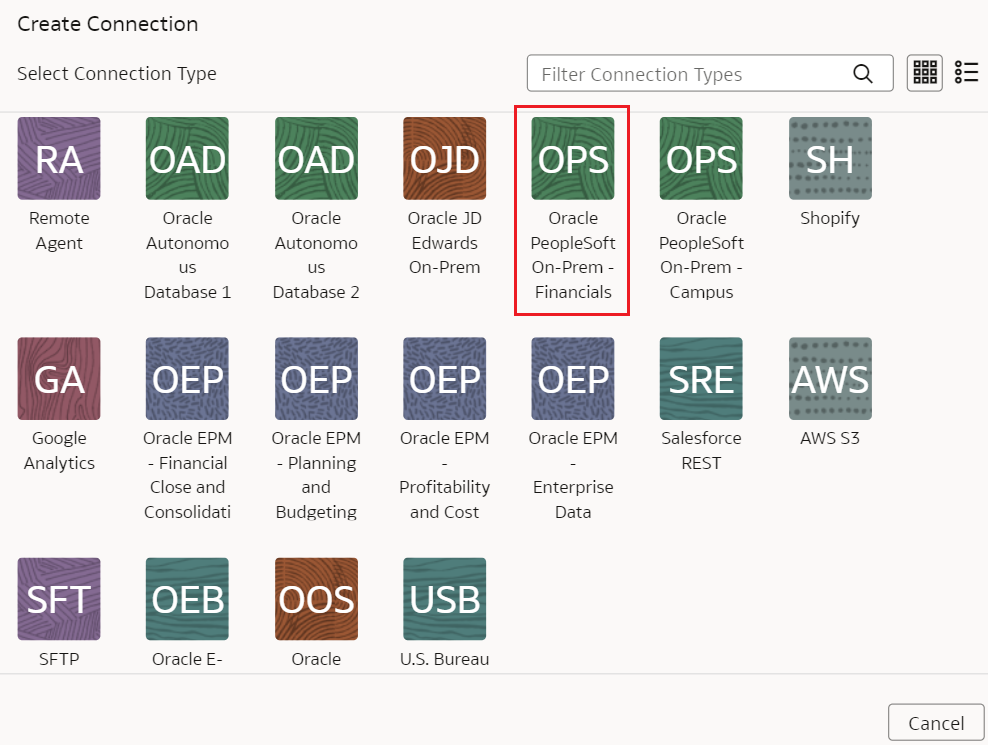
Load Data from Oracle Analytics Publisher into Fusion Analytics Warehouse (Preview)

As a service administrator, you can use the Fusion Analytics Warehouse extract service to acquire data from the Analytics Publisher reports and use it to create data augmentations for various use cases.

Currently, the BI Publisher Reports connector only supports:
  • The Analytics Publisher in Oracle Fusion Cloud Applications for data augmentation.
  • Only those reports that complete within the Analytics Publisher report execution timeout limit that is typically 300 seconds.

The BI Publisher Reports connector workflow must observe the security rules of Oracle Fusion Cloud Applications. You must ensre that the password rotation and update are done on time before executing the BI Publisher Reports connector pipeline. Otherwise, those pipeline jobs will hang and eventually those jobs will get deleted, and the data source will be disabled until you update the password and resubmit the job.

Ensure that BI Publisher Reports is enabled on the Enable Features page prior to creating this connection. See Make Preview Features Available.

  1. In BI Publisher, build a comma separated values (CSV) report for the targeted tables. See Create Reports and Generate CSV Output.
  2. In Fusion Analytics Warehouse, create the data connection to the BI Publisher reports using these instructions:
    1. In Fusion Analytics Warehouse Console, click Data Configuration under Application Administration.
    2. On the Data Configuration page, click Manage Connections.
    3. On the Manage Connections page, click Create and then click Connection.
    4. In Create Connection, select BI Publisher Reports as the connection type.

      BI Publisher connection option

    5. In the dialog for the BI Publisher reports connection, provide these details:
      • Select Standard in Connectivity Type.
      • Enter an email address to receive notifications in Notification Email.
      • Host name of the BI Publisher in Host Name.
      • Credentials to access your BI Publisher in User Name and Password
      • Enter comma separated reports in List of Reports in the <reports directory>/<report names> format.
        Note

        Ensure that the reports directory and report names don't have spaces.
      • Optionally, in Reports Configuration, provide the JSON file with this structure for advanced configuration:
        {
        "reportPath": {desc: "report name and path", type: "STRING"},
        "runInChunkMode": {desc: "if report generates large data set this to true", type: "STRING", values: ["true", "false"]},
        /* parameters array */
        "params": [
        {
        "name": {desc: "parameter name", type: "STRING"},
        "value": {desc: "parameter value", type: "STRING"}", values ["__lastUpdateDate__" or any fixed parameter values"]
        }
        ]
        }
        
        Example :
        {
        "reportPath": "/~it_security_manager/User_Report.xdo",
        "runInChunkMode": true,
        "params": [
        {
        "name": "lastUpdateDate",
        "value": "__lastUpdateDate__"
        },
        {
        "name": "locations",
        "value": "S1 - Chicago 
        "
        }
        ]
        }
        Note

        • If the report execution is completed before the timeout limit and generates large volume of data then set runInChunkMode: true. The recommendation is to set runInChunkMode to true if the report output file is over 7MB.
        • If the report has parameters defined, then provide the values in the "params" section of the report configuration array. If the value in the params array is set with placeholder __lastUpdateDate__, then the connector applies the initial extract date or last successful extract date to the param.
      • In CSV Date Format, enter the expected date format from report; for example, "yyyy-MM-dd".
      • In CSV Timestamp Format, enter yyyy-MM-dd'T'hh:mm:ss.

      Create Connection for BI Publisher dialog

    6. Click Save.
  3. On the Manage Connections page, select Actions (Actions menu ellipsis icon) for the BI Publisher reports connection and then select Test Connection.
  4. On the Manage Connections page, select Actions for the BI Publisher reports connection and then select Refresh Metadata.
    Note

    You can’t create augmentations for the BI Publisher reports unless you perform a metadata extract.
  5. After the connections are successfully established, navigate to the Data Augmentation tile on the Data Configuration page and create a data augmentation using the BI Publisher reports data. Ensure that you select Regular as the source dataset type and BI Publisher reports as the pillar. Select the applicable BI Publisher source tables. See Augment Your Data.
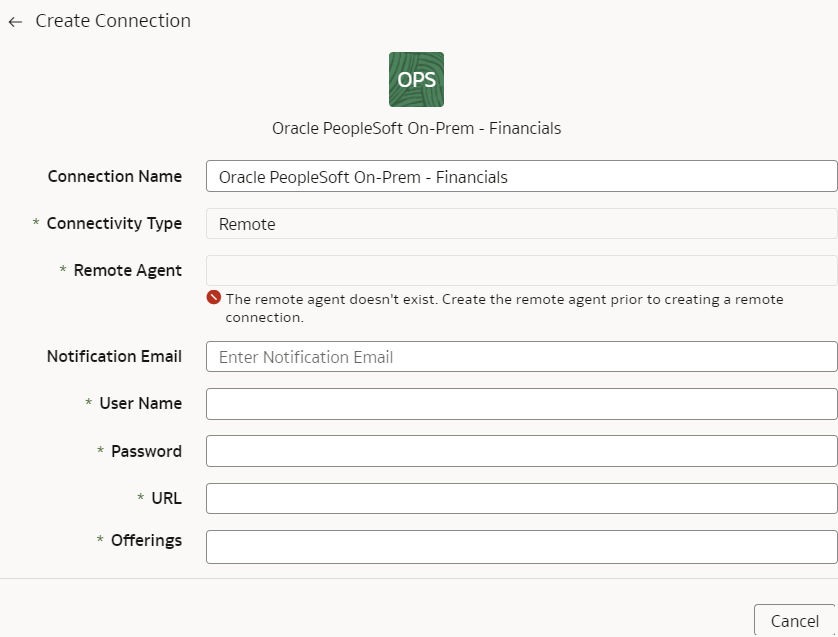
Load Data from Oracle Database Using JDBC into Fusion Analytics Warehouse (Preview)

As a service administrator, you can use an extract service remote agent to connect to an Oracle database using JDBC and use the data to create data augmentations.

After connecting to an Oracle database using JDBC, the remote agent extracts the data and loads it into the autonomous data warehouse associated with your Oracle Fusion Analytics Warehouse instance. The remote agent pulls the metadata through the public extract service REST API and pushes data into object storage using the object storage REST API. You can extract and load the data from an Oracle database into Oracle Fusion Analytics Warehouse only once every 24 hours.

Ensure that Remote Agent and Oracle JDBC are enabled on the Enable Features page prior to creating this connection. See Make Preview Features Available.

  1. Set up the remote agent to load data from your SQL Server into Oracle Fusion Analytics Warehouse.
  2. Configure the remote agent and Oracle database data source on the Data Configuration page in Oracle Fusion Analytics Warehouse using these instructions:
    1. On the Console, click Data Configuration under Application Administration.
    2. On the Data Configuration page, click Manage Connections.
    3. On the Manage Connections page, click Create and then click Connection.
    4. In Create Connection, select Remote Agent as the connection type.
    5. In the Create Connection Remote Agent dialog, in Connection Name, you can modify the default name and verify that Remote is displayed in Connectivity Type.
    6. Enter an email address to receive notifications in Notification Email, provide the Identifier and Host, in Public Key, click Upload File or Drop Above to fill in the details of the remote agent, and then click Save. You can add the configuration details file that you had downloaded or use the configuration details that you had copied after configuring the remote agent.
    7. Navigate to the Manage Connections page, click Create and then click Connection.
    8. In Create Connection, select Oracle JDBC as the connection type.
      Oracle JDBC connection option

    9. In Create Connection for Oracle JDBC, in Connectivity Type, verify that Remote is selected automatically.
      Create Connection for Oracle JDBC

    10. In Remote Agent, select the remote agent connection that you created earlier, for example, Remote Agent.
    11. Enter an email address to receive notifications in Notification Email, provide credentials for the Oracle database source in User Name and Password, and the URL of the Oracle database source in URL.
    12. In Initial Extract Date Column Pattern, provide the initial extract date pattern that matches the pattern in your source.
    13. In Last Update Date Column Pattern, provide the last update date pattern that matches the pattern in your source.
    14. If your source has flashback support, then select Yes in Enable flashback incremental.
    15. In List of Flashback Incremental Exempt datastores, provide a comma separated list of datastores that you want to exempt from the flashback incremental queries.
    16. If your source has ROWSCN support, then select Yes in Enable ROWSCN incremental.
    17. In List of ROWSCN Incremental Exempt datastores, specify a comma-separated list of datastores that you want to exclude from the automatic tracking of row changes based on system change numbers.
    18. Confirm that you see the Remote Agent and Oracle database connections on the Manage Connections page.
    19. On the Manage Connections page, select Actions (Actions menu ellipsis icon) for the Oracle database connection and then select Refresh Metadata.
      Note

      You can’t create augmentations for Oracle database unless you perform a metadata extract.
  3. After the connections are successfully established, navigate to the Data Augmentation tile on the Data Configuration page and create a data augmentation using the Oracle database data. Ensure that you select Regular as the source dataset type and Oracle JDBC as the pillar. Select the applicable Oracle database source tables. See Augment Your Data.
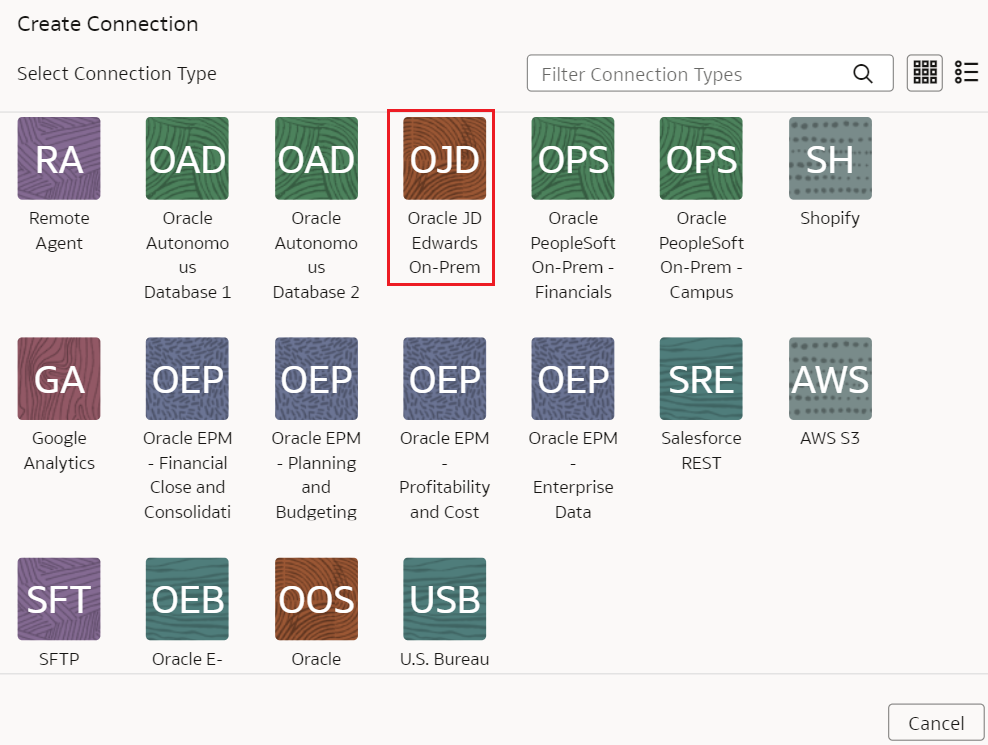
Load Data from QuickBooks Online into Oracle Fusion Analytics Warehouse (Preview)

As a service administrator, you can use the Oracle Fusion Analytics Warehouse extract service to acquire data from QuickBooks Online and use it to create data augmentations.

Ensure that QuickBooks Online is enabled on the Enable Features page prior to creating this connection. See Make Preview Features Available.

  1. In Oracle Fusion Analytics Warehouse, create the QuickBooks Online data connection using these instructions:
    1. In Oracle Fusion Analytics Warehouse Console, click Data Configuration under Application Administration.
    2. On the Data Configuration page, click Manage Connections.
    3. On the Manage Connections page, click Create and then click Connection.
    4. In Create Connection, select QuickBooks Online as the connection type.

      QuickBooks Online connection option

    5. In the dialog for the QuickBooks Online connection, enter these details and click Save:
      • Connectivity Type: Select Standard.
      • Notification Email: Enter an email address to receive notifications.
      • URL: Enter the complete URL of your Quickbooks Online instance.
      • Client ID: This is the unique ID on your Quickbooks Online instance.
      • Client Secret: Copy and paste the entire "client secret" from your authentication.
      • Refresh Token: This token is changed by Quickbooks everyday; enter your refresh token for the day you want to execute this pipeline.
      • Company ID: This is your company ID for the Quickbooks Online instance.

      Create Connection for QuickBooks Online dialog

    6. Click Save.
  2. On the Manage Connections page, select Actions (Actions menu ellipsis icon) for the QuickBooks Online connection and then select Test Connection.
  3. On the Manage Connections page, select Actions for the QuickBooks Online connection and then select Refresh Metadata.
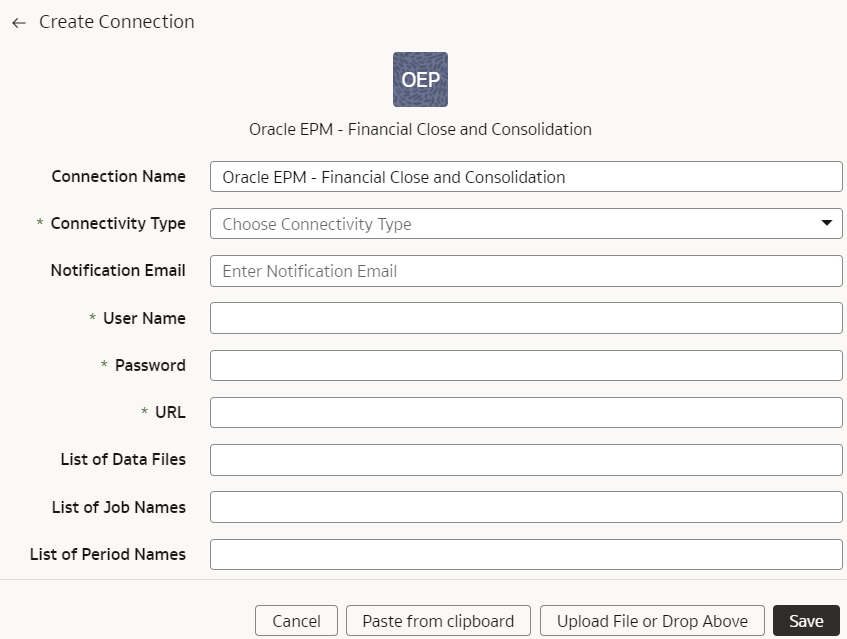
    Note

    You can’t create augmentations for QuickBooks Online unless you perform a metadata extract.
  4. After the connections are successfully established, navigate to the Data Augmentation tile on the Data Configuration page and create a data augmentation using the QuickBooks Online data. Ensure that you select Regular as the source dataset type and QuickBooks Online as the pillar. Select the applicable QuickBooks Online source tables. See Augment Your Data.