Conversion Checklist
Use this page as a guide to help you complete required and recommend actions before and after the conversion of your Fusion Applications environments from the Cloud Classic Console (My Services) to the new Oracle Cloud Console.
For more details about the conversion, see Conversion Overview.
If you encounter issues performing the preparation checklist items or the post-conversion verification, file a Service Request on My Oracle Support (MOS).
| Completed | Item | Action |
|---|---|---|
| Pre-conversion steps | ||
| 1 | Review the entire Conversion Overview document to understand the change and the required and recommended actions for you. | |
| 2 |
Inform your Fusion Applications Service Administrators about this upcoming change and share this information with them. If your organization works with implementation partners to manage your Fusion Applications, share this information with them. Ensure to inform them that many environment lifecycle activities previously handled by Oracle Support (including environment refresh) will be self-service, and no longer processed by Oracle Support. If your organization has Oracle Break Glass for Fusion Cloud Service, inform your approvers that after the conversion they will need to log in to the Oracle Cloud Console to approve break glass requests. If the original approvers are no longer with the organization, file a Support Request to have them removed. If you are not sure who your break glass approvers are, file a Support Request to get the list. |
|
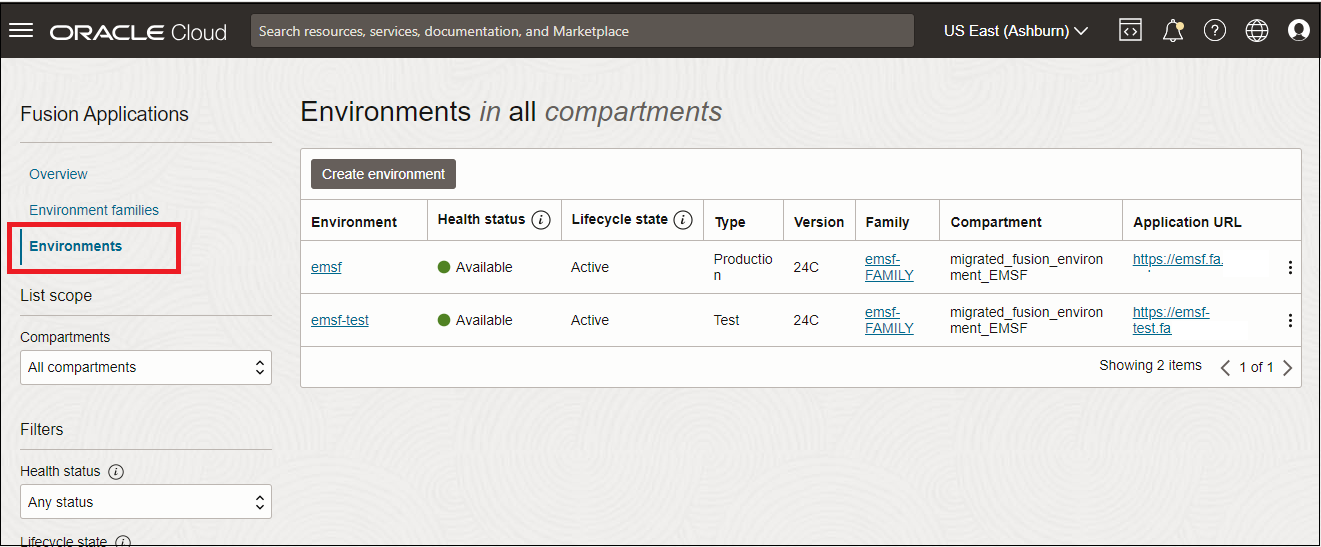
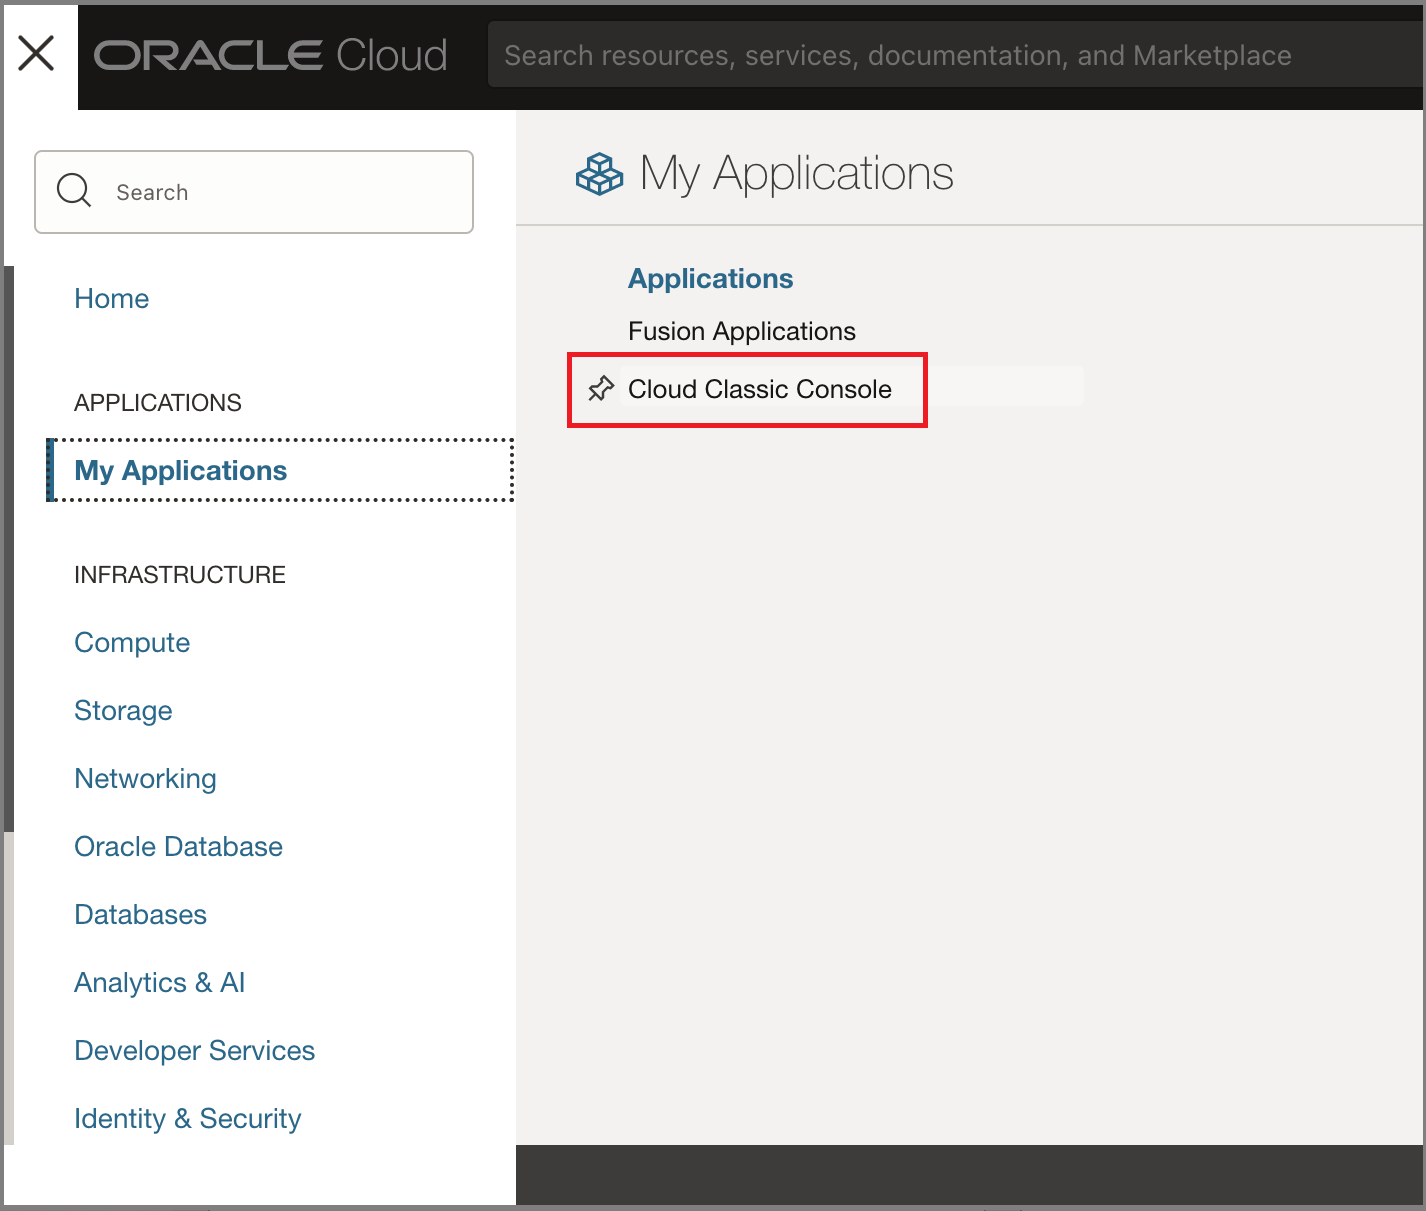
| 3 | Verify that you are able to access the new Oracle Cloud Console:
|
|
| 4 |
Check Existing Policies If you have policies already set up, ensure that they follow the correct syntax. Specifically, verify that when the subject of a policy statement includes the identity domain name, the identity domain name and group name are each surrounded in single quotes as follows:
For example: If any of your policy statements do not have the single quotes placed as shown above, make the correction and save the policy. To navigate to the policies page to check your policy statements: Open the navigation menu and select Identity & Security. Under Identity, select Policies. |
|
| 5 | Take training. The free, one-and-a-half-hour Oracle University course Fusion Applications: Environment Administration will familiarize you with the new Cloud Console interface and the Fusion Applications environment provisioning experience. You will learn:
|
|
| 6 |
Familiarize yourself with the documentation for managing your Fusion Applications environments in the new Oracle Cloud Console: |
|
| 7 | Update network configurations. If you have set up allow-lists to
permit egress network traffic from Oracle IPs, or you have set up a VPN
or FastConnect, you will need to update the
values for the Oracle IPs to prepare for the conversion.
See Update Network Configurations for details. |
|
| 8 |
Import root certificate. If you have embedded the Fusion SSL certificate in external systems that integrate with Fusion, you might need to import the new root certificate. You can download the new certificate from the Digicert site. Search for the DigiCert Global Root G2 certificate in the list. Download and import the certificate. |
|
| 9 | Understand restrictions:
|
|
| Post-conversion steps | ||
| 10 |
Verify Access to the new Console. Note: If you are U.S. Government customer, see Reset Password and Sign in to the new Cloud Console for specific sign in steps. After you receive the email notifying you that the scheduled downtime is complete, verify that you are able to access the new Oracle Cloud Console and that your environments have been converted.
|
|
| 11 | Verify access to your Fusion Applications. Sign in to your Fusion Applications using the URL and steps you normally use. |
|
| 12 |
(Optional) Create logins for implementation partners. If your organization works with implementation partners to manage your Fusion Applications, you can create user accounts for them in the new Oracle Cloud Console and grant them access to perform the self-service tasks that were previously performed by Oracle Support. For example, environment refreshes can now be perform via self-service in the Console. To create a user with the ability to perform refreshes, and no other access, see Managing Oracle Cloud Users with Specific Job Functions for general information about creating users and Environment Read-Only + Refresh User for the details to create this specific type of role. |
|
| 13 |
Ensure Breakglass approvers have access to the Oracle Cloud Console. Break glass approvers must be able to log in to the Oracle Cloud Console to approve or reject access requests in Oracle Managed Access. Individuals on the approver's list will have a user automatically created for them in the Default domain in the Oracle Cloud Console, if the user does not already exist, with the appropriate permissions to approve or deny break glass requests. These users will be notified by email with instructions to sign in to activate their account and set up their password. If SSO is setup for the Default domain, they can use SSO to sign in. Ensure that you notify these users to respond to their account activation email so that their access is not interrupted. For more information about managing access requests in the new Console, see Managed Access. |
|
| 14 | Key management: Bring Your Own Key. Note: If you recently purchased Oracle Break Glass and the encryption was scheduled to be applied in this upgrade cycle, it will not be applied. After conversion is complete, you can follow the instructions in Customer-Managed Keys for Oracle Break Glass to create the vaults and keys required for your environments. The encryption will be applied in the next quarterly update. If you need encryption applied before the next scheduled quarterly update, create the vaults and keys as described in the instructions, and then file a support request. If you have subscribed to Oracle Break Glass for your Fusion Applications and have brought your own key (BYOK), you need to perform these additional steps to import your external key again. When your environments are converted, Oracle creates a new key for you in your tenancy. You can manage your own vaults and keys through the OCI Vault service. To add your own key to a Fusion Applications environment post-conversion:
For more information on managing keys in OCI for Fusion Applications, see the following documentation:
|
|